
Filtering, sorting, and saving views is available to any team member with access to the workspace. Filters only change what you see — they never change the posts themselves or what your users see on the public portal.
The feedback toolbar
Everything for finding posts lives in the header above the list. From left to right:
- View switcher — the title (e.g. Feedback) is a dropdown that flips between broad, ready-made views.
- Search — free-text search across your posts.
- Filter — narrow the list by status, category, labels, and more.
- Display — change the sort order and how the list looks.
- New — create a post (see Create a post).
Switch views
Click the list title to open the View dropdown. These are ready-made views that set a broad scope in one click, so you don’t have to build a filter by hand.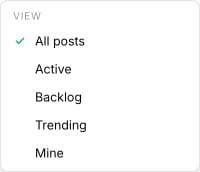
Coming from the old admin? The legacy dashboard had an “all, not closed or completed” filter. That’s now the Active view — open the title dropdown and choose Active to hide closed and completed posts. It’s the same result, just moved into the view switcher.
Search posts
Click the Search icon to open a search box and type to find posts by keyword. Search looks across each post’s title, description, and comments, so you can find a post even if your keyword only appears in the discussion.1
Open search
Click the Search icon in the toolbar. The box expands with the placeholder Search posts….
2
Type your keywords
The list filters as you type. Search combines with any active view and filters, so you can search within a filtered list.
Filter posts
Click Filter to open the filter panel. It has two sections: everyday facet filters at the top and Advanced conditions below. A badge on the Filter button shows how many filters are currently active.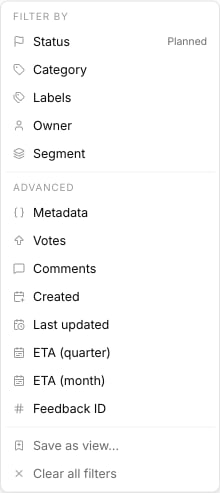
Facet filters
Each facet opens a short list of options drawn from your own workspace settings, so what you see matches how you’ve set up your board.
To apply a facet, click it to expand its options, then pick a value:
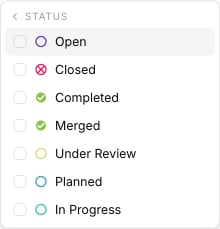
Status, Category, Owner, and Segment let you pick one value — choosing a new value replaces the previous one, and clicking the active value again clears it. Labels is the exception: you can select several labels at once to see posts carrying any of them.
Advanced conditions
The Advanced section filters on numbers and dates. Each condition opens a small editor where you choose a comparison and enter a value, then click Apply.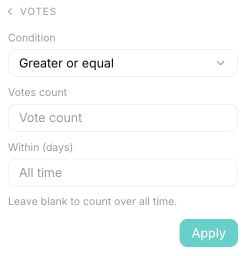
Clear filters
Once at least one filter is active, two rows appear at the bottom of the filter panel:- Save as view… — save the current filters as a reusable view (see Save a view).
- Clear all filters — remove every active filter at once and return to the full list.
Sort and change the layout
Click Display to set the sort order and control how the list looks. Sorting changes the order of posts; the other options only change the list’s appearance for you.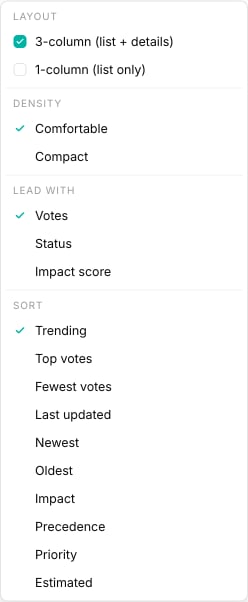
The remaining options adjust the display only:
- Layout — 3-column (list plus a details pane) or 1-column (list only).
- Lead with — what each row shows first: Votes, Status, or Impact score.
- Density — how tightly the rows are packed. See below.
Comfortable vs. Compact density
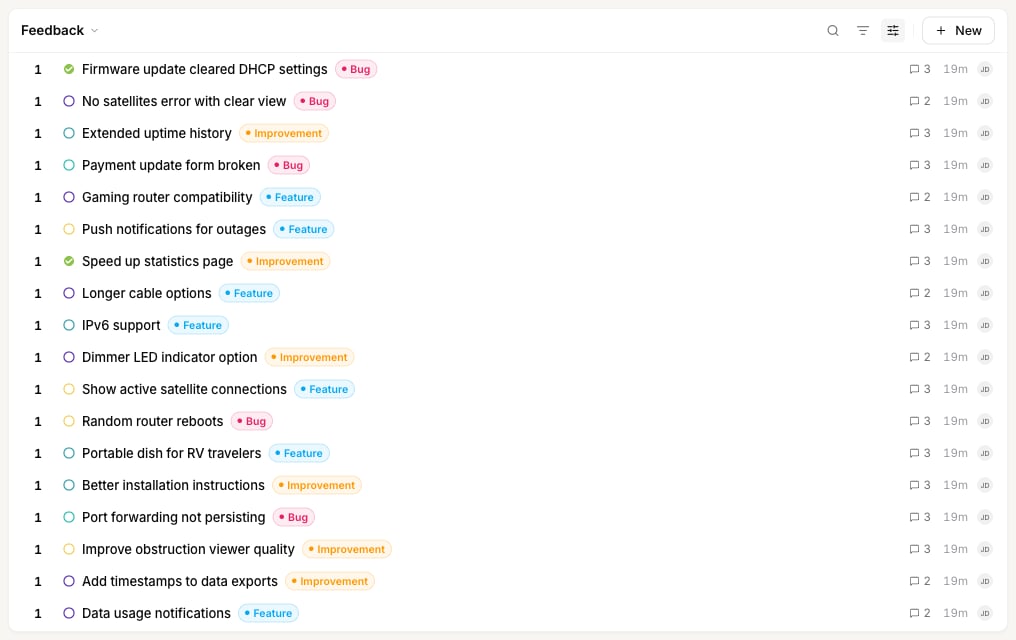
Density controls how much space each post takes up. It’s purely visual — it never changes which posts are shown. Comfortable gives each post two lines, with the category and comment count on their own row below the title. It’s roomier and easier to read title-by-title.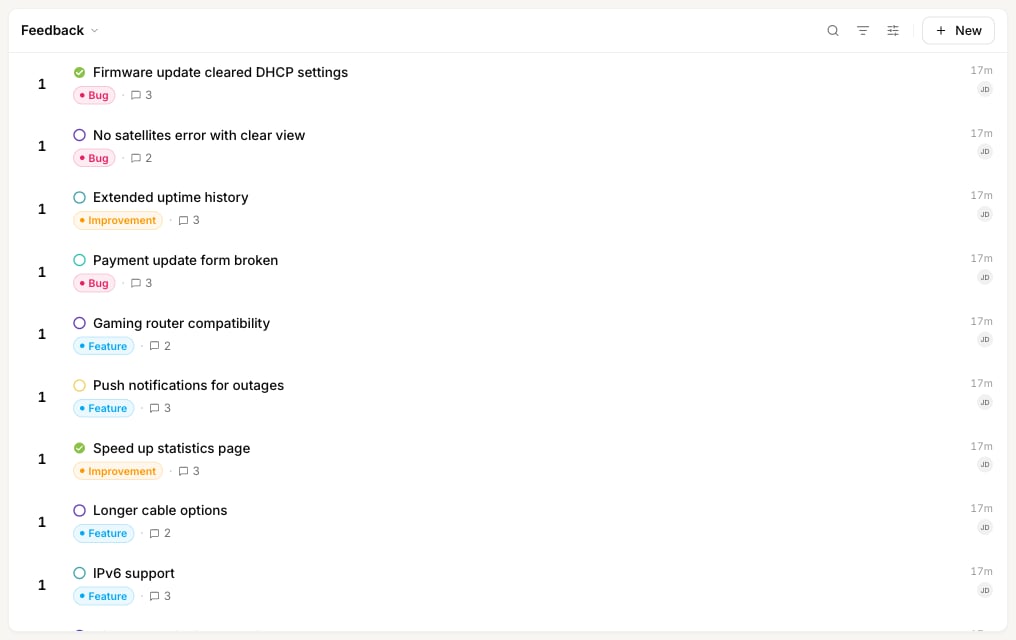
Save a view
When you’ve built a filter you’ll return to, save it as a view so you can reopen it in one click instead of rebuilding it each time. For everything you can do with views, including pinning them to the sidebar, sharing them with your team, and managing them, see Views and the sidebar.1
Set up the list
Pick a view, apply your filters, set the sort, and add a search term if you want — a view saves all of it together.
2
Open Save as view
In the Filter panel, click Save as view… at the bottom. (You can also run Save current view from the ⌘K command palette.)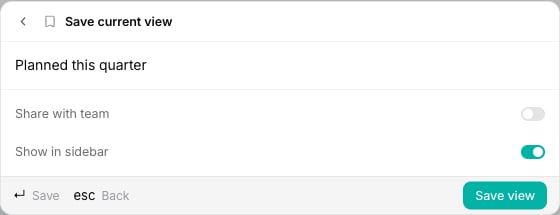
3
Name and save
Give the view a name, then choose:
- Share with team — make the view available to everyone in the workspace (off by default, so views are private unless you share them).
- Show in sidebar — pin the view under the Views section in the left sidebar for quick access.
Next steps
Views and the sidebar
Pin your frequent filters to the sidebar, share them, and manage them.
Create a post
Add feedback from the dashboard and set its status, category, owner, and estimate.