
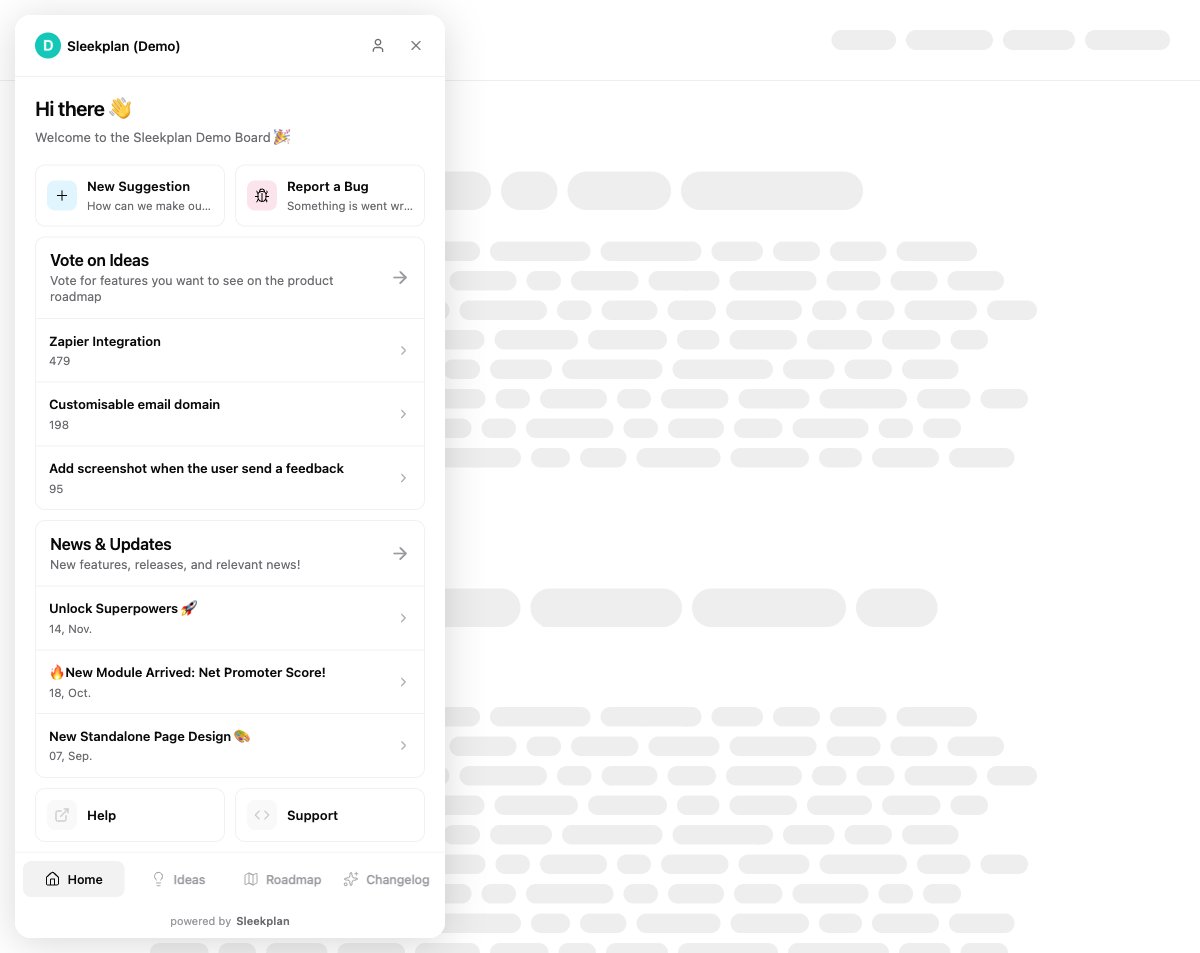
The action screen lives under Public Portal & Widget in your workspace settings, and only workspace owners and admins can change it. If you have not added the widget to your site yet, install the widget first. The action screen shows in the embeddable widget; your public portal website uses the fallback board instead (see below).
Turn on the action screen
1
Open the Home screen settings
Navigate to Settings → Public Portal & Widget → Widget and expand the Home screen section.
2
Set the default screen to Action screen
In the Default screen dropdown, choose Action screen. A save bar appears at the bottom of the page: click Save changes to apply it.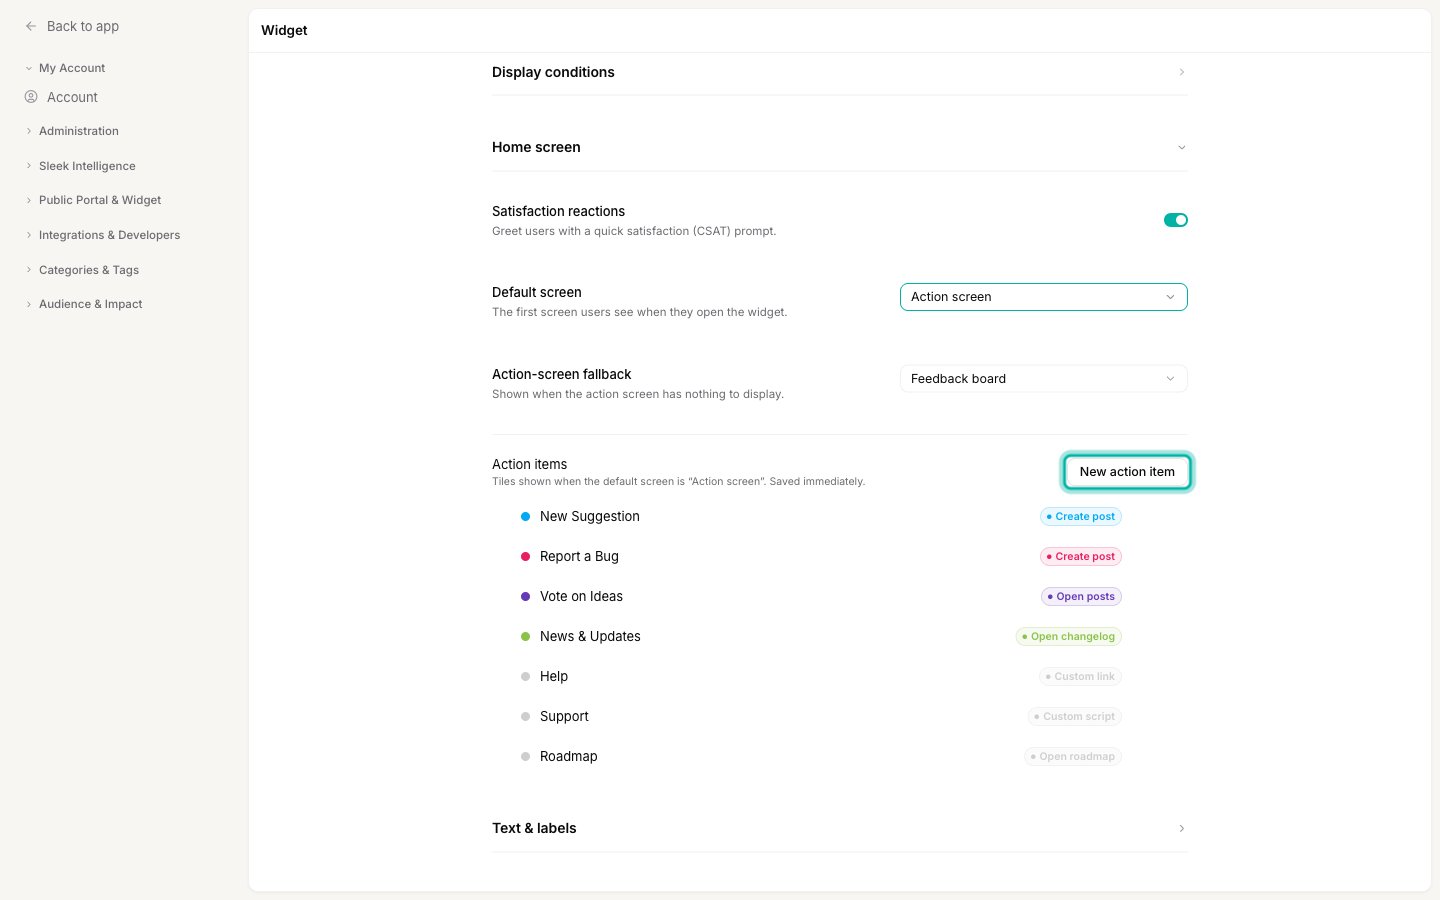
3
Set a fallback board
Choose an Action-screen fallback (Feedback board, Changelog, or Roadmap). This is what shows when the action screen has nothing to display, and it is also what your public portal lands on, since the portal website has no action screen.
Add an action item
Each tile on the action screen is one action item. In the Action items list, click New action item to open the editor. Action items are saved immediately, one at a time, so you do not need the page’s save bar for them.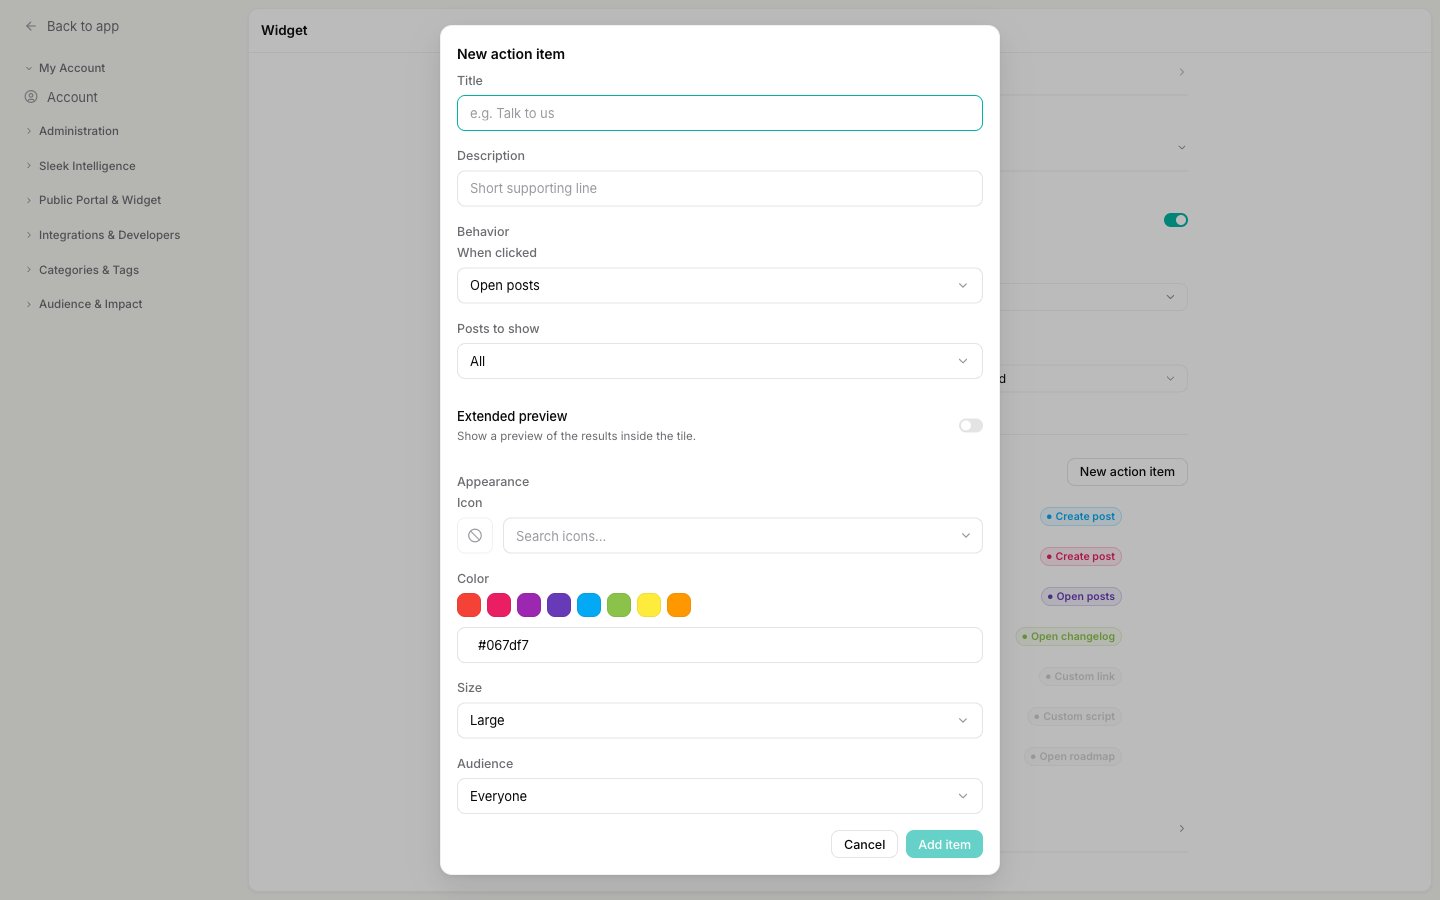
1
Name the tile
Give it a Title (required, for example “Talk to us”) and an optional Description, the short supporting line shown beneath the title.
2
Choose what happens when it's clicked
Under Behavior, open the When clicked dropdown and pick an action type (see the full list below). Depending on the type, a second field appears to point the action at the right place.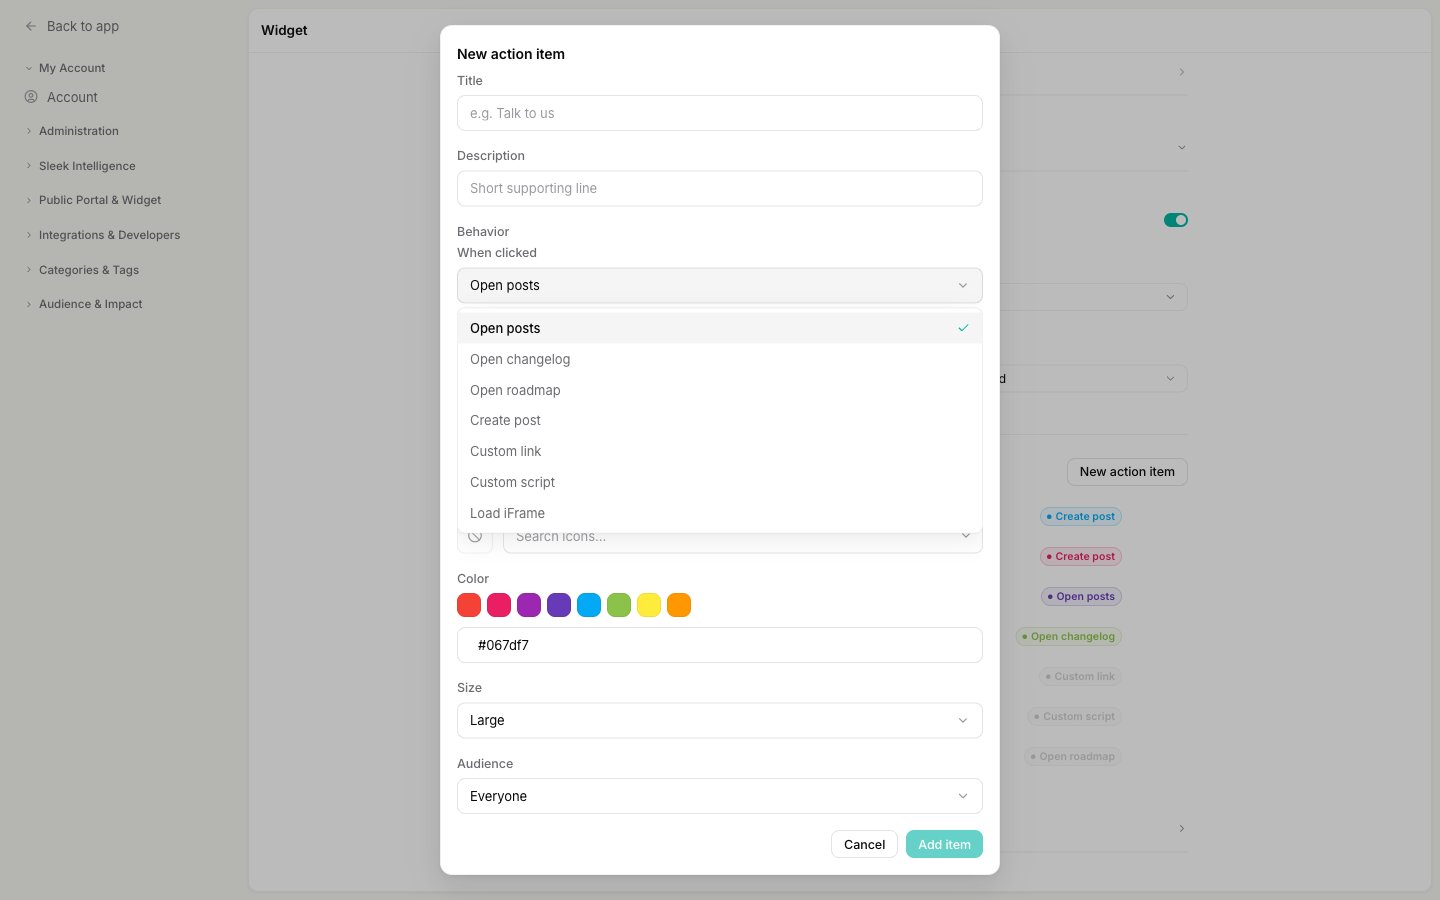
3
Style the tile
Under Appearance, pick an Icon, a Color, and a Size (Large for a full-width row, Small to sit two-per-row in a grid).
4
Choose who sees it
If your workspace uses segments, set the Audience to Everyone or a specific segment so the tile only shows to the people you target.
5
Save the item
Click Add item. The tile appears in the list and on the widget’s action screen right away.
Action types
The When clicked dropdown decides what a tile does:Show a live preview inside the tile
For Open posts and Open changelog tiles, turn on Extended preview in the editor to show a few real results inside the tile itself. That is how the Demo workspace’s “Vote on Ideas” tile lists its top posts and “News & Updates” shows recent changelog entries, straight on the action screen.Reorder, edit, and remove items
In the Action items list, drag an item by its handle to reorder the tiles, use the pencil icon to edit it, or the trash icon to delete it. Every change saves immediately.Next steps
Choose the widget's home screen
Prefer a plain board? Point the home screen at feedback, roadmap, or changelog instead.
Create and manage feedback
See how the posts behind your “Create post” and “Open posts” tiles work.