
Connecting and managing integrations is done from workspace Settings, which is available to workspace owners and admins. See Roles and permissions.
Before you start
- You need an Azure DevOps organization where you are an administrator.
-
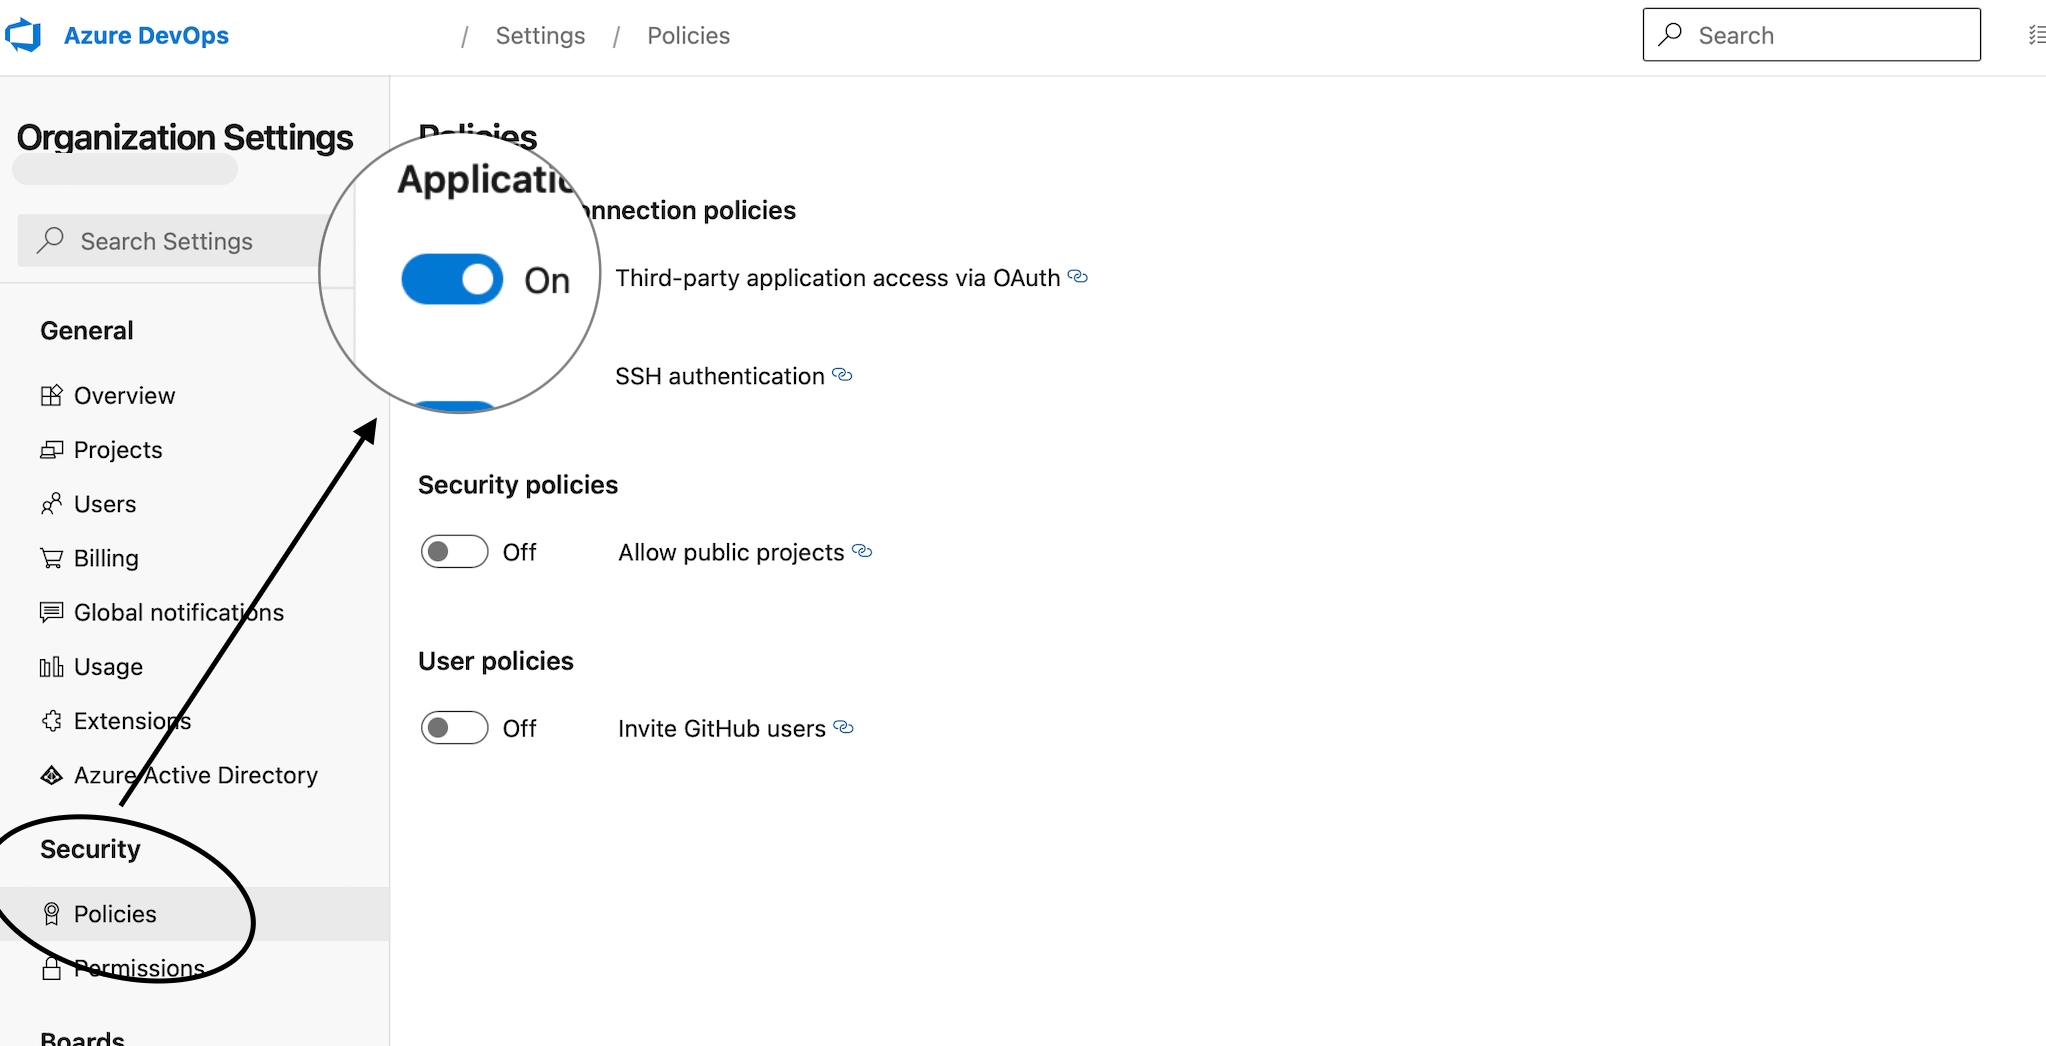
In Azure DevOps, third-party application access over OAuth must be allowed. Open your Azure DevOps Organization settings → Security → Policies and turn on Third-party application access via OAuth.
- The connection is one to one: one Azure DevOps organization links to one Sleekplan workspace. If an organization is already connected to another workspace, it won’t be available to connect again.
Connect Azure DevOps
1
Open the Integrations settings
Go to Settings → Integrations. In the Settings sidebar this lives under Integrations & Developers.
2
Find Azure DevOps and connect
In the All integrations list, find Azure DevOps and click Connect.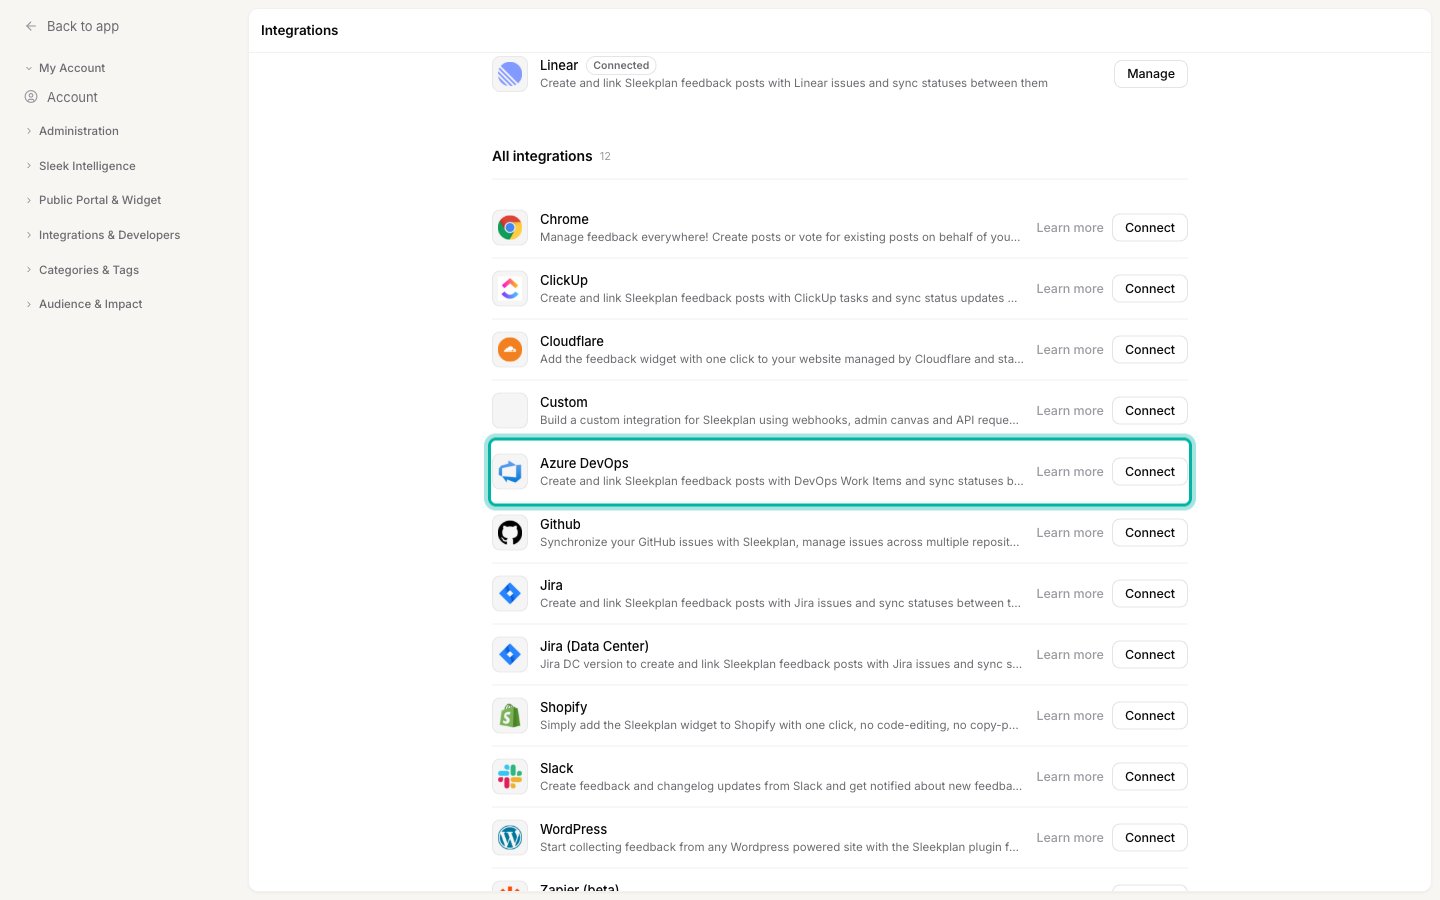
3
Authorize access in Azure DevOps
A new tab opens on Azure DevOps. Sign in if prompted, then accept the requested permissions to let Sleekplan read and update your work items. Azure DevOps sends you back to Sleekplan when you’re done.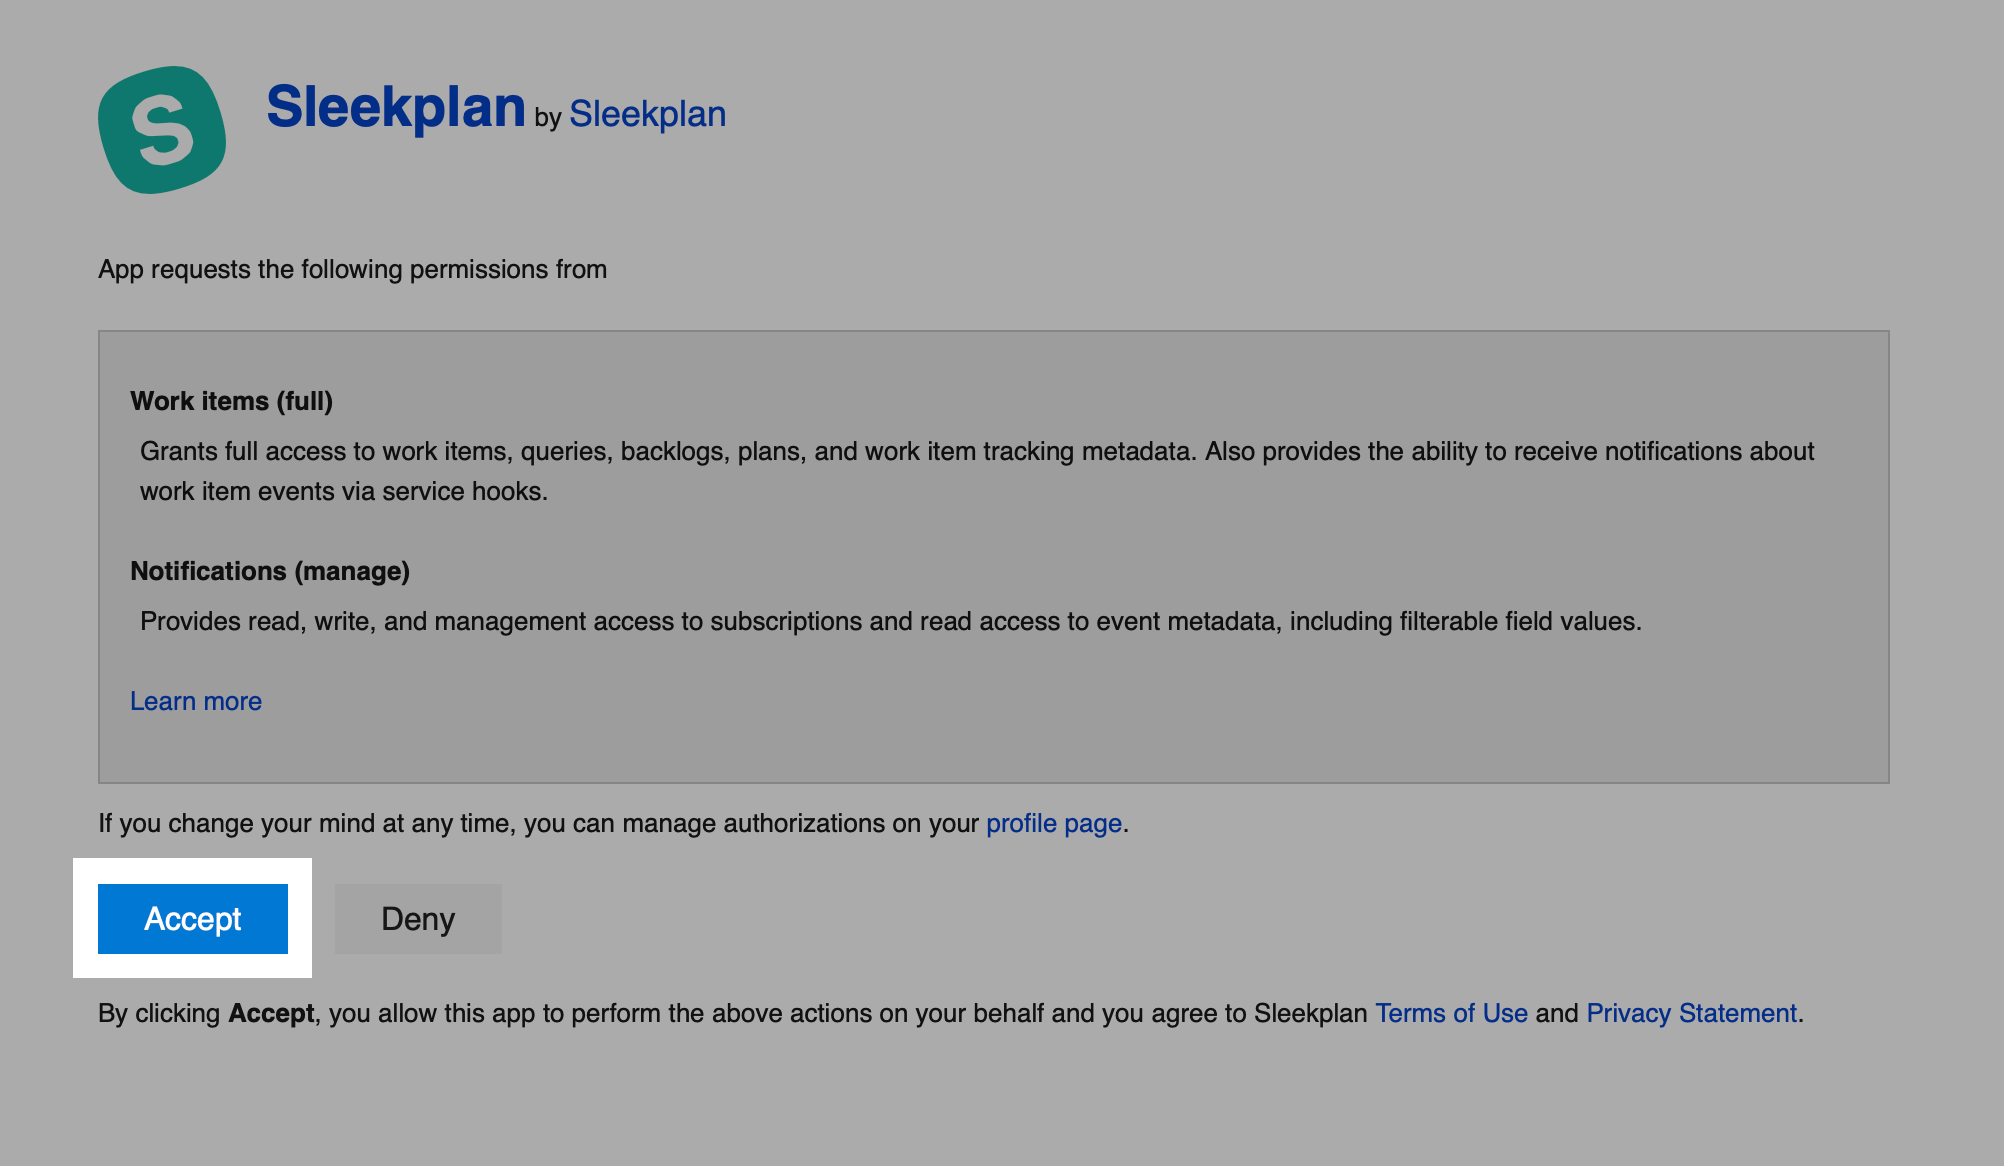
4
Confirm the connection
Back on Settings → Integrations, Azure DevOps now appears at the top under Connected with a Manage button. Your Azure organization is linked to this workspace.
Choose your organization
If your Azure DevOps account has access to more than one organization, Sleekplan connects the first available one. To switch:1
Open the manage dialog
On Settings → Integrations, click Manage on the Azure DevOps row.
2
Select an organization
Use the Select Organization dropdown to pick the Azure DevOps organization you want to connect, then click Save. Only organizations that aren’t already connected to another workspace appear here.
Link and create work items
You link and create work items from an individual feedback post, not from the settings screen.1
Open a feedback post
On your feedback board, open a post to view its detail. The Azure DevOps panel appears in the post’s sidebar.
2
Search for an existing item, or create a new one
Type a search term to find a matching work item and select it to link it, or click Create new item to make one. When you create an item you choose the project, the work item type (for example Bug or User Story), and enter a title and description.
3
Work with the linked item
Once linked, the panel shows the connected work item with a link straight to it in Azure DevOps. Click Unlink item any time to remove the connection.
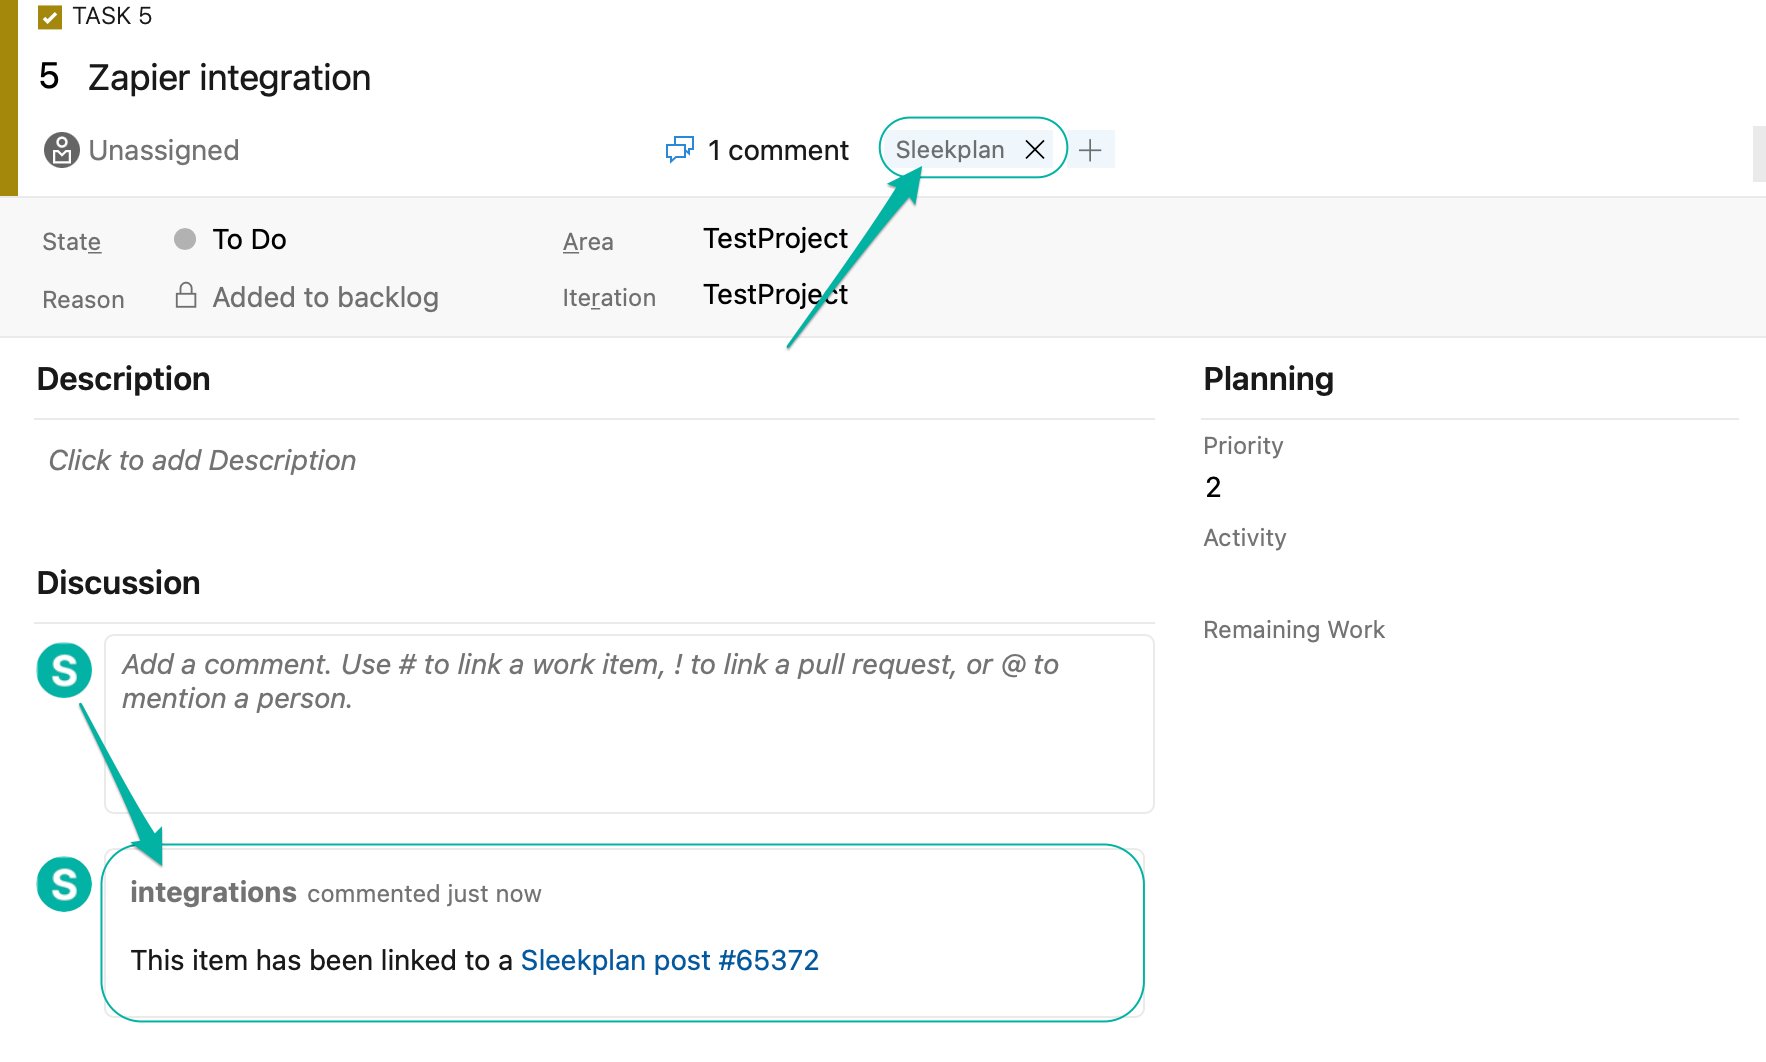
Whenever Sleekplan links or creates a work item, it adds a Sleekplan tag to that item in Azure DevOps and posts a comment in the item’s history with a link back to the Sleekplan post. This makes linked items easy to find and trace in Azure Boards.
Keep statuses in sync
Status sync maps each Azure DevOps state to a Sleekplan status. Once mapped, a status change on one side updates the other for any linked post and work item.1
Enable sync for a project
Open Manage on the Azure DevOps row. For each Azure DevOps project you want to sync, turn on Sync status updates from "", then click Save. Saving loads that project’s available statuses and starts listening for changes in Azure DevOps.
2
Map each Azure DevOps status to a Sleekplan status
A row appears for every state in the enabled projects, grouped by work item type. For each one, pick the Sleekplan status it should map to, or leave it as None to ignore that state. Click Save when you’re done.
3
Turn on two-way sync (optional)
By default, status changes flow from Azure DevOps into Sleekplan. To also push Sleekplan status changes back to the linked work item, turn on Enable two-way sync for status updates and click Save.
- Azure DevOps to Sleekplan. When a linked work item changes to a state you mapped, the Sleekplan post moves to the matching status.
- Sleekplan to Azure DevOps (two-way sync on). When you change a linked post’s status, the work item’s state changes to the mapped Azure DevOps state.
Disconnect Azure DevOps
To stop syncing, open Manage on the Azure DevOps row and click Disconnect. This removes the connection and the webhooks Sleekplan created in Azure DevOps, so status changes no longer sync. Work items you already created stay in Azure DevOps.Related
Feedback statuses
Set up the Sleekplan statuses you map Azure DevOps states to.
Create a feedback post
Where you link and create Azure DevOps work items.