
This article is for self-hosted Jira Data Center / Server, where you run Jira on your own infrastructure. If your Jira lives at an
atlassian.net address, use the Jira Cloud integration instead, which installs from the Atlassian Marketplace with no manual setup.How Data Center differs from Jira Cloud
Data Center is self-hosted, so Sleekplan cannot install a Marketplace app into it. Instead you connect the two systems yourself:- You provide your Jira base URL and a personal access token (PAT) so Sleekplan can call your Jira instance.
- You register a webhook in Jira so Jira can notify Sleekplan when an issue changes.
Before you start
Connecting an integration is available to workspace owners and admins. You also need administrator access to your Jira Data Center instance to create a token and register the webhook.
- Your Jira instance must be reachable from Sleekplan’s servers. Sleekplan connects to your Jira over the public internet from a fixed IP address,
168.119.102.99. If your Jira sits behind a firewall or allowlist, permit that IP so the connection and webhook can get through. - Use a dedicated Jira account for the token. Create the personal access token from a service or admin account (for example, a “Sleekplan” user) rather than a personal one, so the link keeps working when individuals leave.
Set up the integration
The setup has three parts: create a token in Jira, connect it in Sleekplan, then register the webhook back in Jira using the URL Sleekplan gives you.1
Create a personal access token in Jira
In your Jira Data Center instance, open your profile menu → Personal Access Tokens and create a new token. Give it a recognizable name such as 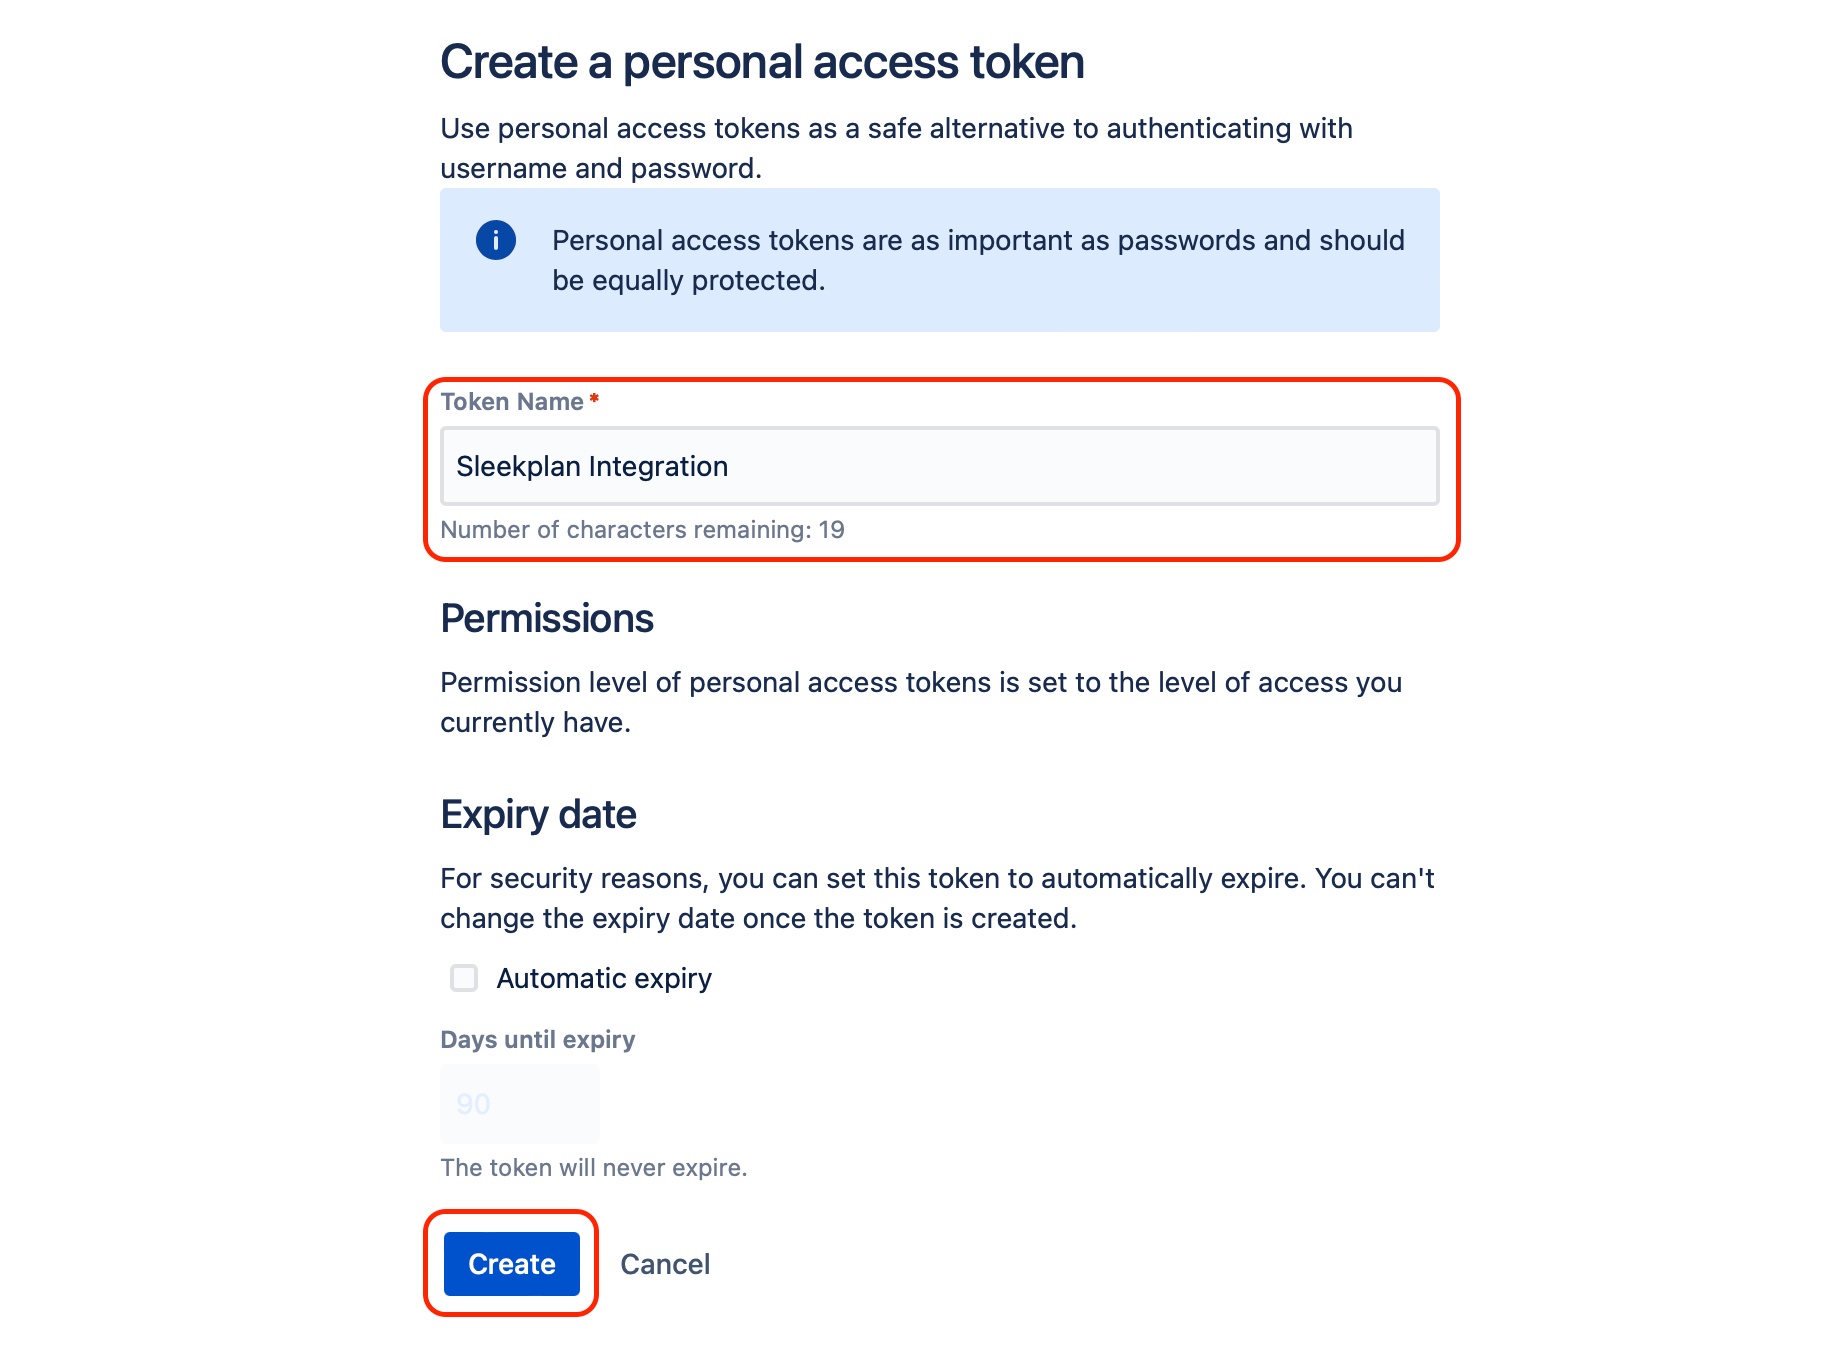
Sleekplan Integration and turn off automatic expiry so the connection does not silently break later. Copy the token value now, because Jira shows it only once.2
Open the Integrations settings in Sleekplan
Go to Settings → Integrations, find Jira (Data Center) in the list, and select Connect.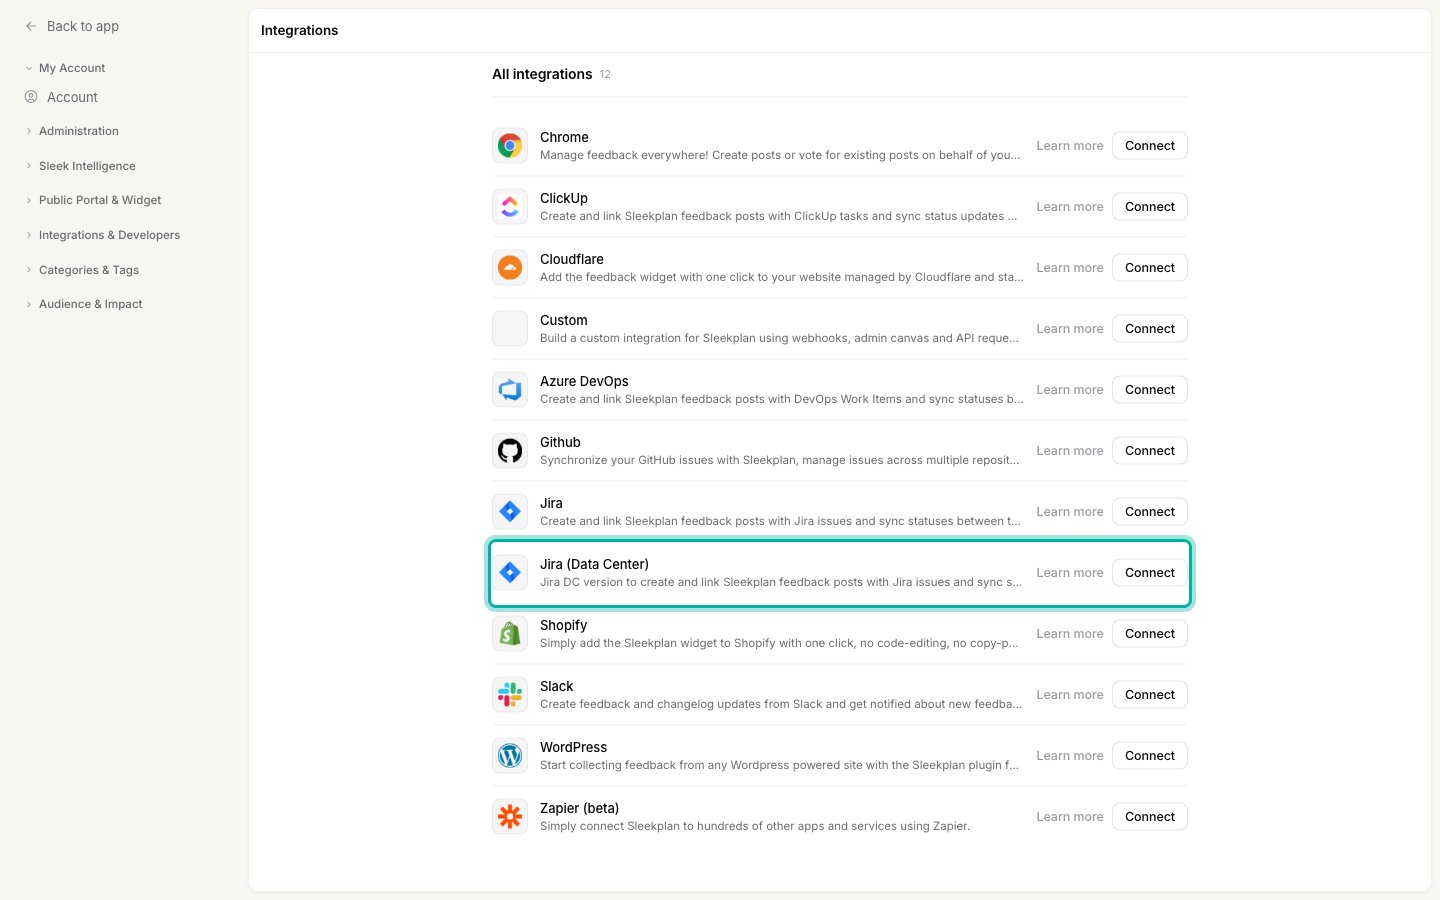
3
Enter your token and base URL
In the setup dialog, paste your Personal access tokens (PAT) and your Jira Base URL (for example 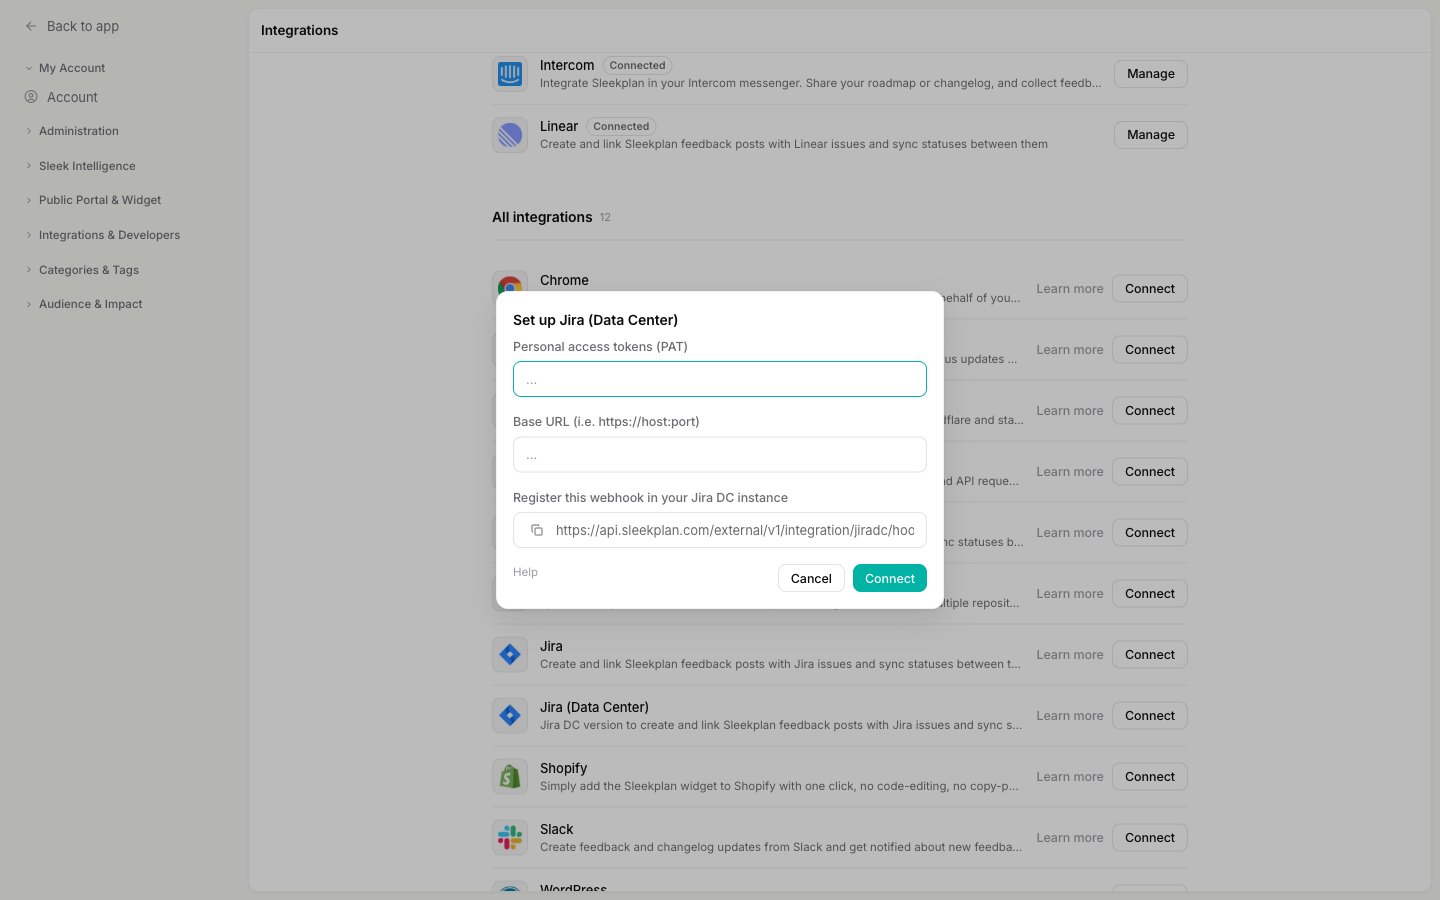
https://jira.yourcompany.com). This is the address you use to reach Jira in your browser, without any project or issue path.4
Copy the webhook URL
The dialog shows a Register this webhook in your Jira DC instance field with a URL unique to your workspace. Copy it. You will paste it into Jira in the next step so status changes made in Jira flow back to Sleekplan.
5
Register the webhook in Jira
In Jira, go to Administration → System → WebHooks and create a new webhook: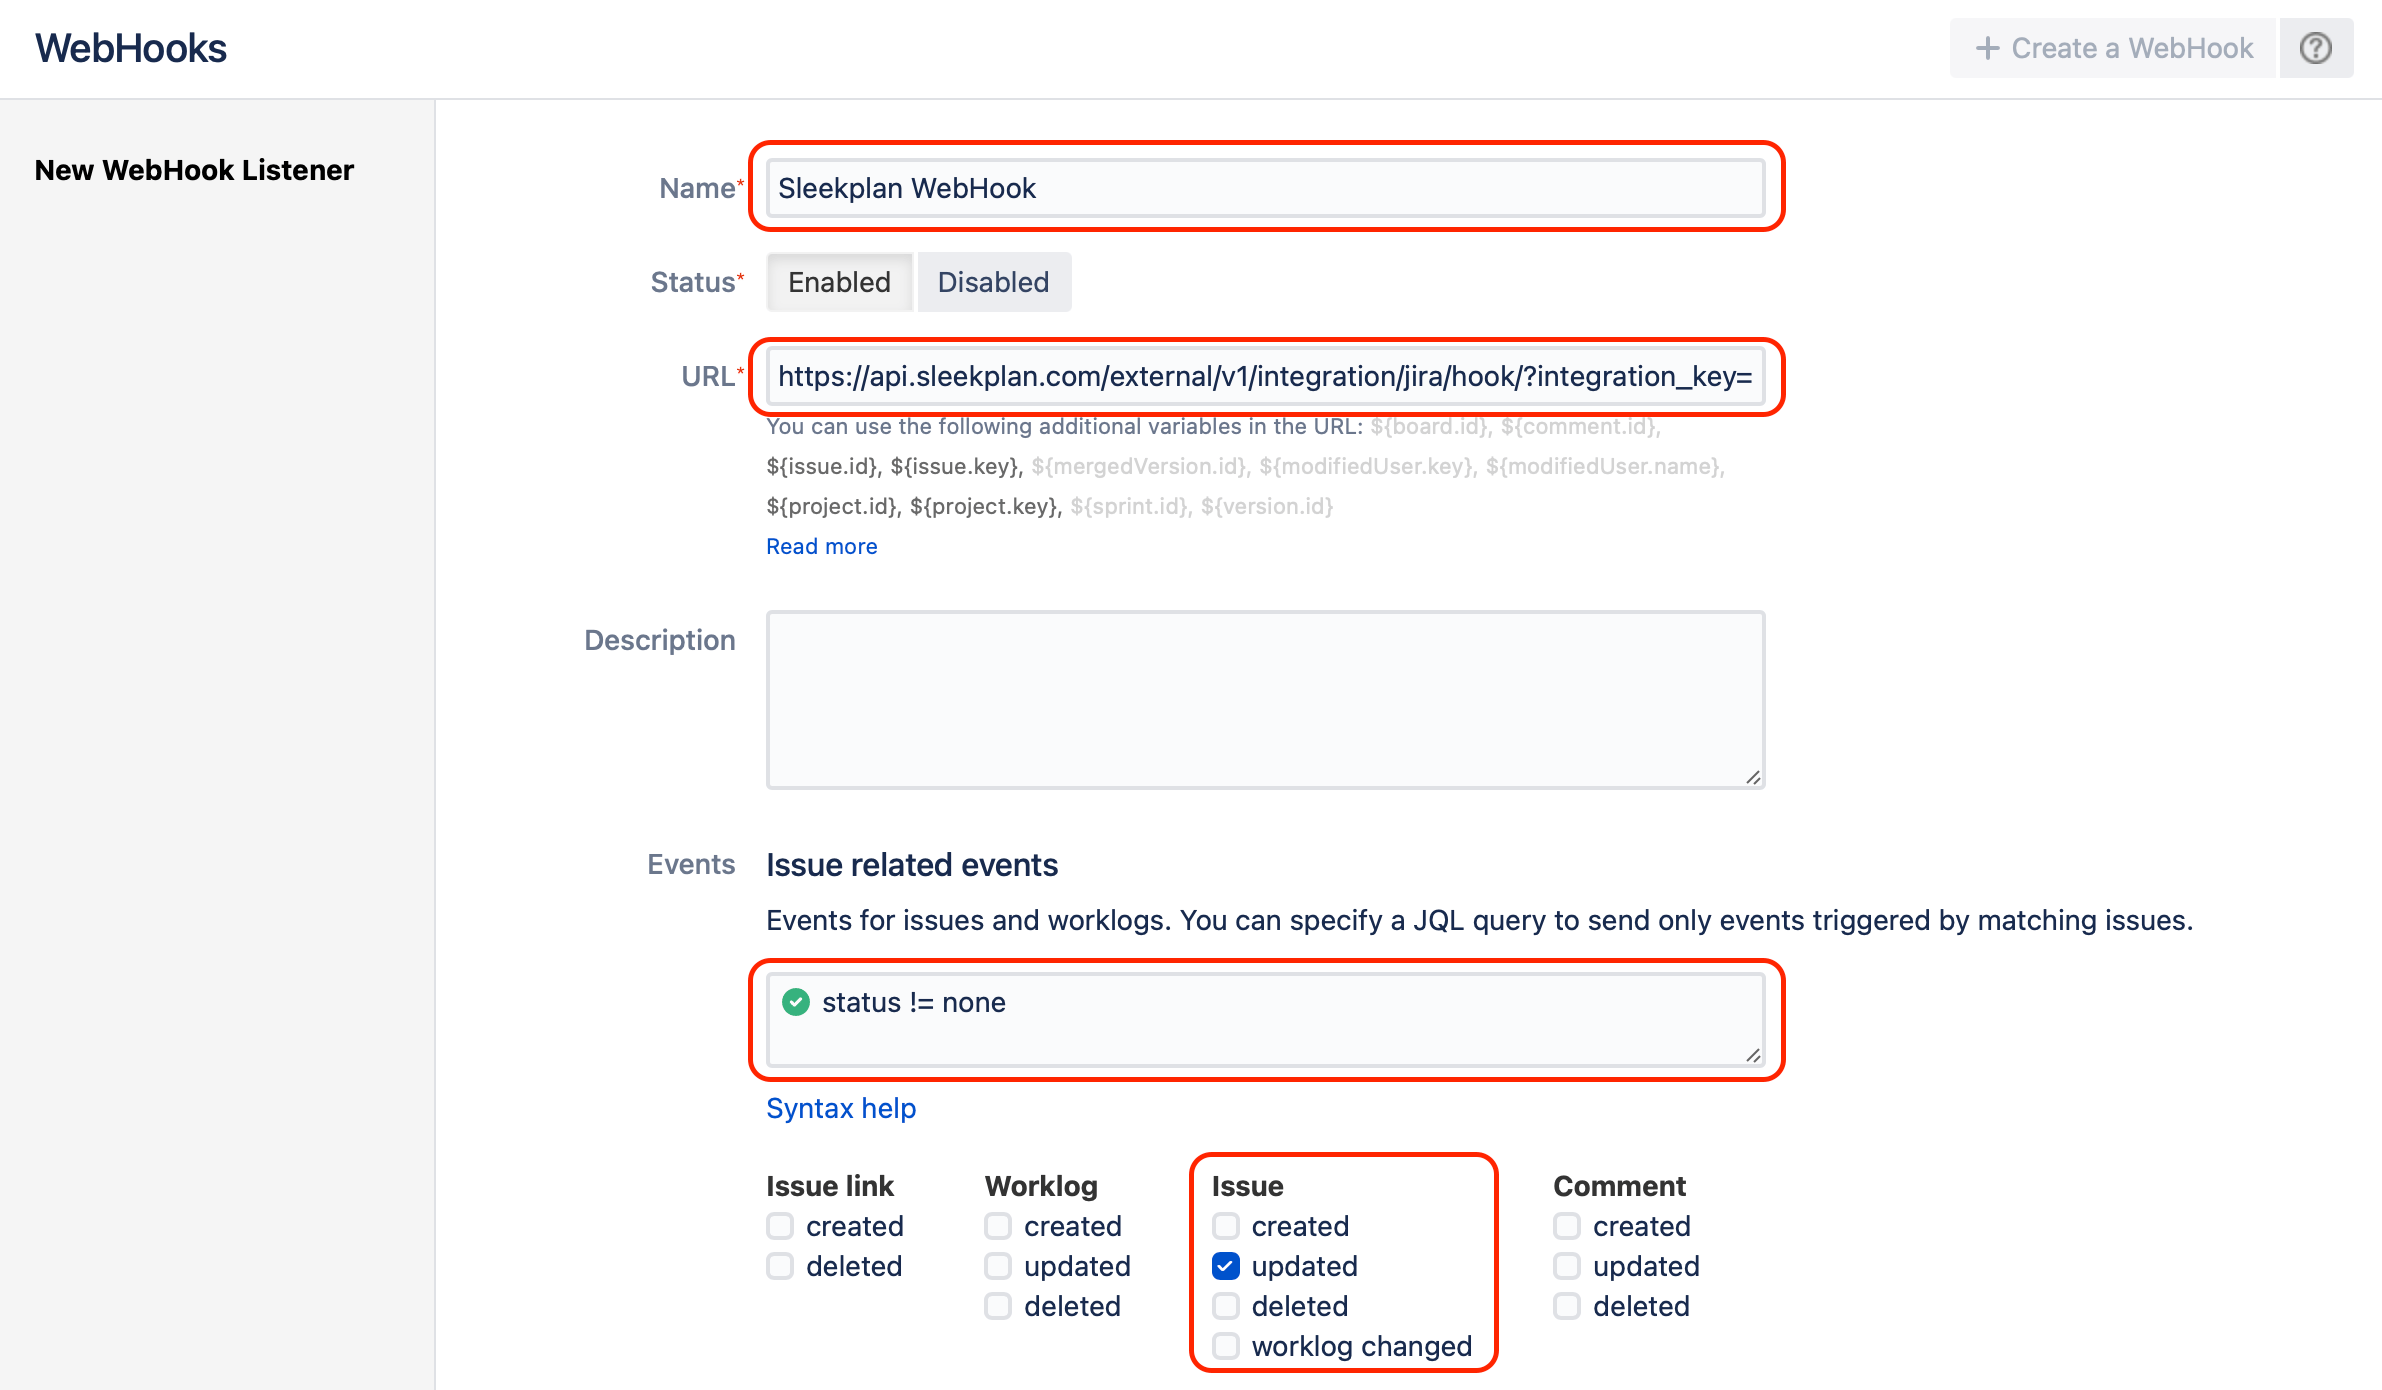
- Name: something clear, such as
Sleekplan. - Status: Enabled.
- URL: the webhook URL you copied from Sleekplan.
- Events: select Issue → updated so Jira notifies Sleekplan whenever an issue changes.
6
Connect
Back in the Sleekplan dialog, select Connect. Sleekplan verifies the token and base URL against your Jira instance. If the details are correct, Jira (Data Center) moves into your Connected list. If you see a connection error, re-check the base URL, the token, and that
168.119.102.99 is allowed through your firewall.Map Jira statuses to Sleekplan statuses
Status sync is driven by a mapping you control: each Jira status points to one of your Sleekplan statuses. Until you map them, statuses will not sync.1
Open the integration settings
On Settings → Integrations, find Jira (Data Center) under Connected and select Manage.
2
Pair each status
For every Jira status, choose the Sleekplan status it should stay in sync with, or leave it as None to ignore that status. For example, map Jira’s “In Progress” to your “In progress” and Jira’s “Done” to your “Live”. Save your changes.
- When a linked post’s status changes in Sleekplan, the Jira issue transitions to the matching Jira status.
- When a mapped Jira issue’s status changes, the linked Sleekplan post updates to the paired status.
Link a post to a Jira issue
Once connected, every feedback post gets a Jira panel where you link work to Jira.1
Open a feedback post
Go to Feedback and open the post you want to connect to Jira.
2
Search for an existing issue or create a new one
In the Jira panel, search by summary or issue key to find an existing issue and link it, or select Create new issue to make one. Creating an issue lets you set a title and description and pick the target project and issue type.
3
Confirm the link
Once linked, the panel shows the linked issue with a button to open it in Jira, and Sleekplan adds a comment to the Jira issue pointing back to the post. To break the connection later, use Unlink issue.
Each feedback post links to a single Jira issue at a time. Linking a different issue replaces the previous link.
Troubleshooting
- The connection fails when you select Connect. Confirm the base URL is the plain host address (no
/browse/...path), the token is valid and unexpired, and your firewall allows Sleekplan’s IP168.119.102.99. - Statuses are not syncing. Open Manage and check the status mapping. Any Jira status left as None is ignored. For Jira-to-Sleekplan sync, also confirm the webhook is registered and enabled in Jira with the Issue → updated event.
- Nothing happens when a Jira issue changes. The webhook drives Jira-to-Sleekplan updates. Re-check that the webhook URL matches the one in the setup dialog and that its status is Enabled.
Related
Jira integration (Cloud)
Connect a hosted Jira Cloud instance from the Atlassian Marketplace.
Feedback statuses
Set up the statuses you map Jira issues to.
All integrations
Browse everything Sleekplan connects with.