
Building a custom integration is a developer task. Someone on your team needs to host an endpoint that receives Sleekplan’s requests. The setup in the admin is quick, but the endpoint behind it is code you write and run. The full technical reference lives in the Developer Docs.
What a custom integration can do
A custom integration combines up to three building blocks, and you can use any one of them on its own:- Webhooks. Sleekplan sends an HTTP POST to your URL whenever an event you subscribe to happens, such as a feedback item being created or updated. Your endpoint receives the payload and does whatever you need with it. See Webhooks in the Developer Docs for the event list and payload format.
- Canvas. Sleekplan renders a panel supplied by your service directly inside the admin, next to a feedback post. Your endpoint returns the panel contents, so you can show related records, links, or actions from your own system. See Canvas in the Developer Docs.
- A shared secret. Sleekplan adds a secret token you choose to the header of every webhook and Canvas request, so your endpoint can verify each request genuinely came from Sleekplan.
Before you start
Setting up integrations requires an Admin or Owner role on the workspace.
- A live endpoint. Your webhook receiver, your Canvas service, or both, reachable over HTTPS.
- The list of events you want. You subscribe to webhook events by name, for example
item.createanditem.update. The complete list is in Webhooks. - The Sleekplan egress IP whitelisted. Sleekplan’s requests reach your endpoint from a fixed IP address. If your endpoint sits behind a firewall or IP allowlist, add the address shown in the setup dialog so the requests get through.
Set up a custom integration
1
Open the Integrations settings
Go to Settings → Integrations. Under All integrations, find Custom.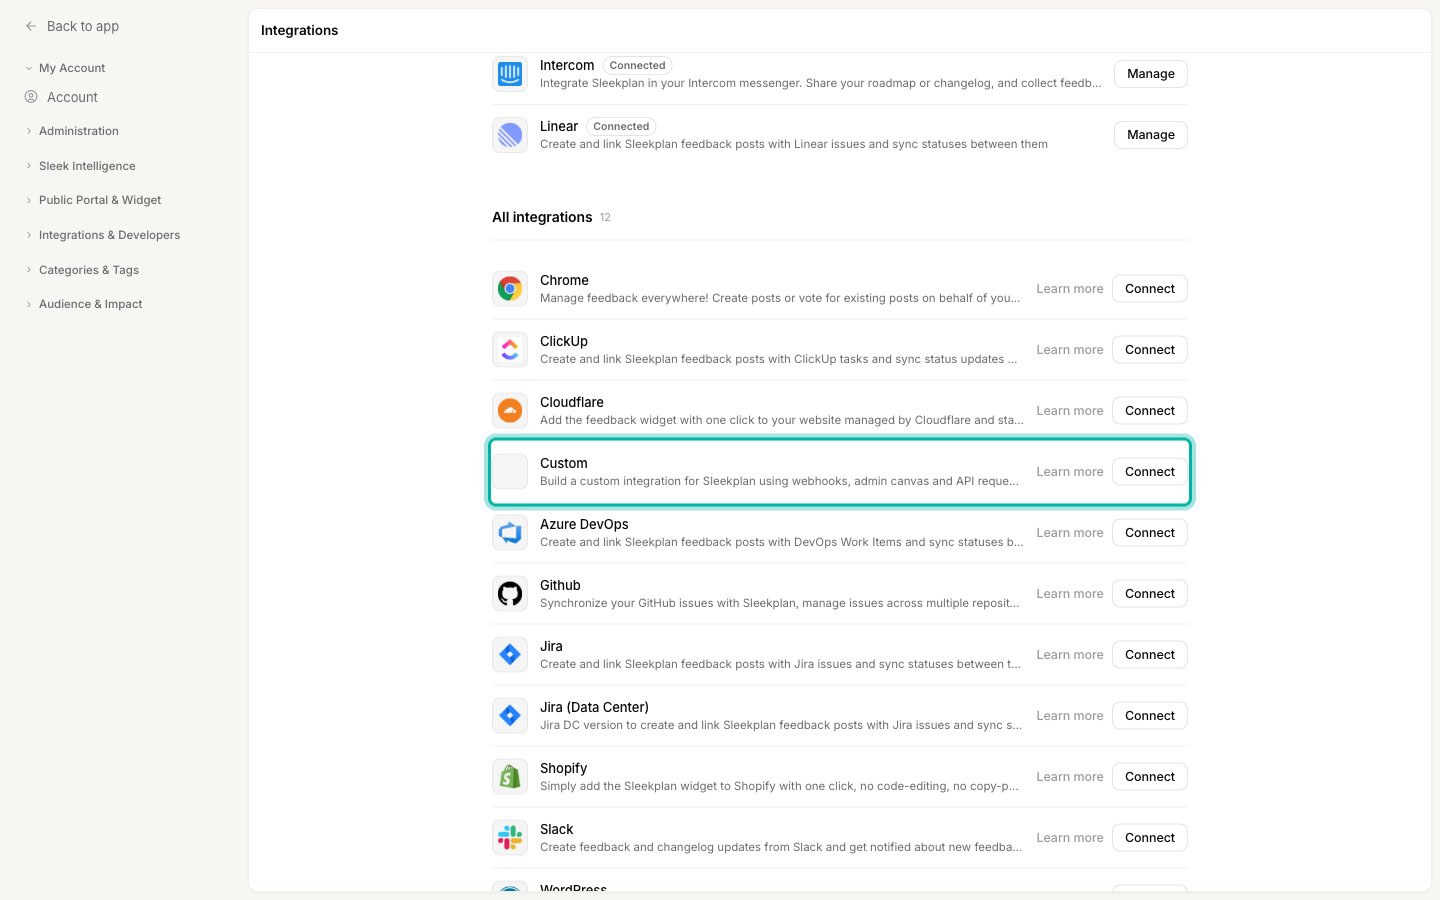
2
Start the connection
Select Connect on the Custom row. The setup dialog opens.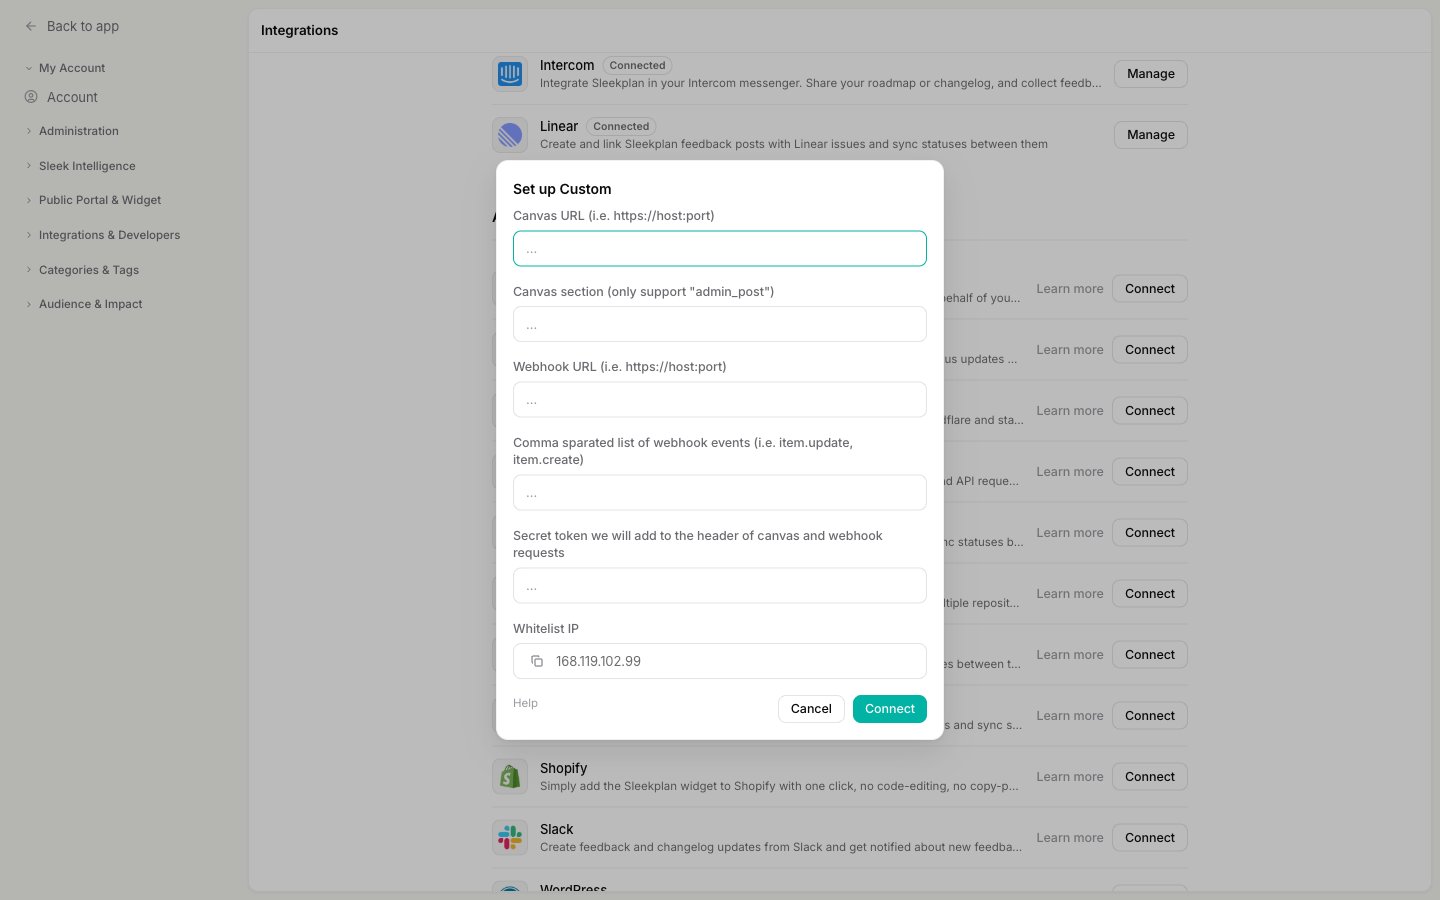
3
Fill in your endpoint details
Complete the fields that apply to you. You need at least a Webhook URL or a Canvas URL:
- Canvas URL: the address of the service that renders your admin panel, for example
https://your-app.com/sleekplan/canvas. - Canvas section: where the panel appears. Use
admin_postto show it next to a feedback post. This is the only supported section today. - Webhook URL: the address that receives event POSTs, for example
https://your-app.com/sleekplan/webhook. - Webhook events: a comma-separated list of the events you want, for example
item.create, item.update. - Secret token: a value you choose. Sleekplan sends it in the header of every request so your endpoint can confirm the request came from Sleekplan. Keep it private.
4
Whitelist the Sleekplan IP if needed
The dialog shows a Whitelist IP address. Copy it with the copy button and add it to your endpoint’s firewall or allowlist if you restrict inbound traffic. Skip this if your endpoint is open.
5
Connect
Select Connect. Sleekplan validates your URLs, saves the configuration, and starts sending events to your webhook and requesting your Canvas panel. The integration now appears under Connected.
Build the integration behind it
The admin dialog only points Sleekplan at your service. The integration itself, the code that receives webhook events and returns Canvas panels, is yours to build. The Developer Docs cover everything you need:Webhooks
Every event Sleekplan can send, the payload shape, and how to verify the shared secret.
Canvas
Render your own panel inside the admin next to a feedback post.
REST API
Read and write feedback, votes, comments, changelog, and users from your service.
JavaScript SDK
Control the widget, identify users, and open specific screens from your app.
Manage or remove a custom integration
Once connected, the Custom integration moves to the Connected section on the Integrations screen. Select Manage to review it, or to disconnect it and stop sending events.Related
Integrations overview
Browse the built-in integrations before building your own.
Import feedback
Bring existing feedback into Sleekplan from another tool.
Developer quickstart
Start building against Sleekplan’s APIs, webhooks, and SDK.
MCP server
Give an AI client direct access to your workspace.