
Segments require the Business plan and an Admin or Manage role. Segments are also evaluated per signed-in customer, so segment targeting on your widget and portal only applies to identified users (people signed in through the widget or single sign-on). Anonymous visitors match no segment.
Create a segment
1
Open the Segments settings
Go to Settings → Audience & Impact → Segments. This screen lists your existing segments and the custom fields available to build them.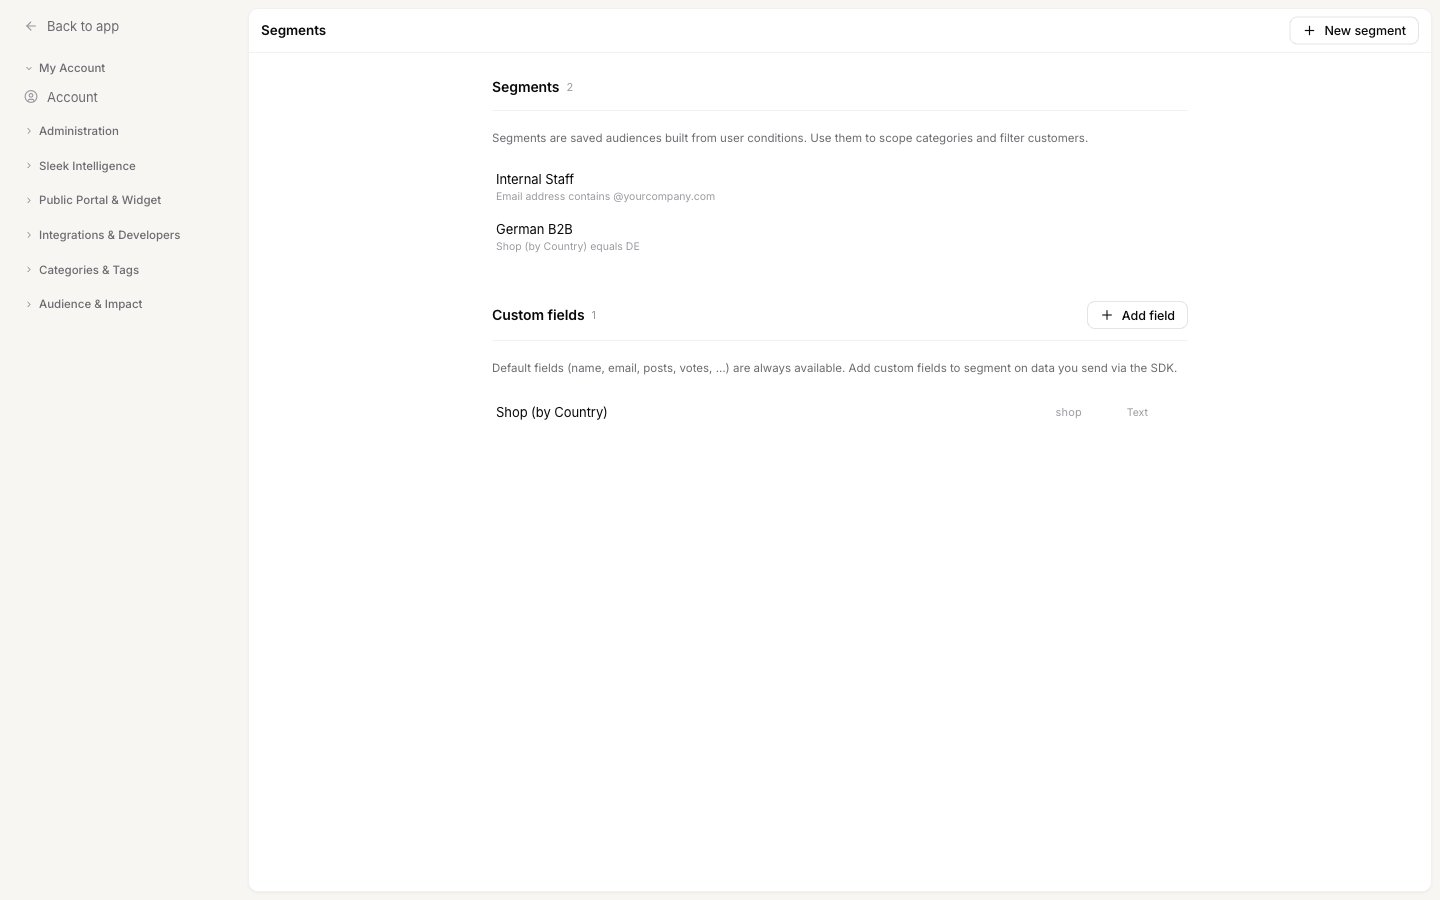
2
Start a new segment
Click New segment in the top right. Give the segment a clear Name that describes the audience, such as “Power users” or “Enterprise customers”. The name is how you will recognize the segment everywhere else you use it.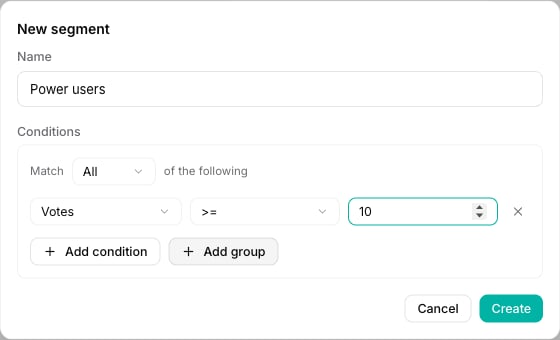
3
Build the conditions
Under Conditions, set whether a customer must match All of the conditions (every one must be true) or Any of them (at least one is enough) using the Match dropdown.Click Add condition and choose a field, a condition (the operator), and a value. For example,
Votes · >= · 10 matches your most engaged customers. Add more conditions to narrow the audience, or use Add group to nest a set of conditions with its own Match logic for more advanced rules. The next section explains how All, Any, and groups fit together.4
Save the segment
Click Create. The segment is saved immediately and becomes available in every place that supports segment targeting. You can edit or delete a segment later from the same screen using the pencil and trash icons on its row.
Fields you can build conditions on
Every workspace starts with a set of default fields, split into text fields and numeric fields:
Text fields offer operators like equals, contains, begins with, and is empty. Numeric fields offer comparisons like
=, >, and <=. The date fields (User created, User updated) use day-based operators such as more than __ days ago.
How All, Any, and groups combine
A segment is just a list of conditions plus a Match setting that decides how they add up. Getting this one setting right is what makes a segment behave the way you expect.- Match All means a customer has to meet every condition to be in the segment. Each condition you add makes the audience smaller. Use it when you are describing a single kind of customer, like “on the Enterprise plan and based in Germany”.
- Match Any means a customer only has to meet one condition. Each condition you add makes the audience larger. Use it to pull several separate groups into one segment, like “on the Enterprise plan or on the Pro plan”.
Mix “and” with “or” using groups
One Match setting is sometimes not enough, because you want some conditions joined by “and” and others by “or”. That is what Add group is for. A group is a set of conditions with its own Match setting, and the whole group counts as a single condition inside its parent. Say you want “Enterprise customers who are highly engaged”. You would build it as:- Match All of the following
- Plan tier
equalsEnterprise - Match Any of the following (a group)
- Votes
>=10 - Comments
>=5
- Votes
- Plan tier
Segment on your own data with custom fields
The default fields cover identity and activity, but the most powerful segments often use data only your product knows: plan tier, company name, MRR, signup source, and so on. You send this data to Sleekplan through the widget SDK, then add a matching custom field so you can build conditions on it.1
Add the custom field
On the Segments settings screen, in the Custom fields section, click Add field. Enter a Field name (the label you will see in the condition builder, e.g. “Plan tier”), an Identifier (the data key, e.g. 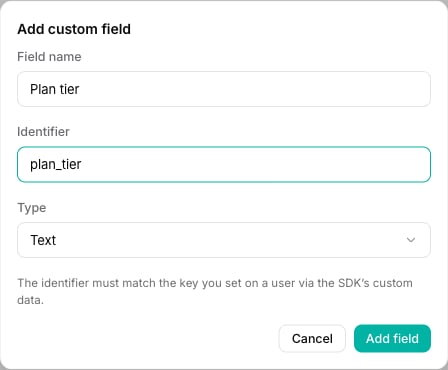
plan_tier), and a Type of Text or Number.2
Match the identifier to your SDK data
The Identifier must exactly match the key you attach to a user with the SDK’s
addMetadata() method. If you send { plan_tier: 'enterprise' }, use plan_tier as the identifier. See Identify and manage users in the developer docs for how to pass this data.3
Use the field in a segment
Once added, the custom field appears in the field dropdown when you build a segment’s conditions, right alongside the default fields.
Deleting a custom field removes it from the condition builder, and any segment that relied on it will no longer match on that field. Deleting a segment leaves your customers untouched (segments never store data on the customer), but anything scoped to that segment falls back to no segment.
Where you can use segments
Setting up a segment is only the first half. The point of a segment is to reuse that audience across Sleekplan. Once a segment exists, you can:- Filter your feedback board by segment. Narrow the feedback list to posts whose author belongs to a segment, so you can see what your enterprise customers or power users are asking for. See Find and filter feedback and save it as a reusable view.
- Filter your Customers list by segment. On the Customers screen, filter your end users down to a single segment to browse or export just that audience.
- Show categories to a segment. Restrict a feedback category to a segment so only matching customers see its posts, useful for employee-only, private, or beta boards. See Show a category to only some of your customers.
- Target widget popups and survey prompts. Set a popup, changelog announcement, or NPS/CSAT survey to show only to a specific segment by setting its Audience to that segment (applies to signed-in users).
- Personalize action items. Show a home-screen action tile only to a chosen segment by setting the tile’s Audience, so different customers see different shortcuts.
- Target changelog entries. Limit a changelog entry to a segment so only that audience sees it in the widget and receives the notification about it.
- Show a widget or portal section to a segment. Limit the feedback board, changelog, roadmap or notifications to signed-in customers in a segment. Your default screen always stays visible to everyone. See Choose the widget’s home screen.
- Break down analytics by segment. Filter your NPS and CSAT results by segment to compare satisfaction across different groups of customers.
Filter your feedback
Filter the feedback board by segment, status, category, and more.
Scope a category
Restrict a board to a segment so only matching customers see it.
Action items
Show different home-screen shortcuts to different segments.
How end-user accounts work
Understand who your customers are and how they get identified.