
Connectors work inside Sleekmate, so Sleekmate must be turned on for your workspace and your plan must include AI (Starter and above). Each message still uses Intelligence credits.
Add a connector
1
Open Connectors
Go to Settings → My Account → Connectors and click Add connector.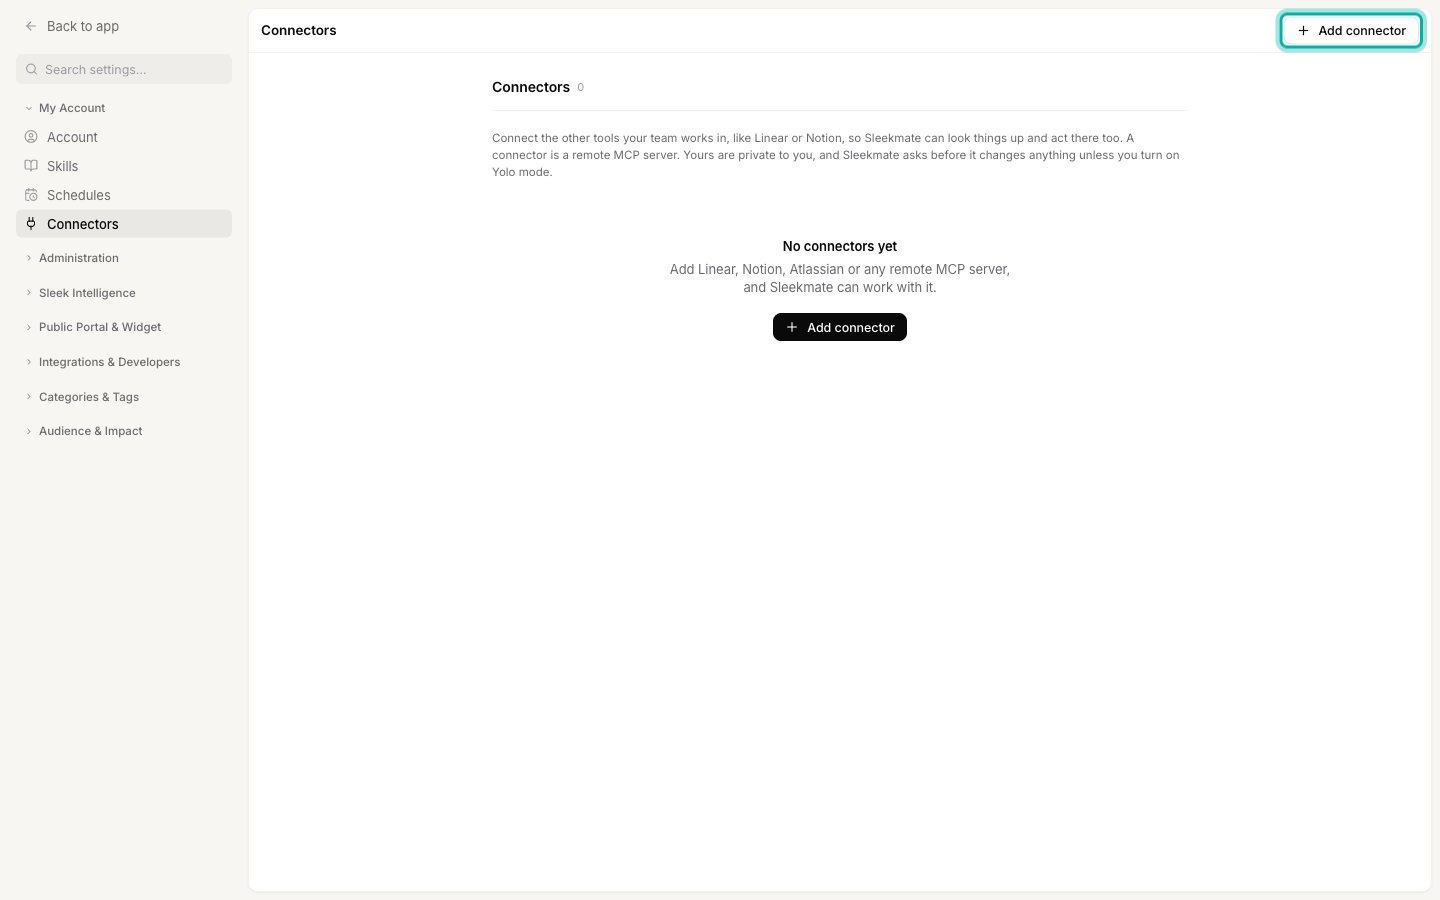
2
Pick an app
Choose an app from the list, or Custom connector for any other remote MCP server. Picking an app fills in its name and server URL for you. See Available apps for the full list.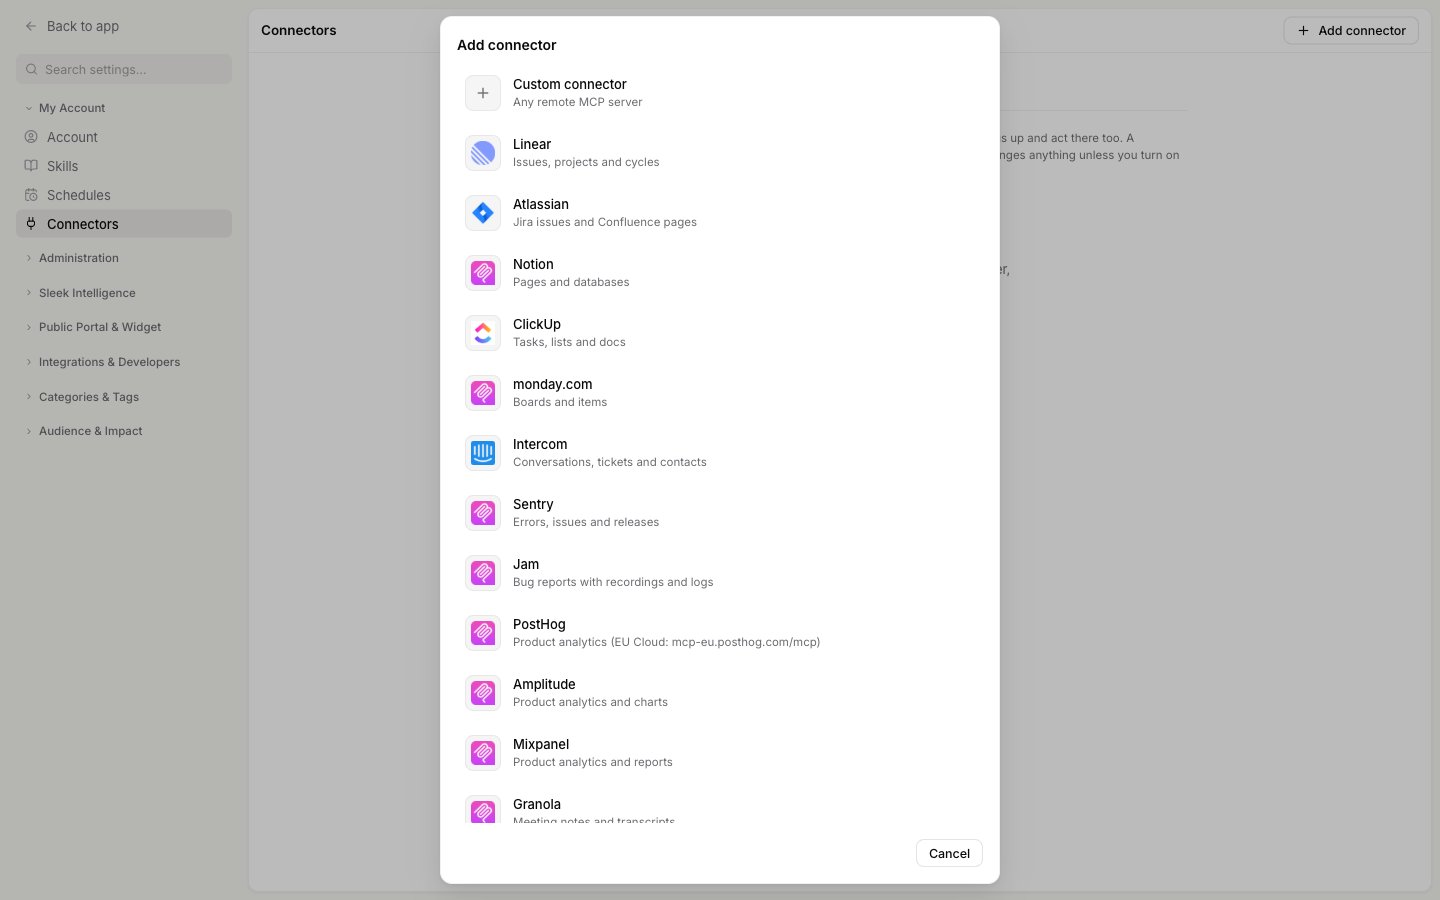
3
Check the name and server URL
The Name is how the connector shows up in Sleekmate. For a custom connector, paste the Server URL from the app’s own documentation. It must start with
https:// and usually ends in /mcp.4
Choose how to sign in
Under Authentication, keep Sign in automatically for most apps. Sleekplan checks whether the server needs a sign-in and, if it does, opens the app’s sign-in in a new window. Choose API key when the app gives you a key or token instead, see Connect with an API key.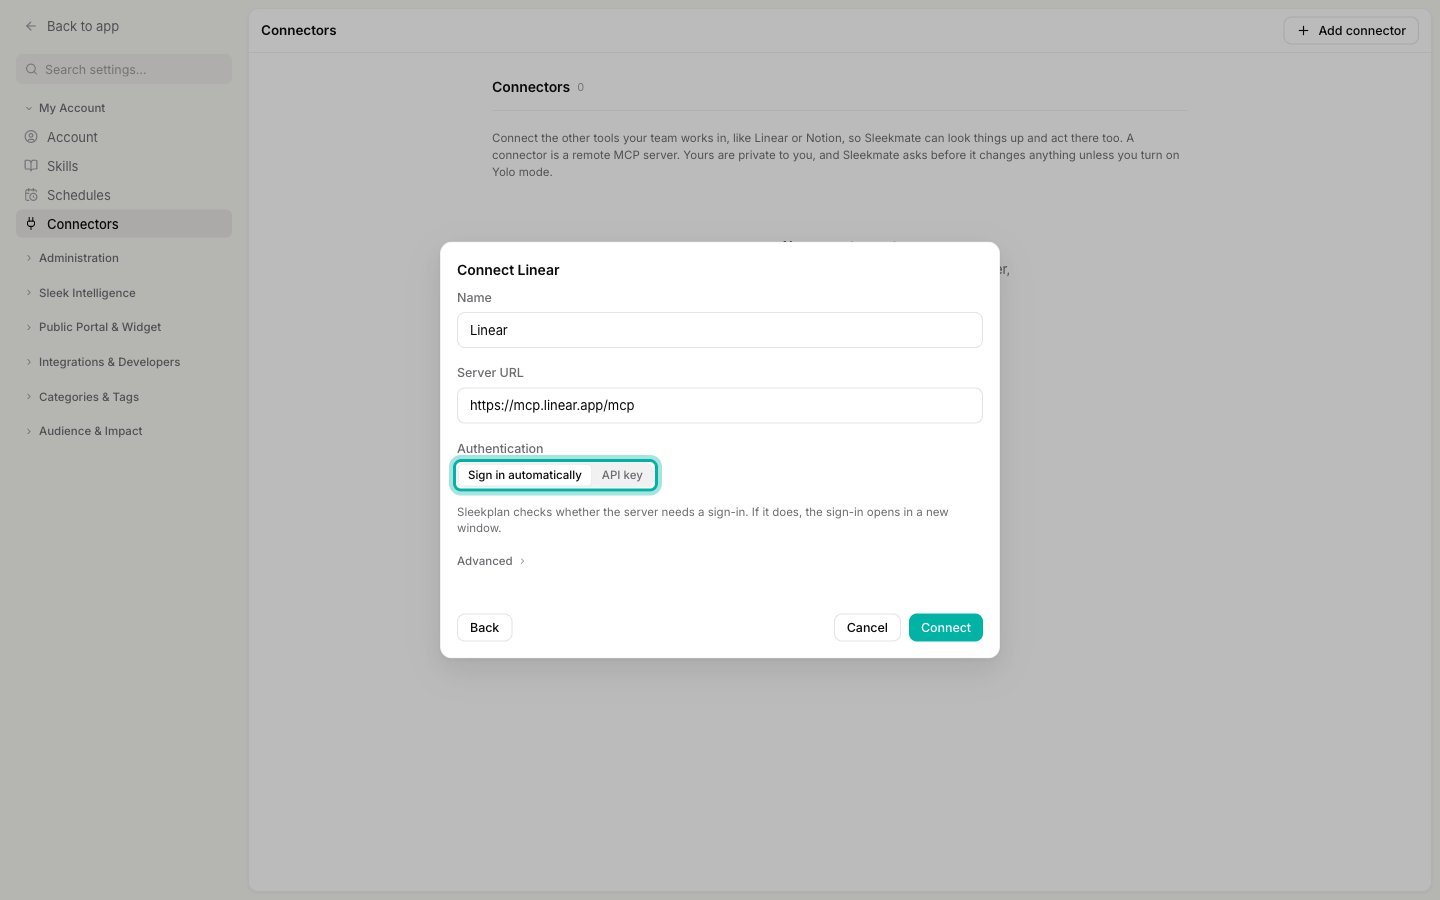
5
Connect
Click Connect. If the app asks you to sign in, log in and allow access in the window that opens. The window then shows Connected and closes by itself, and the connector appears in your list. A server that needs no sign-in connects right away.
Available apps
A few of them need an extra step:
- Atlassian: an Atlassian admin may need to allow Sleekplan before you can sign in.
- PostHog: if your PostHog project is on EU Cloud, change the server URL to
https://mcp-eu.posthog.com/mcp. - GitHub: GitHub doesn’t let other apps sign in to its MCP server, so it connects with a personal access token. See the next section.
Connect with an API key
Some servers don’t offer a sign-in and take an API key or access token instead. GitHub is one of them, so its preset switches to API key for you.1
Create a key in the other app
Create an API key or access token in the app you’re connecting. For GitHub, create a personal access token.
2
Choose API key and paste it
In the connector form, choose API key under Authentication. Leave Header name as 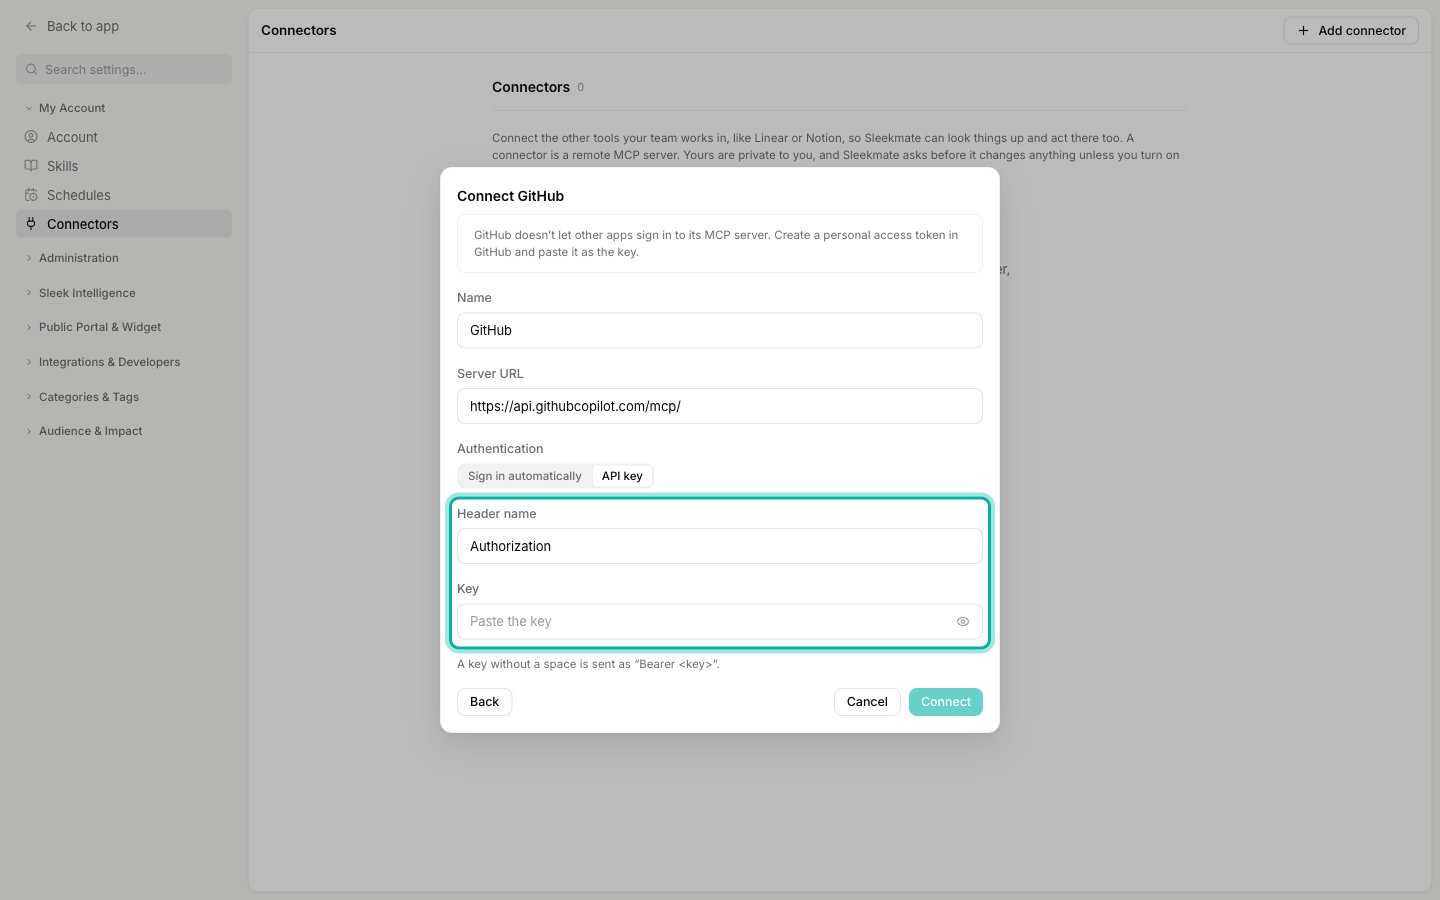
Authorization unless the app’s documentation names a different header, then paste your key into Key.3
Connect
Click Connect. Sleekplan tries the key with the server first and only saves the connector if the server accepts it.
Bearer <key>, which is what most servers expect. If an app needs another format, like Basic …, paste the full value including that prefix.
When a server can’t register Sleekplan by itself
During sign-in, most apps let Sleekplan register itself automatically. If one doesn’t, you’ll see “This server doesn’t let apps register automatically. Add an OAuth client ID under Advanced.” The connector is saved with Needs sign-in, and its settings open with Advanced unfolded:- In the other app, create an OAuth app (some apps call it an OAuth client or an integration). Use the Callback URL shown under Advanced as its redirect URL.
- Back in Sleekplan, enter the app’s OAuth client ID, and its OAuth client secret if it gave you one. Click Save.
- Open the connector again and click Sign in.
Use connectors in Sleekmate
Once a connector is added, Sleekmate can use it in every chat. Ask in plain language, and Sleekmate reaches for the connected app when your request needs it, for example:- “Find the Linear issue for this post and tell me its status.”
- “Create a Jira ticket from this feedback.”
- “Check Sentry for errors that match what this customer reported.”
- “Summarize our Notion spec for this feature.”
Switch connectors on or off for a chat
Under the composer, next to Yolo mode, the Connectors button shows how many of your connectors this chat uses, for example “1 of 1”. Click it to switch a connector off for the current chat, or click Manage connectors to open the settings page.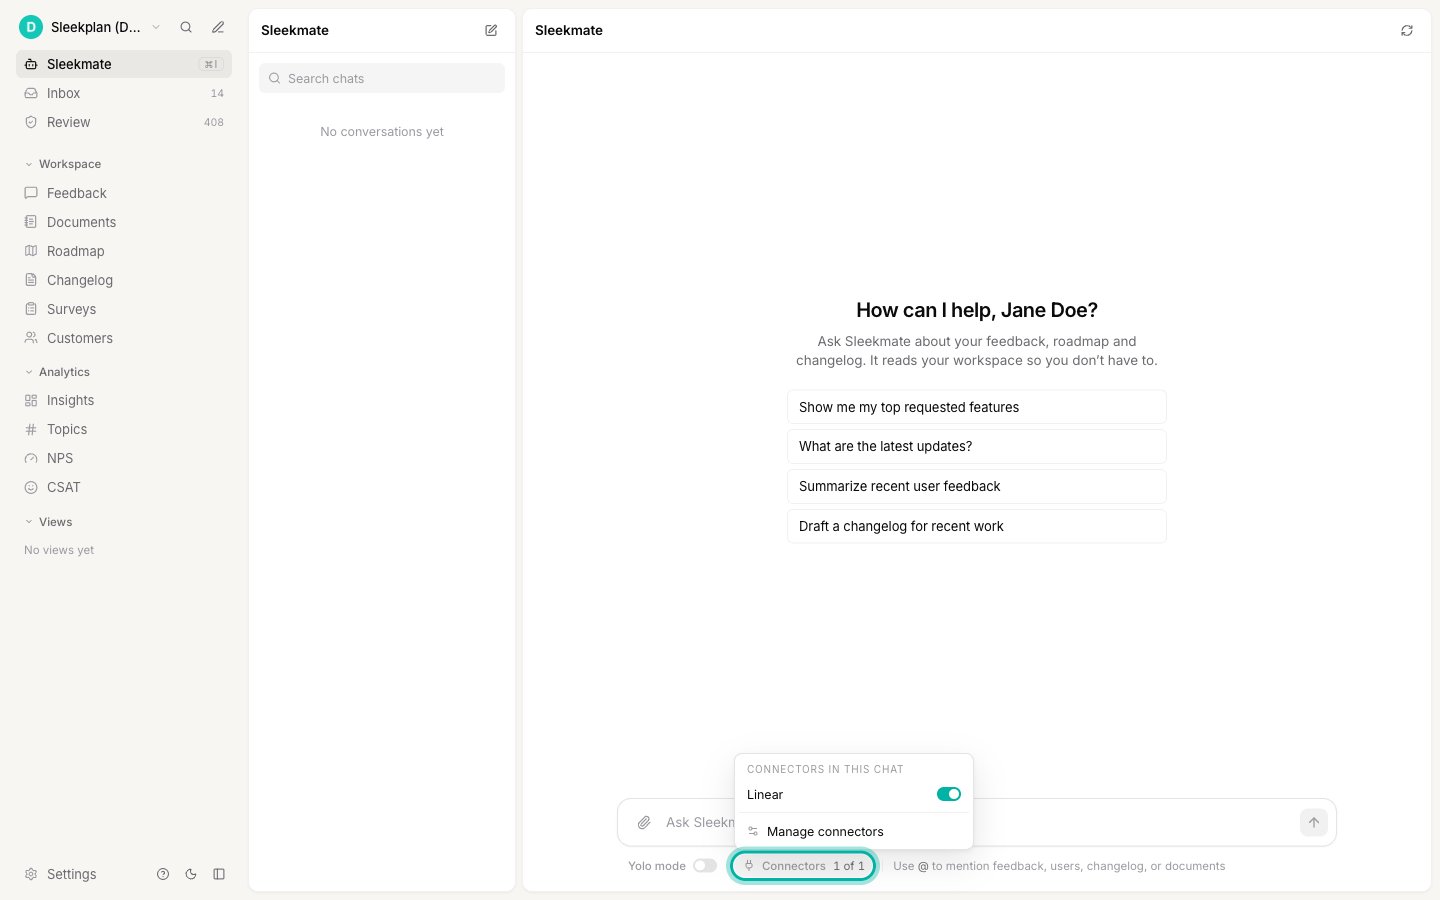
- A new chat starts with all your connectors on, and each chat remembers its own choice.
- The button only appears once you have at least one connector.
- A connector that needs attention is greyed out with Needs sign-in or Needs a new key. See Fix a connector.
Approving changes in other apps
Sleekmate treats your other apps the way it treats your board. It only runs an action without asking when the app marks it as read-only, like a search or a lookup. Anything else, like creating an issue or editing a page, stops at an approval card first. The card names the app and the action, for example Linear · create issue. Yolo mode turns these approvals off for connectors too. While it’s on, the Connectors menu reminds you: “Yolo mode is on: Sleekmate makes changes in these apps without asking.” If a connector can’t be used during a chat, for example because its sign-in expired or the server doesn’t answer, Sleekmate carries on without it and tells you the app is unavailable.Connectors in schedules
When you create or edit a schedule, the Connectors section lists your connectors, each with a switch. They’re all on by default, and a connector you add later is on for your existing schedules too. Switch off the ones a schedule doesn’t need.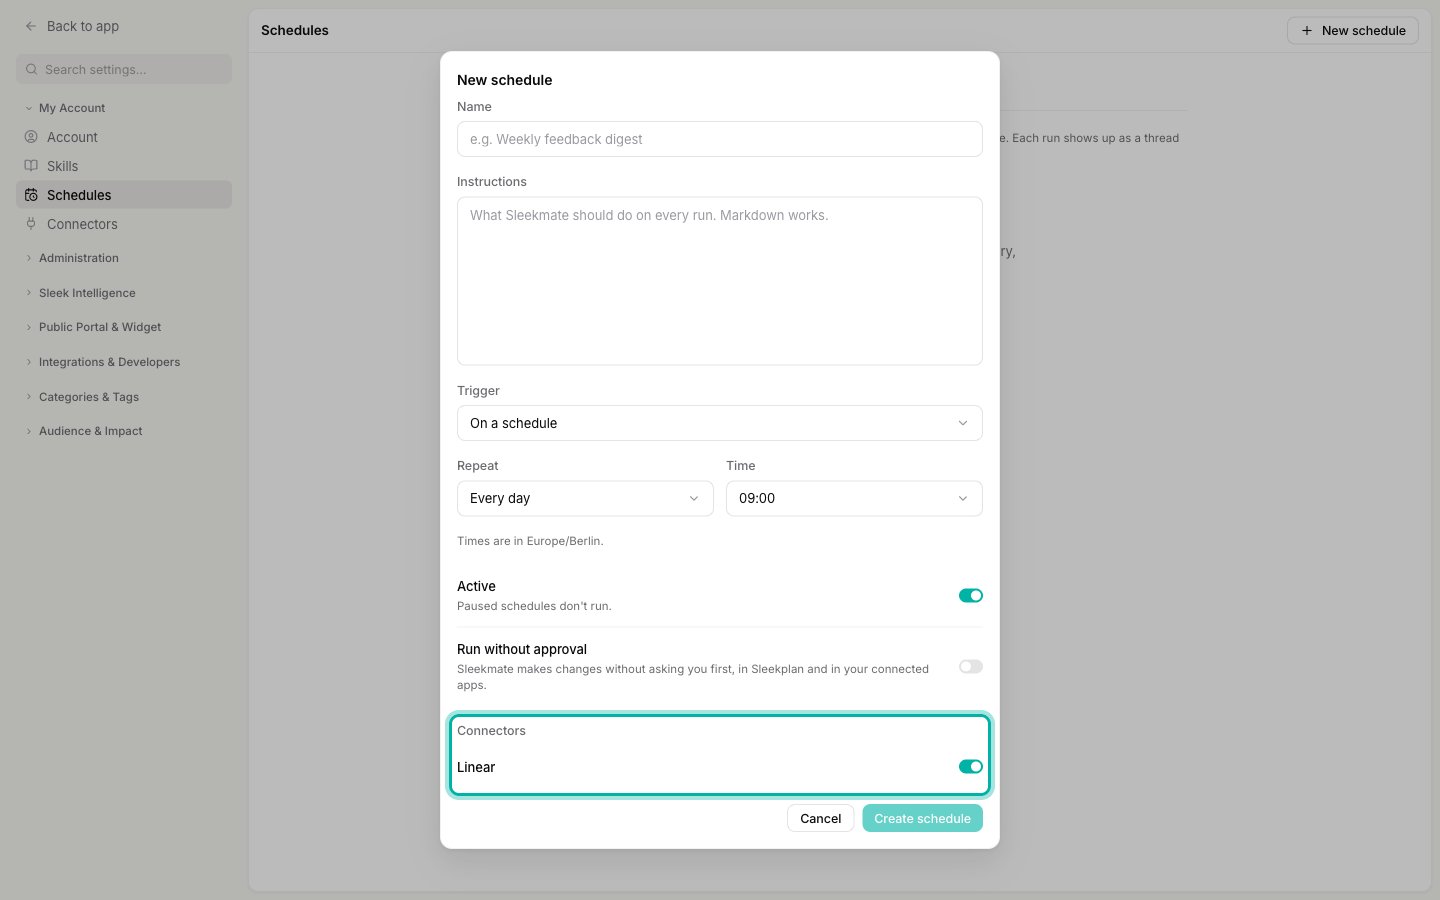
Manage your connectors
The Connectors page lists each connector with its server address and how it signs in: OAuth, API key or No sign-in. Hover a row to edit or delete it.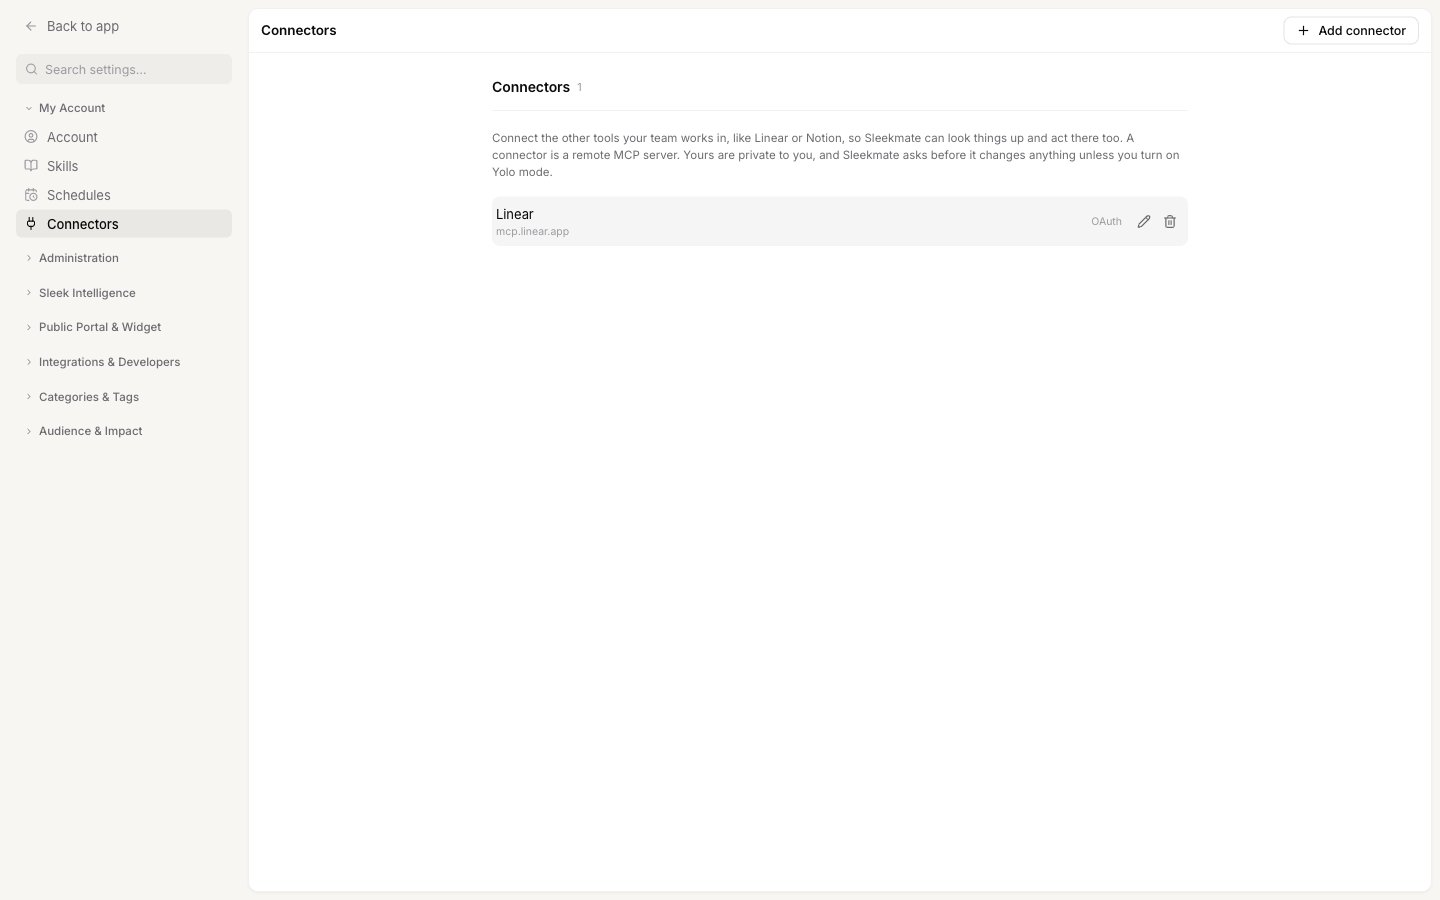
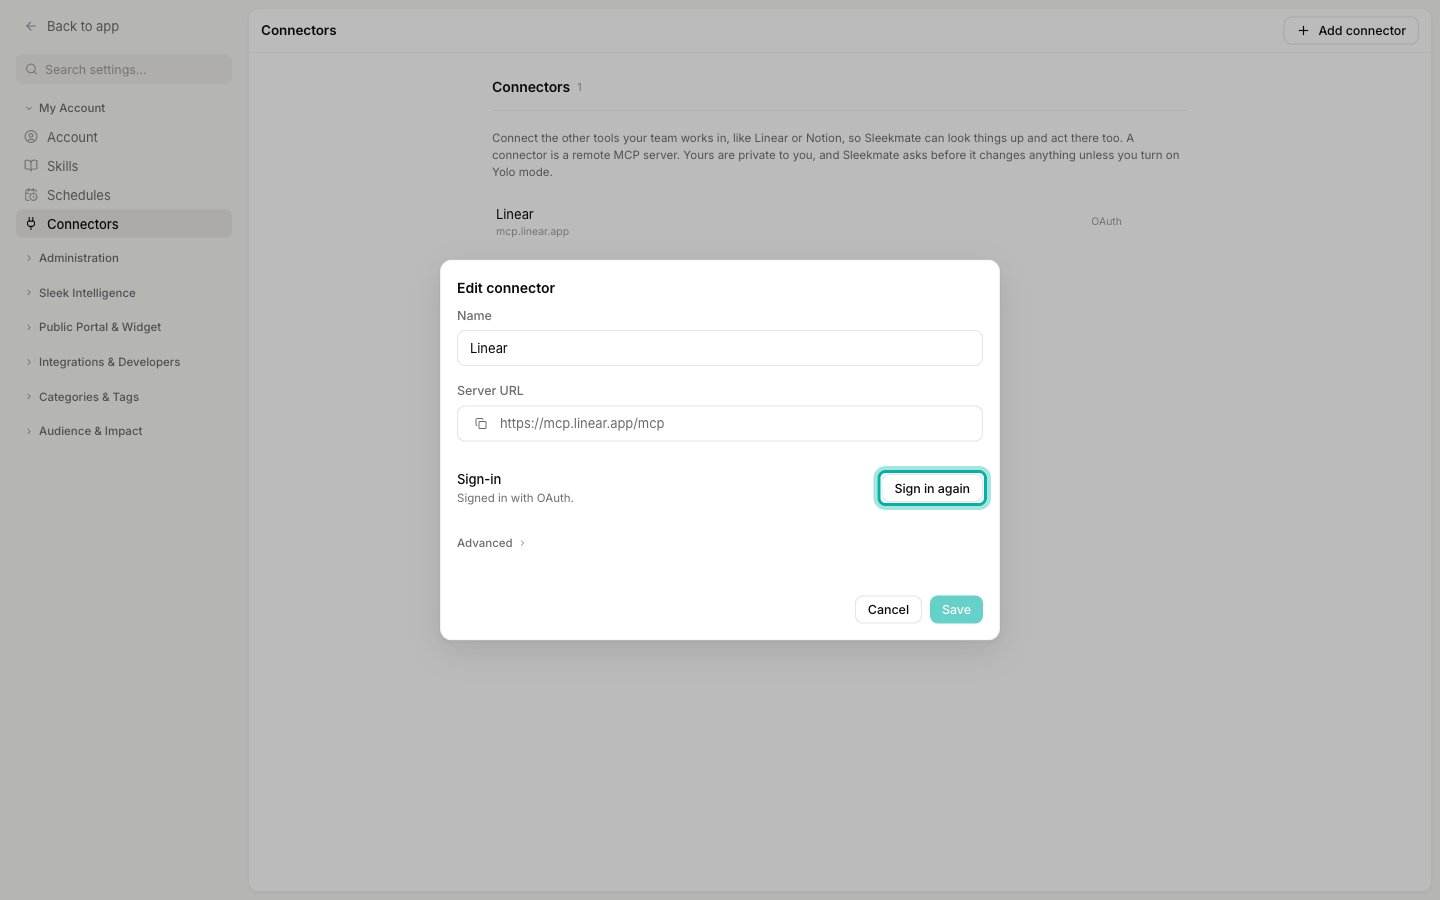
- Rename a connector. Click the row, change Name and click Save. The server URL can’t be changed: to use another URL, add a new connector and delete the old one.
- Sign in again. For a connector that signs in with OAuth, open it and click Sign in again.
- Replace an API key. Open the connector and click Replace API key. A saved key is never shown again, not even to you.
- Delete a connector. Hover the row, click Delete and confirm. Sleekmate stops using it in your chats and schedules. This can’t be undone.
Deleting a connector removes it from Sleekplan, but doesn’t revoke the access you granted in the other app. To cut that off too, remove Sleekplan’s access in that app’s settings, or revoke the API key you created for it.
Fix a connector
A tag on the row tells you when a connector can’t be used:Troubleshooting
These messages can appear when you add a connector or sign in:Limits
- Up to 10 connectors per person in each workspace.
- A connector name can have up to 60 characters.
- Only remote MCP servers over
https://are supported. MCP servers that run locally on your computer, and servers that only offer the older SSE connection, can’t be added. - Up to 20 connection attempts per 10 minutes. Adding a connector, starting a sign-in and saving a new API key each count as one.
- Sleekmate uses up to 100 tools from one connector and up to 150 connector tools in one chat. A connector that would take a chat past 150 is left out of that chat, so switch off the connectors a chat doesn’t need.
Related
Sleekmate
The copilot that uses your connectors, and how approvals and Yolo mode work.
Schedules
Let Sleekmate run your instructions on a schedule, with the connectors you choose.
Skills
Write down how a task should be done once, including the steps in your other apps.
Sleekplan MCP server
The other direction: work with your Sleekplan data from Claude, ChatGPT or Cursor.