> ## Documentation Index
> Fetch the complete documentation index at: https://sleekplan.com/llms.txt
> Use this file to discover all available pages before exploring further.
# Show your Terms and Privacy Policy
> Add your Terms and Privacy Policy links to the widget sign-up form, and optionally make users tick an I Agree checkbox before they identify themselves. Point the links at your own legal pages or use Sleekplan's defaults.
The **Legal** page lets you show your **Terms and Conditions** and **Privacy Policy** on the sign-up form of your portal and widget, so people agree to them before they identify themselves to vote, post, or comment. You can display the links on their own, or require a visitor to actively tick an "I Agree" checkbox first.
This is how most teams meet the consent requirement of privacy rules like GDPR: nobody leaves feedback under an identity without first being shown, and optionally accepting, your legal terms.
Legal lives under **Public Portal & Widget** and only workspace **owners** and **admins** can see it. There is no plan requirement, so this is available on every plan.
## Where the links appear
The Terms and Privacy links show on the **sign-up form**, the step where a visitor enters their email to identify themselves on your board. They appear only when visitors sign in with their email through Sleekplan. If you [force your own single sign-on](/help/portal-widget/access-privacy#force-single-sign-on), your login already owns identity, so the consent block is not shown.
To control who reaches your board and how they sign in, see [Control who can access your board](/help/portal-widget/access-privacy).
## Open the Legal settings
Go to [**Settings → Public Portal & Widget → Legal**](https://app.sleekplan.com/settings/legal).
 ## Turn on Terms and Privacy
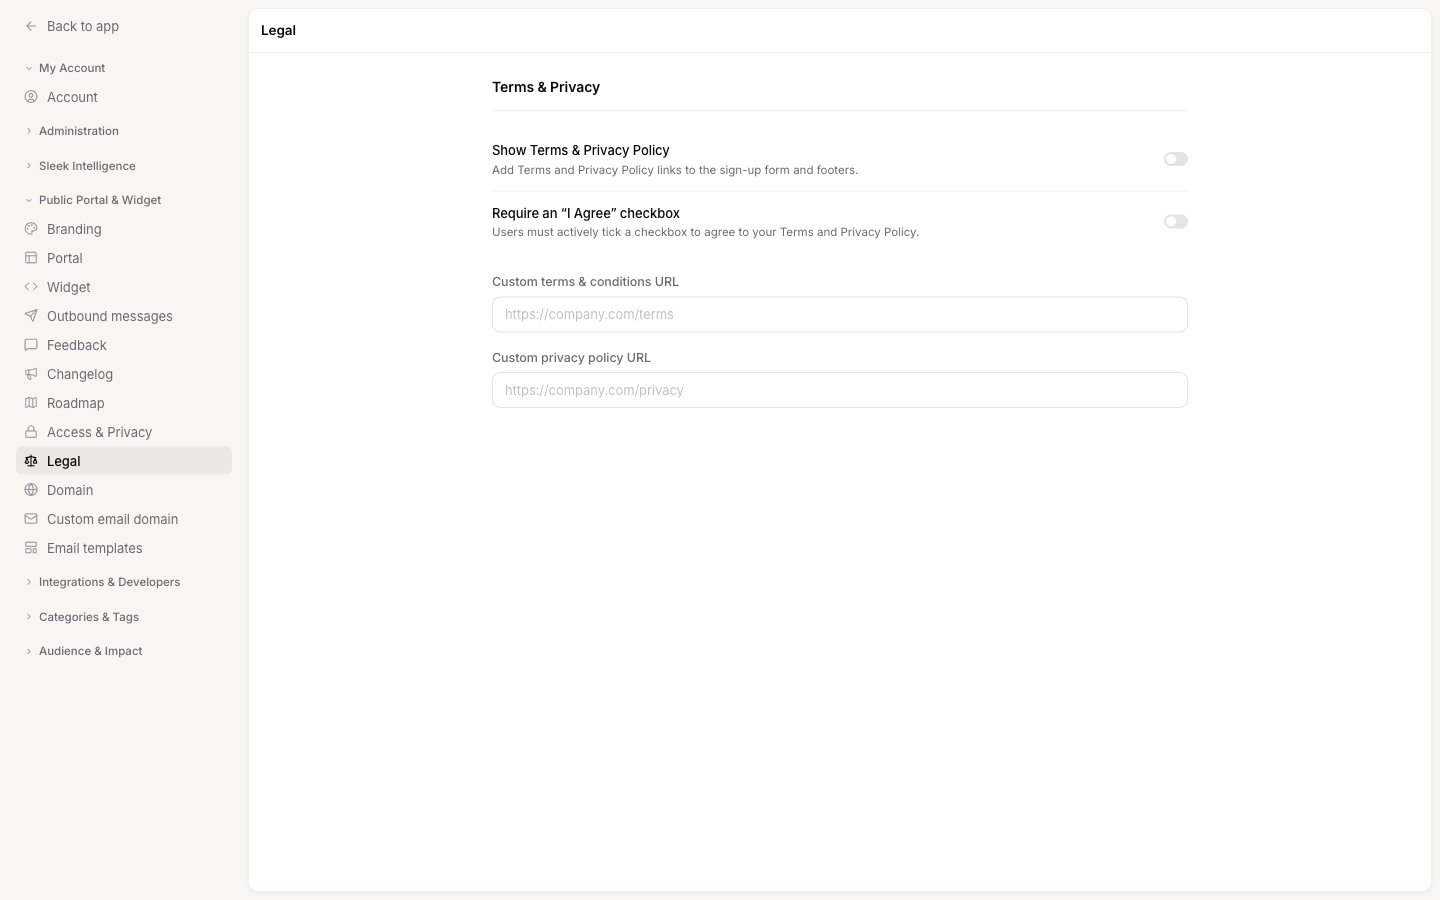
Turn on **Show Terms & Privacy Policy**. This adds the Terms and Conditions and Privacy Policy links to your sign-up form. The two custom URL fields below become editable once this is on.
Leave **Require an "I Agree" checkbox** off for implied consent, or turn it on to make agreement an active, deliberate step. The next section explains the difference.
Click **Save changes** in the bar at the bottom of the page. Nothing is live until you save.
## Choose how consent is given
The **Require an "I Agree" checkbox** toggle decides whether a visitor has to actively accept your terms, or accepts them simply by continuing.
* **Off (implied consent).** No checkbox appears. Below the email field, the visitor sees: *"By submitting your email, you agree to the Terms and Conditions and Privacy Policy."* Submitting their email counts as agreement. This keeps sign-up quick.
* **On (explicit consent).** A checkbox appears that the visitor must tick to continue, next to: *"I have read and agree to the Terms and Conditions and Privacy Policy."* Use this when you need a clear, recorded action of agreement.
In both cases, **Terms and Conditions** and **Privacy Policy** are clickable links that open in a new tab.
## Link to your own legal pages
By default the links point to Sleekplan's built-in Terms and Privacy pages hosted on your portal. If you have your own legal pages, point the links at them instead.
In **Custom terms & conditions URL**, paste the full URL of your Terms and Conditions page, for example `https://company.com/terms`.
In **Custom privacy policy URL**, paste the full URL of your Privacy Policy page.
## Turn on Terms and Privacy
Turn on **Show Terms & Privacy Policy**. This adds the Terms and Conditions and Privacy Policy links to your sign-up form. The two custom URL fields below become editable once this is on.
Leave **Require an "I Agree" checkbox** off for implied consent, or turn it on to make agreement an active, deliberate step. The next section explains the difference.
Click **Save changes** in the bar at the bottom of the page. Nothing is live until you save.
## Choose how consent is given
The **Require an "I Agree" checkbox** toggle decides whether a visitor has to actively accept your terms, or accepts them simply by continuing.
* **Off (implied consent).** No checkbox appears. Below the email field, the visitor sees: *"By submitting your email, you agree to the Terms and Conditions and Privacy Policy."* Submitting their email counts as agreement. This keeps sign-up quick.
* **On (explicit consent).** A checkbox appears that the visitor must tick to continue, next to: *"I have read and agree to the Terms and Conditions and Privacy Policy."* Use this when you need a clear, recorded action of agreement.
In both cases, **Terms and Conditions** and **Privacy Policy** are clickable links that open in a new tab.
## Link to your own legal pages
By default the links point to Sleekplan's built-in Terms and Privacy pages hosted on your portal. If you have your own legal pages, point the links at them instead.
In **Custom terms & conditions URL**, paste the full URL of your Terms and Conditions page, for example `https://company.com/terms`.
In **Custom privacy policy URL**, paste the full URL of your Privacy Policy page.
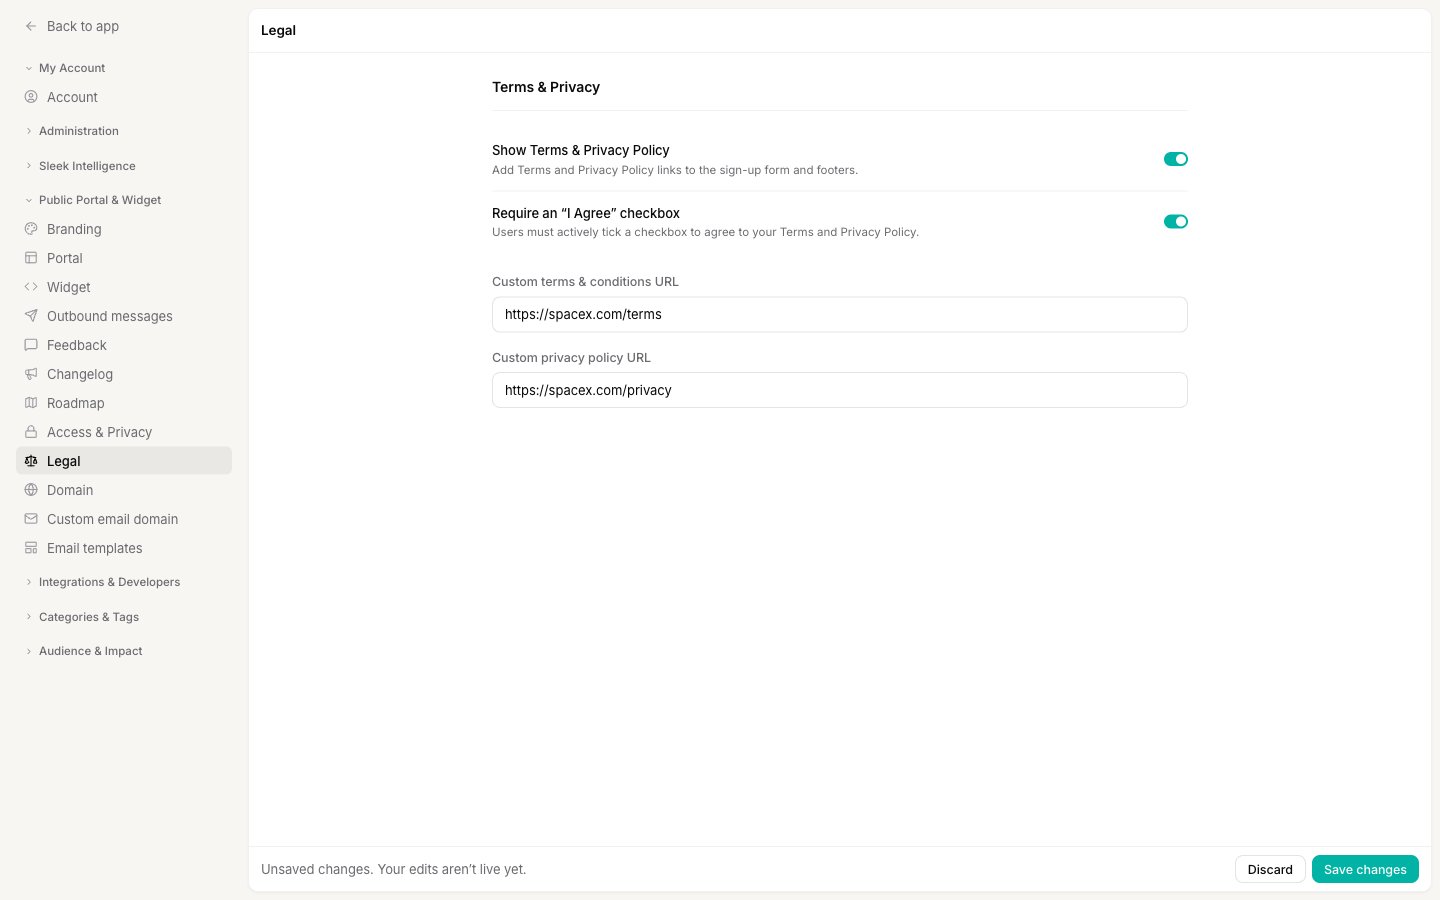 Click **Save changes**. The sign-up form now links to your own pages.
Leave a field blank to keep Sleekplan's default page for that link. You can set one custom URL and leave the other on the default.
## Save your changes
Every change on this page is a draft until you save it. Whenever you have unsaved edits, a bar appears at the bottom reading **"Unsaved changes. Your edits aren't live yet."** with **Discard** and **Save changes** buttons. Your sign-up form keeps its current behavior until you click **Save changes**.
## Next steps
Set who can reach your board and how visitors sign in before they post.
How customer accounts work and why your end users never create a Sleekplan login.
Every message your users receive, including sign-in and verification codes.
Serve your portal from your own domain so legal links stay on-brand.
Click **Save changes**. The sign-up form now links to your own pages.
Leave a field blank to keep Sleekplan's default page for that link. You can set one custom URL and leave the other on the default.
## Save your changes
Every change on this page is a draft until you save it. Whenever you have unsaved edits, a bar appears at the bottom reading **"Unsaved changes. Your edits aren't live yet."** with **Discard** and **Save changes** buttons. Your sign-up form keeps its current behavior until you click **Save changes**.
## Next steps
Set who can reach your board and how visitors sign in before they post.
How customer accounts work and why your end users never create a Sleekplan login.
Every message your users receive, including sign-in and verification codes.
Serve your portal from your own domain so legal links stay on-brand.