> ## Documentation Index
> Fetch the complete documentation index at: https://sleekplan.com/llms.txt
> Use this file to discover all available pages before exploring further.

# Add custom code to your portal

> Inject your own HTML, head markup, CSS, and JavaScript into your standalone feedback portal to match your brand, load fonts, add analytics, or restyle the page.

The **Custom code** settings let you inject your own markup, styling, and scripts into your public feedback portal. Use them to load a web font, add a verification or analytics snippet, restyle the page with CSS, or drop in a chat widget. If the built-in appearance settings do not get you all the way there, custom code fills the gap.

<Info>
  Custom code is available on the **Pro** plan and above. If a field is locked when you try to save, check your [plan and billing](https://app.sleekplan.com/settings/billing) first.
</Info>

<Warning>
  Custom code applies to your **standalone portal** only, the hosted page your visitors see at your Sleekplan address or [custom domain](/help/portal-widget/custom-domain). It does **not** run inside the [embedded widget](/help/getting-started/install-widget) on your own site. The widget renders in an isolated frame and never loads tenant markup, so style and script the widget through its own settings, not here.
</Warning>

## Where to find it

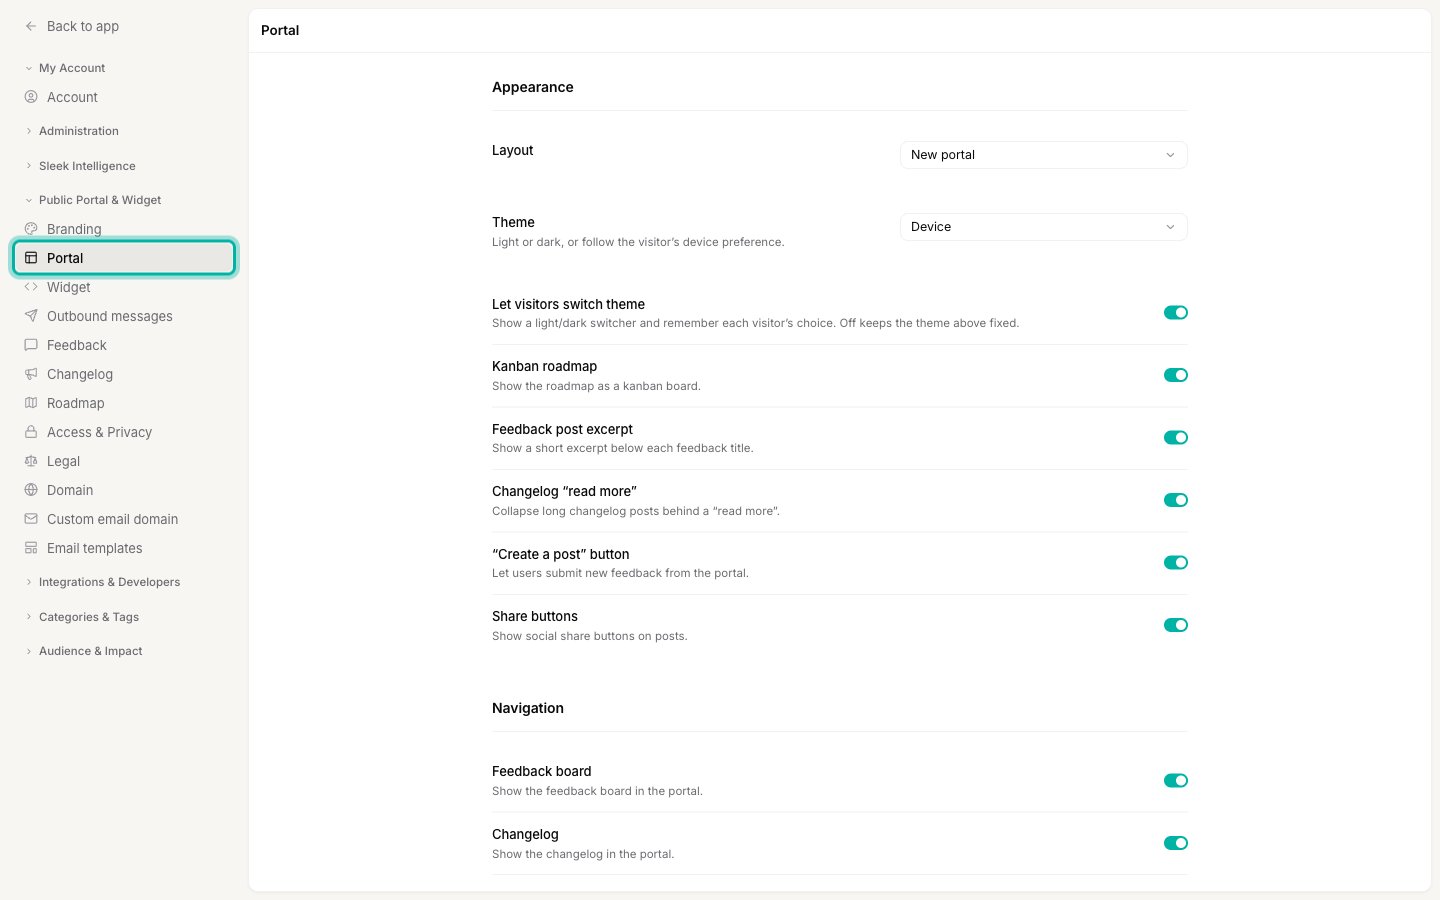
Everything on this page lives in [**Settings → Public Portal & Widget → Portal**](https://app.sleekplan.com/settings/portal), in the **Custom code** section at the bottom of the page.

<Steps>
  <Step title="Open the Portal settings">
    Go to [**Settings → Public Portal & Widget → Portal**](https://app.sleekplan.com/settings/portal).
    <img src="https://mintcdn.com/sleekplangmbh/aTt89CuN0RTRvfJ4/images/portal-custom-code-nav.png?fit=max&auto=format&n=aTt89CuN0RTRvfJ4&q=85&s=81b20a2d81cab1d3b5cd26cabd23beb6" alt="The Portal settings page open in the admin, with the Portal item highlighted in the Public Portal & Widget sidebar section" width="1440" height="900" data-path="images/portal-custom-code-nav.png" />
  </Step>

  <Step title="Open the Custom code section">
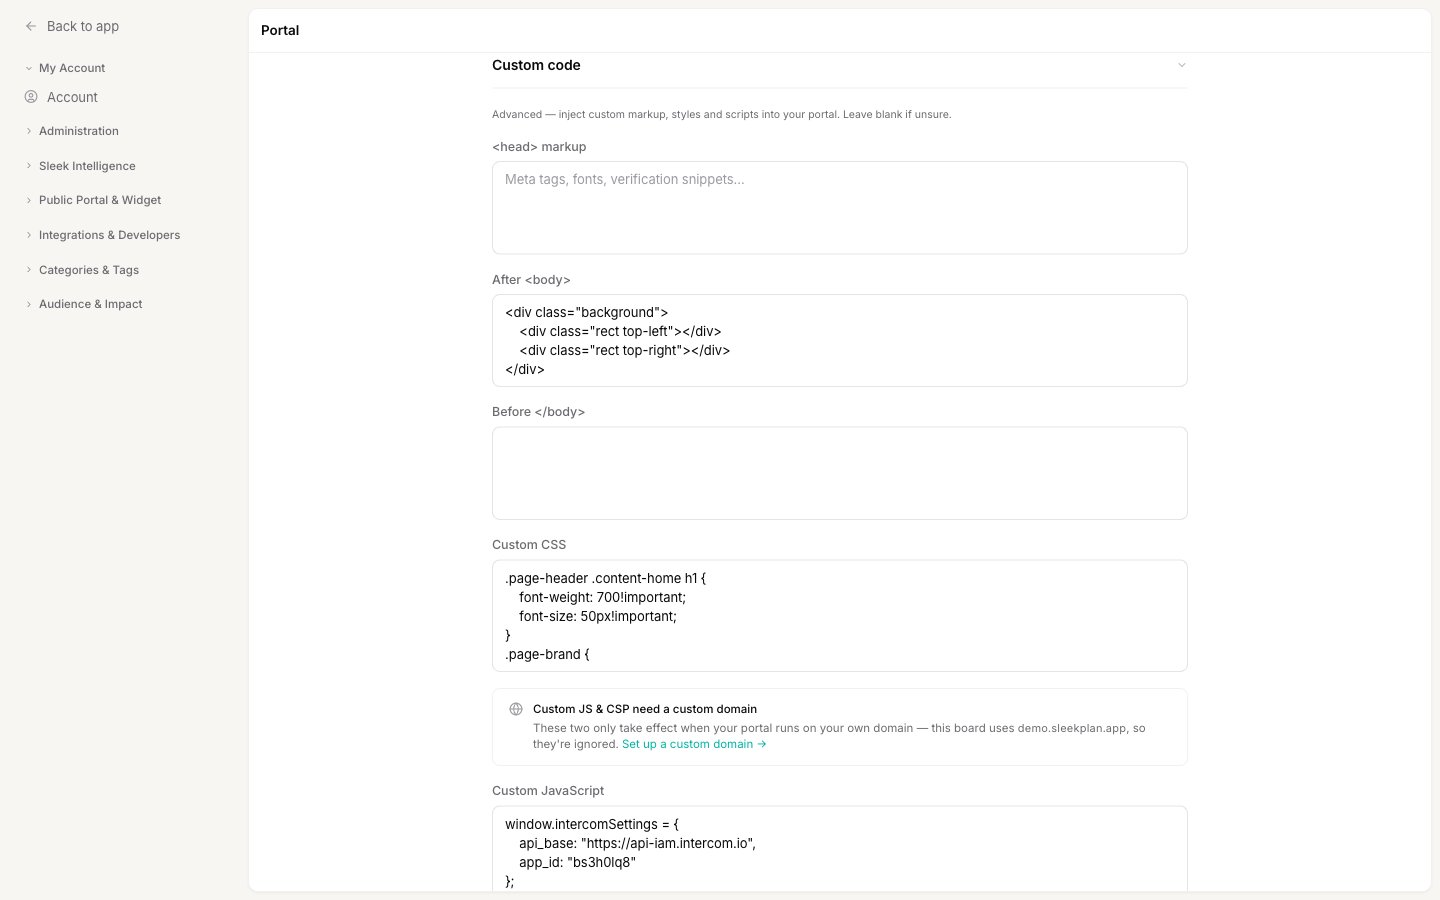
    Scroll to the bottom of the page and click **Custom code** to expand it. The section is collapsed by default because it is advanced, so leave it closed if you do not need it.
    <img src="https://mintcdn.com/sleekplangmbh/aTt89CuN0RTRvfJ4/images/portal-custom-code-fields.png?fit=max&auto=format&n=aTt89CuN0RTRvfJ4&q=85&s=3ef769f40c687ac9595caaedee14f3cb" alt="The expanded Custom code section showing the head markup, After body, Before body, and Custom CSS fields" width="1440" height="900" data-path="images/portal-custom-code-fields.png" />
  </Step>

  <Step title="Paste your code into the right field">
    Add your markup, styles, or script to the matching field (see [The fields](#the-fields) below). Each field targets a specific part of the page.
  </Step>

  <Step title="Save your changes">
    A save bar appears at the bottom of the page once you edit a field. Click **Save** to publish your changes to the portal.
  </Step>
</Steps>

## The fields

There are six fields, each targeting a different part of the portal page. Enter your code directly: do not wrap CSS in a `<style>` tag or JavaScript in a `<script>` tag, because Sleekplan adds those wrappers for you.

| Field                     | What it does                                                                                                                                                            | What is allowed                                                                                      |
| ------------------------- | ----------------------------------------------------------------------------------------------------------------------------------------------------------------------- | ---------------------------------------------------------------------------------------------------- |
| `<head> markup`           | Adds tags inside the page `<head>`: meta tags, web fonts, site verification, or analytics loaders.                                                                      | External `<script src="...">` and `<link>` tags only. Inline scripts are not accepted here.          |
| `After <body>`            | HTML placed right after the opening `<body>` tag, for example a background layer or a top banner.                                                                       | Plain HTML only. No `<script>`, `<style>`, or `<link>` tags.                                         |
| `Before </body>`          | HTML placed right before the closing `</body>` tag, a good spot for late-loading markup.                                                                                | Plain HTML only. No `<script>`, `<style>`, or `<link>` tags.                                         |
| `Custom CSS`              | Restyles the portal with your own CSS rules.                                                                                                                            | Plain CSS. Enter the rules directly, without a `<style>` tag.                                        |
| `Custom JavaScript`       | Runs your own JavaScript on the portal (analytics, a chat widget, and so on). Requires a [custom domain](/help/portal-widget/custom-domain).                            | Plain JavaScript. Enter the code directly, without a `<script>` tag.                                 |
| `Content Security Policy` | Adds allowed sources to the portal's Content Security Policy so your custom scripts and assets can load. Requires a [custom domain](/help/portal-widget/custom-domain). | Valid CSP directives. Your sources are added to Sleekplan's policy, they cannot remove or loosen it. |

<Tip>
  To target the portal with CSS, inspect the page in your browser to find the class you want to restyle. Portal elements use classes like `.page-header`, `.content-home`, and `.page-brand`. Keep your selectors specific so a future portal update does not override them.
</Tip>

## Custom JavaScript and CSP need a custom domain

The **Custom JavaScript** and **Content Security Policy** fields only take effect when your portal runs on your own domain, like `feedback.yourcompany.com`. On a free `.sleekplan.app` address they are saved but ignored, and the section shows a reminder telling you which address the board is using.

<img src="https://mintcdn.com/sleekplangmbh/aTt89CuN0RTRvfJ4/images/portal-custom-code-domain-gate.png?fit=max&auto=format&n=aTt89CuN0RTRvfJ4&q=85&s=c3f00f4d397fb4e0bef0eb75fe5f7082" alt="The Custom code section showing the notice that Custom JS and CSP need a custom domain, above the Custom JavaScript and Content Security Policy fields" width="1440" height="900" data-path="images/portal-custom-code-domain-gate.png" />

This is a safety boundary: scripts run in your visitors' browsers, so Sleekplan only executes them once you have proven you own the domain they run on. To unlock these two fields, [connect a custom domain](/help/portal-widget/custom-domain) first. The other four fields work on any portal, including your free Sleekplan address.

## Good to know

* **Changes are validated when you save.** If a field contains something that is not allowed, for example a `<script>` tag inside **Custom CSS** or an inline script in **head markup**, saving is blocked and you are told which field to fix. This keeps a stray tag from breaking the portal.
* **Your CSP can only add, never remove.** Directives you enter are merged into Sleekplan's built-in Content Security Policy. You can allow extra sources (a font host, an analytics domain), but you cannot strip out the entries Sleekplan needs to render the portal.
* **Test after you save.** Open your portal in a new tab and confirm your changes look right and nothing else broke. Custom code runs on the live portal for every visitor.
* **Leave it blank if you are unsure.** The portal works fully without any custom code. These fields are for advanced customization only.

## Related

<CardGroup cols={2}>
  <Card title="Add analytics tracking" icon="chart-line" href="/help/portal-widget/analytics-tracking">
    A worked example: add Google Analytics or any third-party tracker to your board.
  </Card>

  <Card title="Custom domain" icon="globe" href="/help/portal-widget/custom-domain">
    Host your portal on your own subdomain, and unlock Custom JavaScript and CSP.
  </Card>

  <Card title="Install the widget" icon="code" href="/help/getting-started/install-widget">
    Embed the feedback widget in your own product. Styling the widget is separate from portal custom code.
  </Card>

  <Card title="Widget and a Content Security Policy" icon="shield-check" href="/help/getting-started/install-widget/content-security-policy">
    The CSP directives to allowlist when your own site enforces a policy.
  </Card>

  <Card title="Connect a custom email domain" icon="envelope" href="/help/portal-widget/custom-email-domain">
    Send portal notification emails from your own domain.
  </Card>
</CardGroup>
