> ## Documentation Index
> Fetch the complete documentation index at: https://sleekplan.com/llms.txt
> Use this file to discover all available pages before exploring further.
# Jira Cloud integration
> Connect Sleekplan to Jira Cloud to link feedback posts with Jira issues and keep their statuses in sync both ways.
The Jira Cloud integration connects a Sleekplan workspace to your Jira site. Once connected, you can link any feedback post to a Jira issue (or create a new issue from the post), and keep the post's status and the issue's status in sync in both directions.
The integration is an Atlassian Connect app that you install from the Atlassian Marketplace, so installing it happens partly in Sleekplan and partly in Jira.
You need admin access to your Sleekplan workspace to connect an integration, and permission to install apps in your Jira site (a Jira administrator). This article covers **Jira Cloud**. Jira Data Center is a separate integration.
## Connect Jira to your workspace
Connecting takes three parts: start from Sleekplan, install the app in the Atlassian Marketplace, then finish the connection from Jira's app configuration screen.
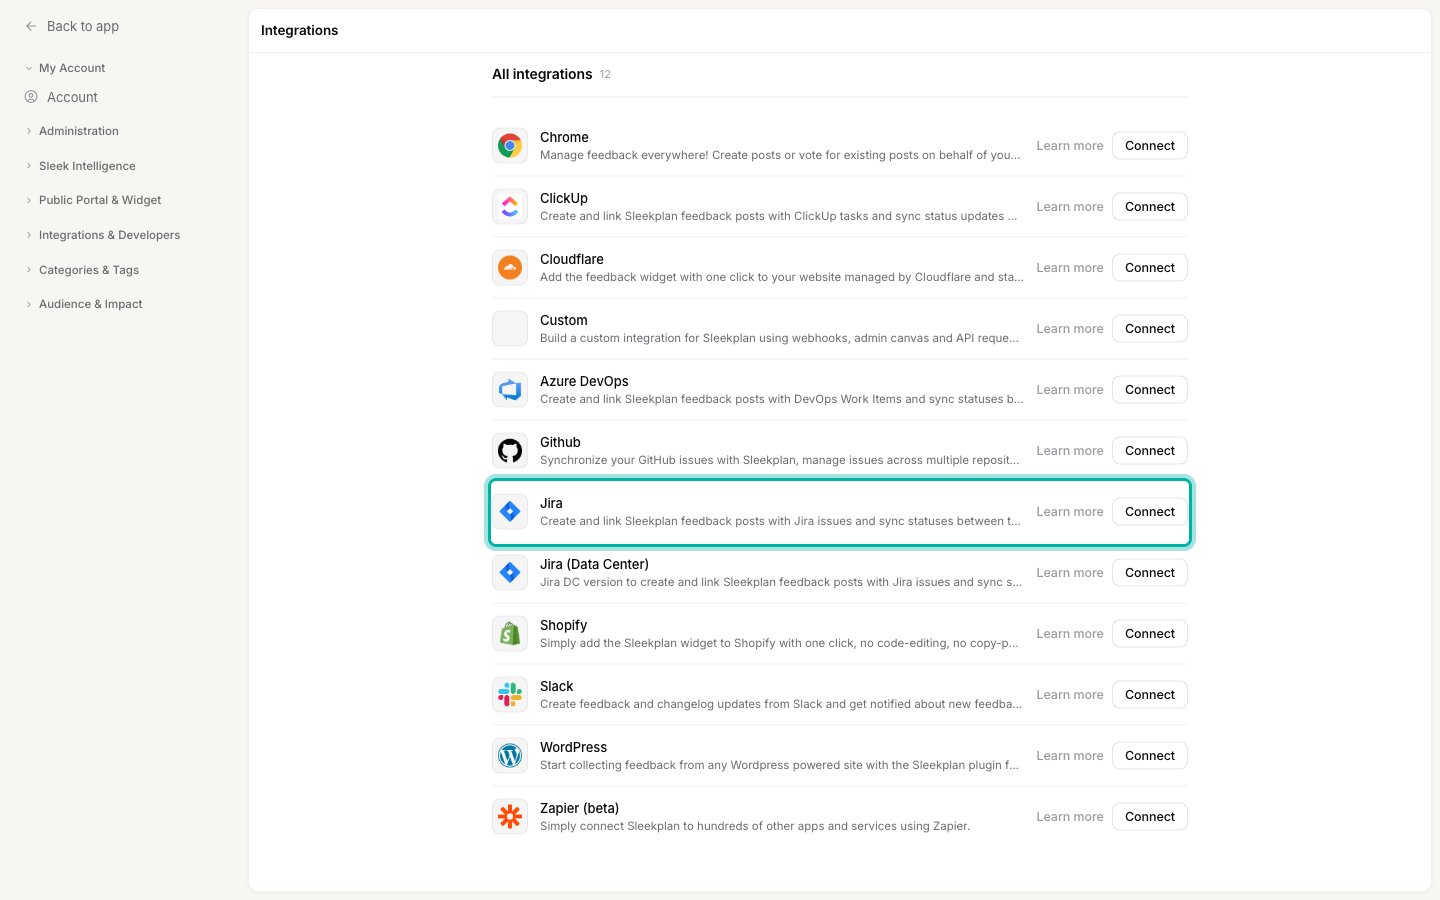
Go to [**Settings → Integrations**](https://app.sleekplan.com/settings/integrations). Find **Jira** in the **All integrations** list and select **Connect**.
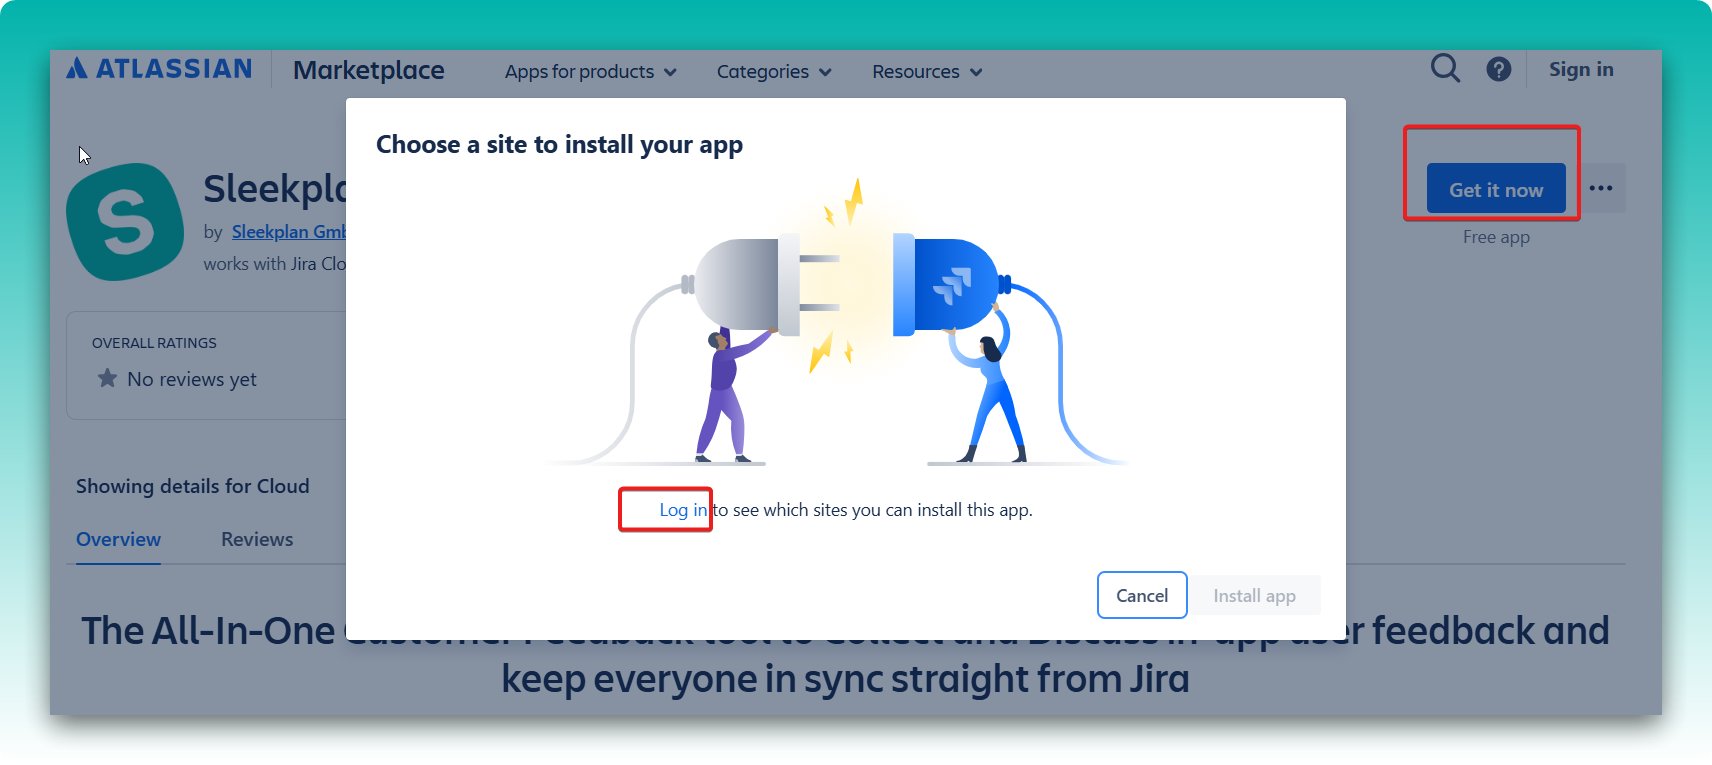
 Sleekplan opens the Sleekplan app listing on the Atlassian Marketplace in a new tab. Select **Get it now**, and sign in to Jira if prompted.
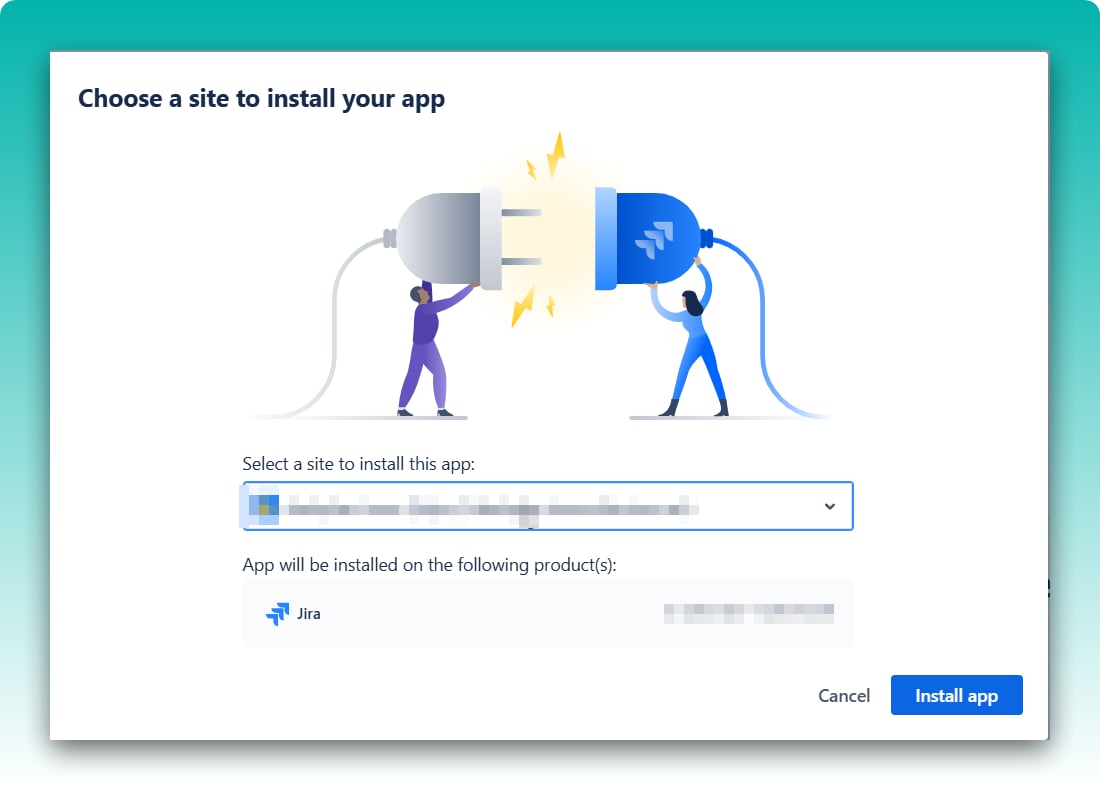
 Choose the Jira site you want to connect, then select **Install app**.
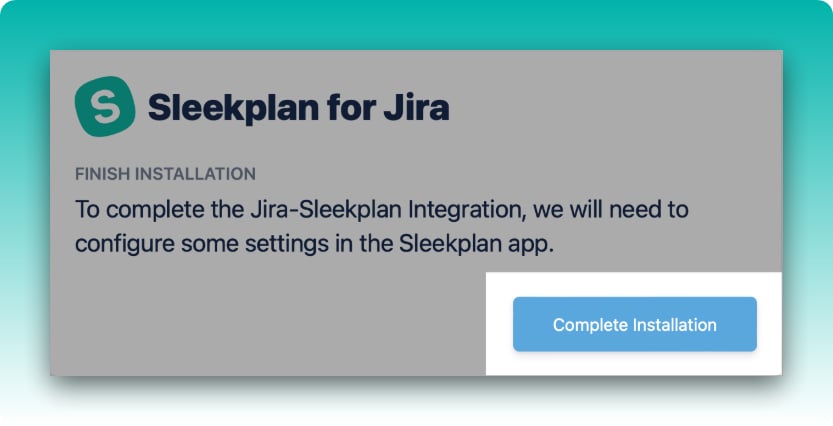
 After the app installs, open its configuration screen in Jira and select **Complete Installation**.
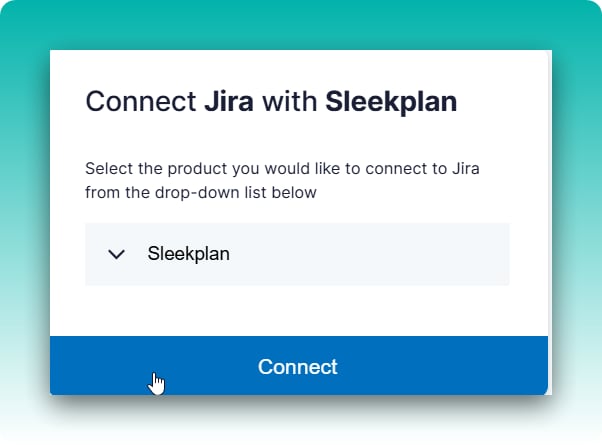
 You are sent back to Sleekplan to choose which workspace to connect, then confirm with **Connect**.
 Jira returns to Sleekplan and your Integrations page reloads. Jira now appears under **Connected**.
You can connect more than one Sleekplan workspace to the same Jira installation. Reopen the app's configuration screen in Jira and select **Connect another product** to link an additional workspace.
## Map Jira statuses to Sleekplan statuses
Status sync is driven by a mapping you control: each Jira status points to one Sleekplan [status](/help/feedback/statuses). When a linked issue or post changes status, the matching side is moved to the mapped status.
On [**Settings → Integrations**](https://app.sleekplan.com/settings/integrations), find Jira under **Connected** and select **Manage**.
The dialog lists every status from your Jira site. For each one, choose the Sleekplan status you want to keep it in sync with. To leave a Jira status out of the sync, choose **None**.
Select **Save**. Sync starts right away and listens for status changes on both sides.
Status sync only applies to posts that are linked to a Jira issue. Linking a post is described below.
## Link a feedback post to a Jira issue
Once Jira is connected, a **Jira** panel appears on each feedback post in the admin. Use it to link the post to an existing issue or to create a new one. Open a post from the [**Feedback**](https://app.sleekplan.com/feedback) list to see the panel.
### Link an existing issue
In the Jira panel, type a search term into **Search for an issue** and submit. You can search by words in the issue summary, or paste a full issue key such as `PROJECT-123`. Pick the issue you want from the results to link it.
When you link an issue, Sleekplan adds a comment on the Jira issue with a link back to the Sleekplan post, so the connection is visible from both tools.
### Create a new issue
If no issue exists yet, select **Create new issue**. Fill in a **Title** and **Description**, choose the **Project** the issue should live in, and pick its **Issue type**. Select **Create**. Sleekplan creates the issue in Jira, links it to the post, and adds a comment on the new issue pointing back to the post.
### Unlink an issue
To break the link, open the Jira panel on the post and select **Unlink issue**. The post and issue stop syncing, and Sleekplan leaves a comment on the Jira issue noting that it was unlinked.
## How the two-way sync works
After a post is linked and your status mapping is saved:
* **Sleekplan to Jira:** when you change a linked post's status, Sleekplan moves the Jira issue to the status you mapped it to (if a matching transition is available on that issue).
* **Jira to Sleekplan:** when the linked Jira issue changes status, Sleekplan updates the post to the mapped status.
Statuses you set to **None** in the mapping are ignored, so you can keep internal Jira states out of your public roadmap.
## Disconnect Jira
To stop syncing, go to [**Settings → Integrations**](https://app.sleekplan.com/settings/integrations), select **Manage** on the Jira row, then **Disconnect**. This removes the connection and stops all syncing for that workspace. Uninstalling the Sleekplan app from your Jira site disconnects every workspace linked to that installation.
## Related
Set up the workspace statuses you map Jira issues to.
Create the posts you link to Jira issues.
Browse the other tools you can connect to Sleekplan.
Jira returns to Sleekplan and your Integrations page reloads. Jira now appears under **Connected**.
You can connect more than one Sleekplan workspace to the same Jira installation. Reopen the app's configuration screen in Jira and select **Connect another product** to link an additional workspace.
## Map Jira statuses to Sleekplan statuses
Status sync is driven by a mapping you control: each Jira status points to one Sleekplan [status](/help/feedback/statuses). When a linked issue or post changes status, the matching side is moved to the mapped status.
On [**Settings → Integrations**](https://app.sleekplan.com/settings/integrations), find Jira under **Connected** and select **Manage**.
The dialog lists every status from your Jira site. For each one, choose the Sleekplan status you want to keep it in sync with. To leave a Jira status out of the sync, choose **None**.
Select **Save**. Sync starts right away and listens for status changes on both sides.
Status sync only applies to posts that are linked to a Jira issue. Linking a post is described below.
## Link a feedback post to a Jira issue
Once Jira is connected, a **Jira** panel appears on each feedback post in the admin. Use it to link the post to an existing issue or to create a new one. Open a post from the [**Feedback**](https://app.sleekplan.com/feedback) list to see the panel.
### Link an existing issue
In the Jira panel, type a search term into **Search for an issue** and submit. You can search by words in the issue summary, or paste a full issue key such as `PROJECT-123`. Pick the issue you want from the results to link it.
When you link an issue, Sleekplan adds a comment on the Jira issue with a link back to the Sleekplan post, so the connection is visible from both tools.
### Create a new issue
If no issue exists yet, select **Create new issue**. Fill in a **Title** and **Description**, choose the **Project** the issue should live in, and pick its **Issue type**. Select **Create**. Sleekplan creates the issue in Jira, links it to the post, and adds a comment on the new issue pointing back to the post.
### Unlink an issue
To break the link, open the Jira panel on the post and select **Unlink issue**. The post and issue stop syncing, and Sleekplan leaves a comment on the Jira issue noting that it was unlinked.
## How the two-way sync works
After a post is linked and your status mapping is saved:
* **Sleekplan to Jira:** when you change a linked post's status, Sleekplan moves the Jira issue to the status you mapped it to (if a matching transition is available on that issue).
* **Jira to Sleekplan:** when the linked Jira issue changes status, Sleekplan updates the post to the mapped status.
Statuses you set to **None** in the mapping are ignored, so you can keep internal Jira states out of your public roadmap.
## Disconnect Jira
To stop syncing, go to [**Settings → Integrations**](https://app.sleekplan.com/settings/integrations), select **Manage** on the Jira row, then **Disconnect**. This removes the connection and stops all syncing for that workspace. Uninstalling the Sleekplan app from your Jira site disconnects every workspace linked to that installation.
## Related
Set up the workspace statuses you map Jira issues to.
Create the posts you link to Jira issues.
Browse the other tools you can connect to Sleekplan.