> ## Documentation Index
> Fetch the complete documentation index at: https://sleekplan.com/llms.txt
> Use this file to discover all available pages before exploring further.

# Install the Sleekplan widget

> Add the Sleekplan feedback widget to your website by pasting one script snippet, then identify your logged-in users so their feedback, votes, and comments are attributed correctly.

The widget adds a feedback button to your website or app so your users can post ideas, vote, comment, and see your roadmap and changelog without leaving your product. Installing it takes only a few minutes: you copy one script snippet from your dashboard and paste it into your site.

<Info>
  You need access to edit your website's HTML, or to your CMS or theme header (for example the header settings in WordPress, Shopify, or Webflow). No coding beyond pasting a snippet is required.
</Info>

## Install the widget

<Steps>
  <Step title="Copy your widget snippet">
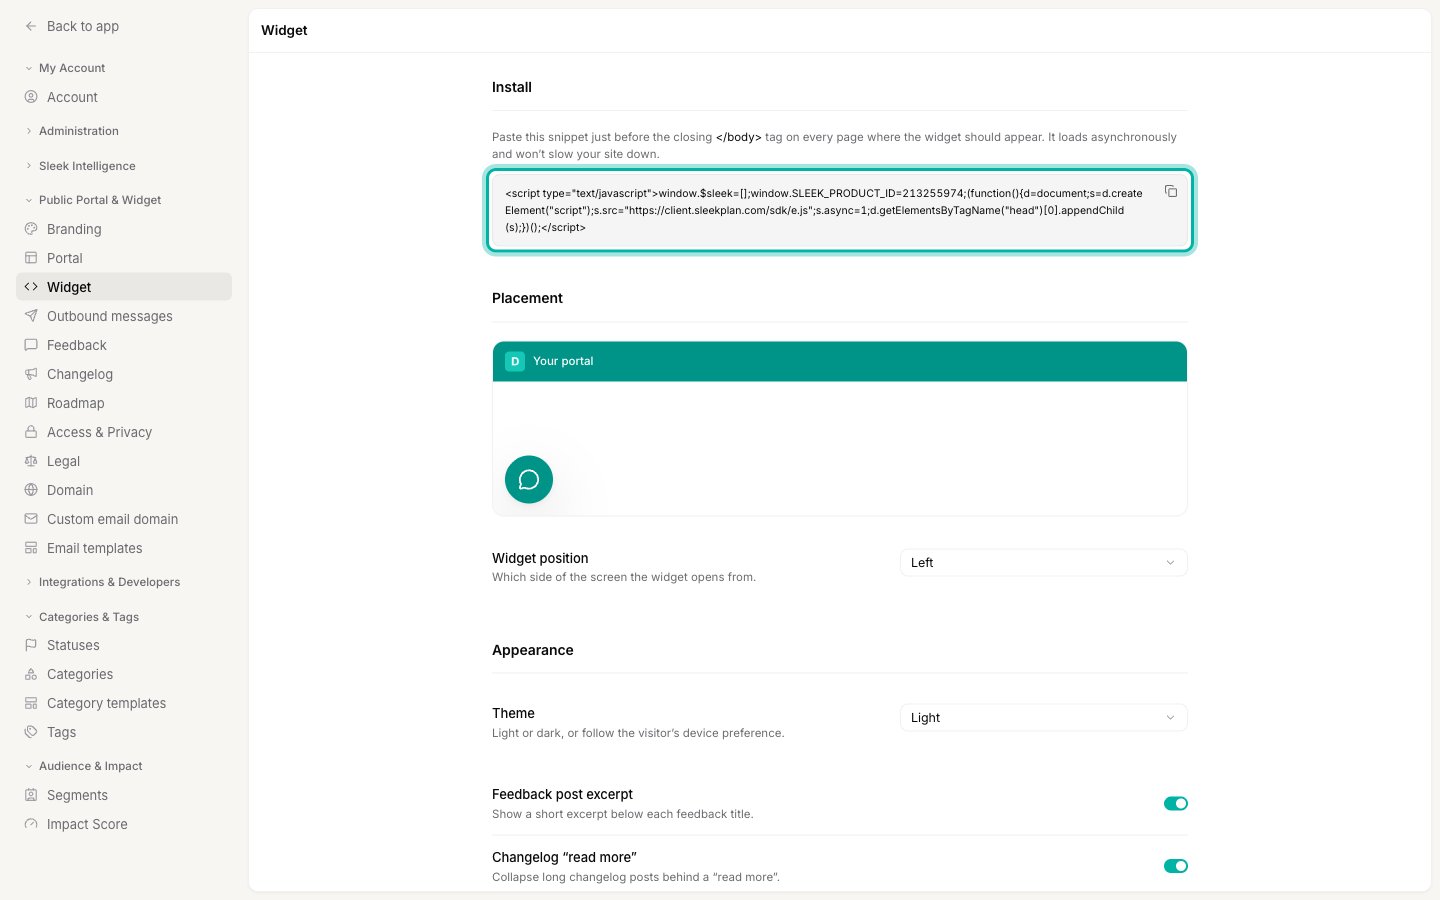
    Go to [**Settings → Widget**](https://app.sleekplan.com/settings/widget). Your personal install snippet is shown there under **Install**, already filled in with your workspace's unique product ID. Click **Copy snippet**.
    <img src="https://mintcdn.com/sleekplangmbh/REXm8T6ZU0wKAwW4/images/getting-started-install-widget-snippet.png?fit=max&auto=format&n=REXm8T6ZU0wKAwW4&q=85&s=1c6771f481019240e8dbd34e788c4e18" alt="The Widget settings screen with the install snippet highlighted" width="1440" height="900" data-path="images/getting-started-install-widget-snippet.png" />

    Leave the `SLEEK_PRODUCT_ID` value as-is: it is what links the widget to your workspace. The snippet looks like this:

    ```html theme={"system"}
    <script type="text/javascript">window.$sleek=[];window.SLEEK_PRODUCT_ID=XY;(function(){d=document;s=d.createElement("script");s.src="https://client.sleekplan.com/sdk/e.js";s.async=1;d.getElementsByTagName("head")[0].appendChild(s);})();</script>
    ```
  </Step>

  <Step title="Paste it into your website">
    Add the snippet just before the closing `</body>` tag on every page where you want the widget to appear. It loads asynchronously, so it will not slow your site down.

    ```html theme={"system"}
    <html>
      <head>
        <!-- your existing head content -->
      </head>
      <body>
        <!-- your page content -->

        <!-- Sleekplan widget -->
        <script type="text/javascript">window.$sleek=[];window.SLEEK_PRODUCT_ID=XY;(function(){d=document;s=d.createElement("script");s.src="https://client.sleekplan.com/sdk/e.js";s.async=1;d.getElementsByTagName("head")[0].appendChild(s);})();</script>
      </body>
    </html>
    ```

    <Tip>
      Placing it in your site's `<head>` works too. Either way, add it to every page where the widget should appear (or to a shared layout or template so it loads everywhere at once).
    </Tip>
  </Step>

  <Step title="Reload and check the widget">
    Publish the change and reload your site. The Sleekplan launcher button appears (bottom-right by default). Click it to open the feedback board, roadmap, and changelog.

    If the button does not show up on the first load, clear your browser cache and reload the page.
  </Step>
</Steps>

## Identify your logged-in users

By default anyone can post feedback as a guest. If your website already has signed-in users, pass their identity to Sleekplan so every vote, comment, and post is tied to the right person, and your users never have to create a separate Sleekplan account.

There are two ways to do this:

* **Pass user details directly.** Your developer adds a small amount of code that sends each user's email, ID, and name to the widget. See [Identify your users](https://sleekplan.com/docs/sdk/user-setup) in the Developer Docs.
* **Single Sign-On (SSO).** For private boards or when you require confirmed accounts, authenticate users silently with a signed token. See [Single Sign-On](https://sleekplan.com/docs/authentication/single-sign-on) in the Developer Docs.

<Info>
  Identifying users involves a short code change and is usually done by a developer. The full walkthrough lives in the [Developer Docs](https://sleekplan.com/docs/quickstart).
</Info>

## Install on a specific platform

The same snippet works anywhere you can add a script tag. If you build your site with a JavaScript framework or a visual site builder, follow the guide for your stack so the snippet loads at the right moment:

<CardGroup cols={2}>
  <Card title="React" icon="react" href="/help/getting-started/install-widget/react">
    Load the widget from a `useEffect` hook, plus notes for Next.js.
  </Card>

  <Card title="Vue" icon="vuejs" href="/help/getting-started/install-widget/vue">
    Add the snippet to `index.html` or mount it from your root component.
  </Card>

  <Card title="Webflow" icon="webflow" href="/help/getting-started/install-widget/webflow">
    Paste the snippet into your project's custom code and publish.
  </Card>

  <Card title="Content Security Policy" icon="shield-halved" href="/help/getting-started/install-widget/content-security-policy">
    Allowlist the Sleekplan domains if your site enforces a CSP.
  </Card>
</CardGroup>

For WordPress, Shopify, or any site behind Cloudflare, add the snippet to your theme's header or a "custom code" / "header scripts" area, then reload as described above.

If you cannot embed a script at all, or you want feedback to live on its own page, you have two alternatives:

* **Host on your own domain.** Point a subdomain like `feedback.yourcompany.com` at Sleekplan instead of embedding a widget. See [Host on a custom domain](https://sleekplan.com/docs/install/standalone).
* **Embed in an iframe or mobile webview.** Load Sleekplan inside an `<iframe>` for native apps or platforms that block third-party scripts. See [Embed in an iframe](https://sleekplan.com/docs/install/iframe).

## Next steps

<CardGroup cols={2}>
  <Card title="Customize the widget" icon="paintbrush" href="/help/portal-widget/index">
    Change the launcher button, colors, and which tabs appear to match your brand.
  </Card>

  <Card title="Create your first post" icon="pen" href="/help/feedback/create-post">
    Add feedback on behalf of a user and start organizing suggestions.
  </Card>

  <Card title="Developer install guide" icon="code" href="https://sleekplan.com/docs/install/widget">
    The full technical reference for the widget snippet, trigger buttons, and notification badges.
  </Card>

  <Card title="Set up your roadmap" icon="map" href="/help/roadmap/index">
    Show users what you are planning and building next.
  </Card>
</CardGroup>
