> ## Documentation Index
> Fetch the complete documentation index at: https://sleekplan.com/llms.txt
> Use this file to discover all available pages before exploring further.
# Create a post
> Add a feedback post from the admin dashboard: write with Markdown, post on behalf of a user, attach files, and set status, category, precedence, owner, and estimate.
A post is a single piece of feedback — a feature request, bug, or idea — that lives on your feedback board and can collect votes and comments. You'll usually let your users create posts themselves, but you can add one at any time, for example to log feedback that came in over email, a call, or a support chat.
Creating posts is available to team members with access to the workspace.
## Create a post
Click [**New post**](https://app.sleekplan.com/feedback/new) in the left sidebar — it's available from anywhere in the dashboard. You can also open it from the [**Feedback**](https://app.sleekplan.com/feedback) list by clicking **New post** in the list header.
The composer opens with an empty draft: a title, a description, and a properties panel on the right.
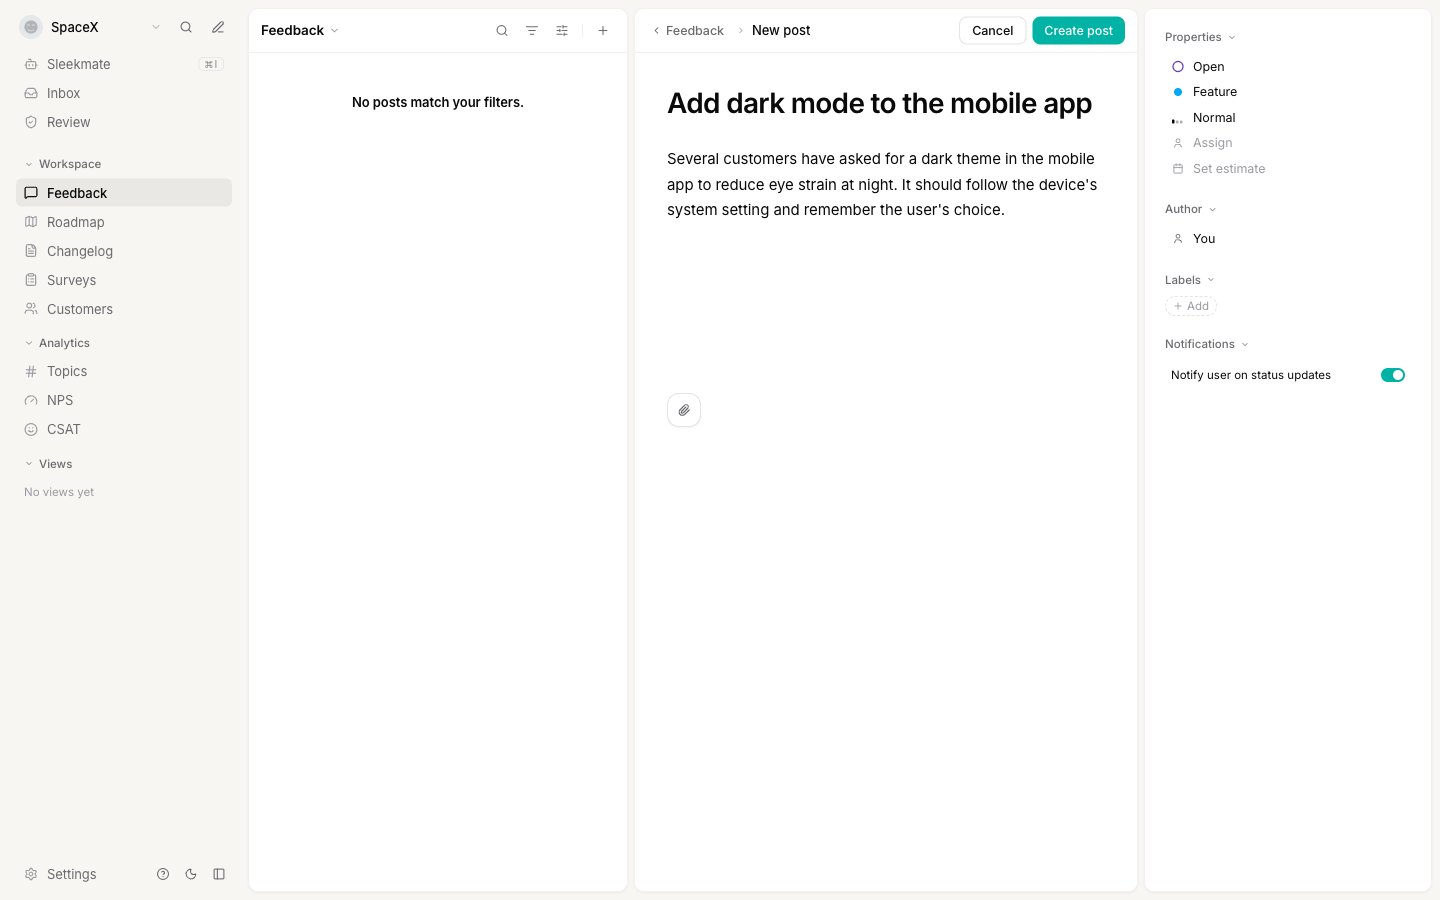 Give the post a short, specific **title**, then describe the request in the body — what's needed and why. The description supports rich formatting; see [Write and format the description](#write-and-format-the-description) below.
In the panel on the right, set the [status, category, precedence, owner, and estimate](#set-the-post-properties) for the post. You can change any of these later.
Select **Create post** in the top right. The post is published to your board and opens so you can add comments or keep editing.
## Write and format the description
The description is a rich-text editor, so you have three ways to style your text.
### Type in Markdown
Use Markdown shortcuts as you type and they convert instantly:
| Type | Result |
| ------------ | ------------- |
| `# ` | Heading |
| `- ` or `* ` | Bulleted list |
| `1. ` | Numbered list |
| `> ` | Quote |
| ` ``` ` | Code block |
| `**bold**` | **Bold** |
| `*italic*` | *Italic* |
You can also paste Markdown from another document and it keeps its formatting.
### Use the "/" menu
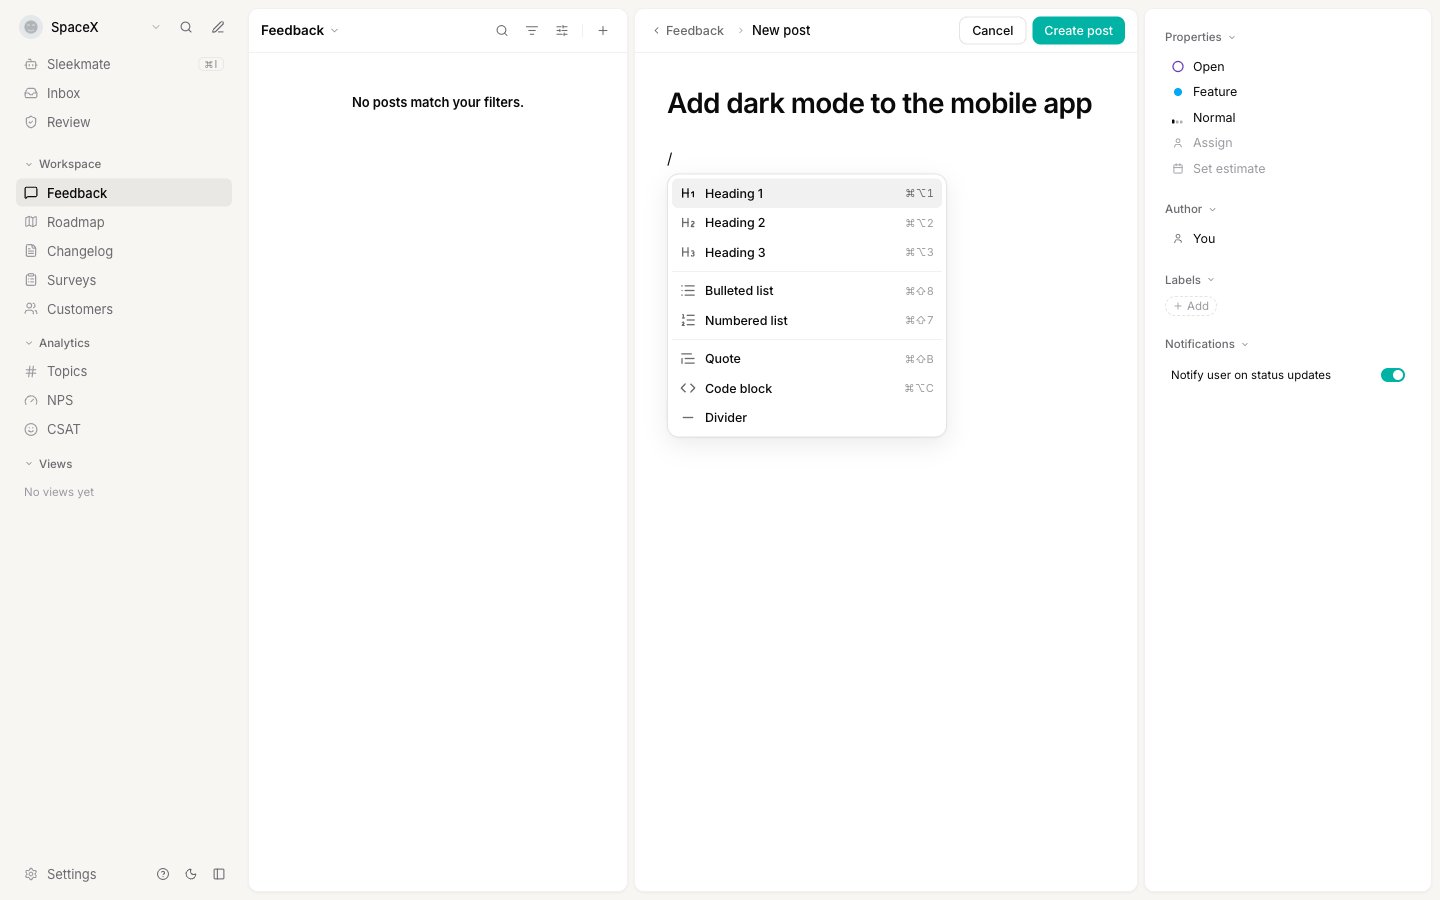
Type `/` on a new line to open the formatting menu, then pick a block — **Heading 1–3**, **Bulleted list**, **Numbered list**, **Quote**, **Code block**, or **Divider**.
Give the post a short, specific **title**, then describe the request in the body — what's needed and why. The description supports rich formatting; see [Write and format the description](#write-and-format-the-description) below.
In the panel on the right, set the [status, category, precedence, owner, and estimate](#set-the-post-properties) for the post. You can change any of these later.
Select **Create post** in the top right. The post is published to your board and opens so you can add comments or keep editing.
## Write and format the description
The description is a rich-text editor, so you have three ways to style your text.
### Type in Markdown
Use Markdown shortcuts as you type and they convert instantly:
| Type | Result |
| ------------ | ------------- |
| `# ` | Heading |
| `- ` or `* ` | Bulleted list |
| `1. ` | Numbered list |
| `> ` | Quote |
| ` ``` ` | Code block |
| `**bold**` | **Bold** |
| `*italic*` | *Italic* |
You can also paste Markdown from another document and it keeps its formatting.
### Use the "/" menu
Type `/` on a new line to open the formatting menu, then pick a block — **Heading 1–3**, **Bulleted list**, **Numbered list**, **Quote**, **Code block**, or **Divider**.
 ### Select text for inline styling
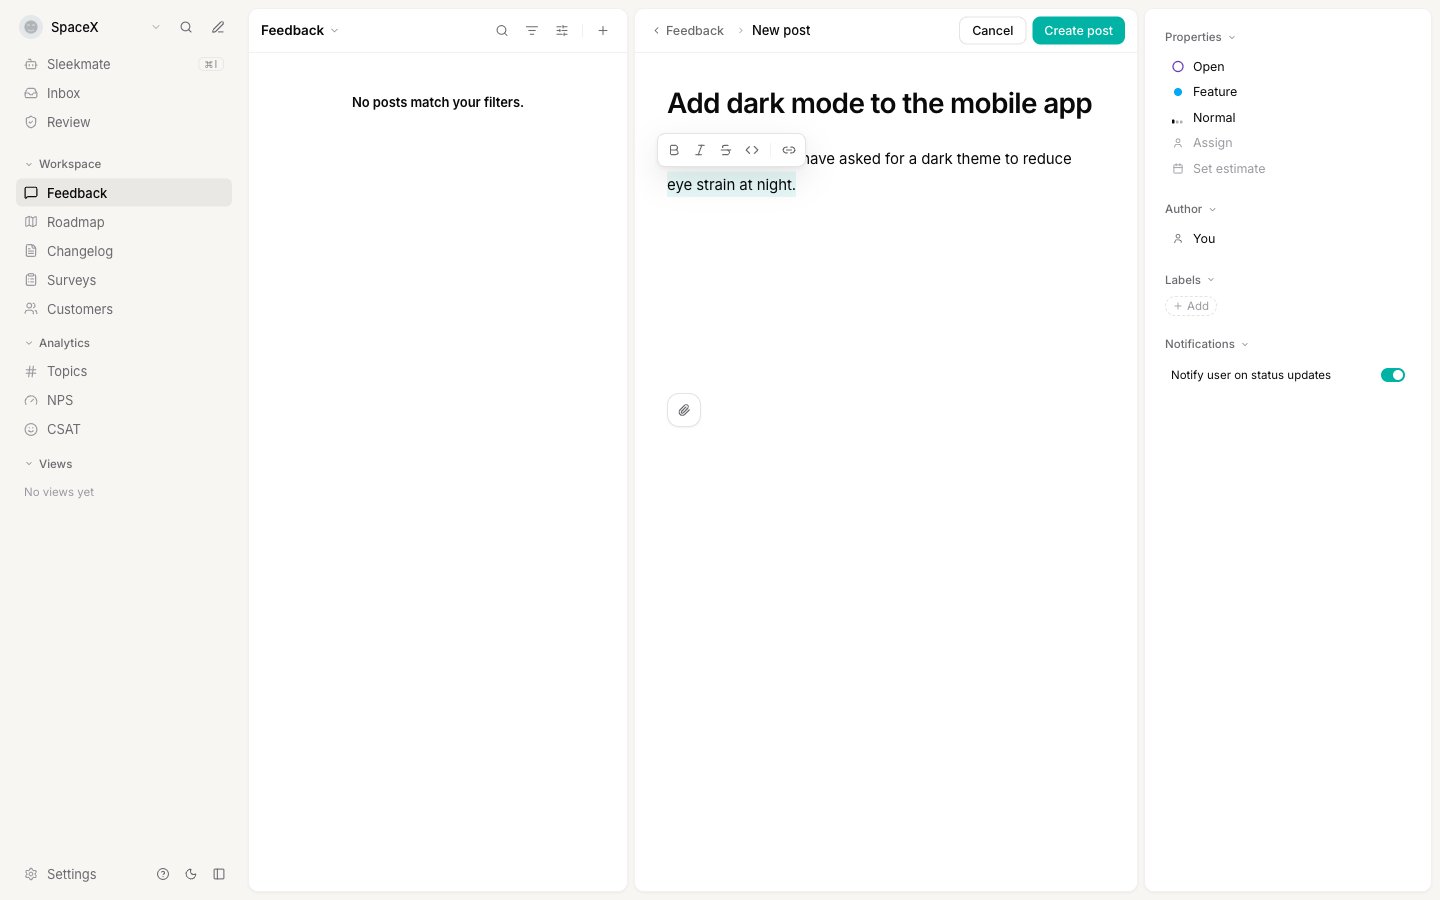
Select any text to bring up the styling toolbar, then apply **Bold**, **Italic**, **Strikethrough**, **Inline code**, or a **Link**.
### Select text for inline styling
Select any text to bring up the styling toolbar, then apply **Bold**, **Italic**, **Strikethrough**, **Inline code**, or a **Link**.
 ## Post on behalf of someone else
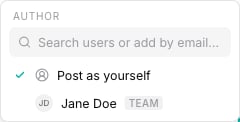
When you're logging feedback a customer gave you, you can credit the post to them instead of yourself. The post then shows on your board under their name and counts toward their activity, and they get notified about replies and status changes just as if they'd posted it themselves. In the **Author** section of the properties panel, click the author and choose who the post is from:
* **Post as yourself** is the default: the post is credited to you.
* **An existing user or team member**: search by name and select them.
* **A new user**: type their email address and select **Add**. Sleekplan creates an [end-user account](/help/account-security/end-user-accounts) for that email and assigns the post to it, so you don't need to invite or import them first.
## Post on behalf of someone else
When you're logging feedback a customer gave you, you can credit the post to them instead of yourself. The post then shows on your board under their name and counts toward their activity, and they get notified about replies and status changes just as if they'd posted it themselves. In the **Author** section of the properties panel, click the author and choose who the post is from:
* **Post as yourself** is the default: the post is credited to you.
* **An existing user or team member**: search by name and select them.
* **A new user**: type their email address and select **Add**. Sleekplan creates an [end-user account](/help/account-security/end-user-accounts) for that email and assigns the post to it, so you don't need to invite or import them first.
 Posting on behalf of someone else is a paid feature, available on the **Starter** plan and above. Posting as yourself is always free.
The author can only be set while you're creating the post. Once it's published, the author is fixed.
Already have a post and just want to add a customer's vote to it? See [Vote on behalf of a user](/help/feedback/vote-on-behalf).
## Attach images and files
Use the paperclip **Attach files** button below the description to add screenshots, mockups, or documents to a new post. The size limits and [allowed file types](/help/feedback/attachment-file-types) come from your workspace settings. By default only images are accepted.
Posting on behalf of someone else is a paid feature, available on the **Starter** plan and above. Posting as yourself is always free.
The author can only be set while you're creating the post. Once it's published, the author is fixed.
Already have a post and just want to add a customer's vote to it? See [Vote on behalf of a user](/help/feedback/vote-on-behalf).
## Attach images and files
Use the paperclip **Attach files** button below the description to add screenshots, mockups, or documents to a new post. The size limits and [allowed file types](/help/feedback/attachment-file-types) come from your workspace settings. By default only images are accepted.
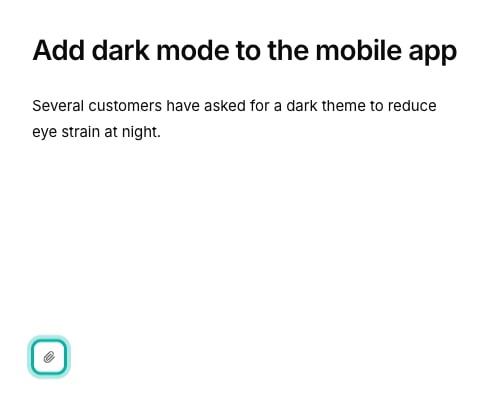 Attachments are added as the post's **first comment**, not embedded in the description itself. This keeps the original request text clean while still linking the files to the post. Attachments can only be added while creating the post.
## Set the post properties
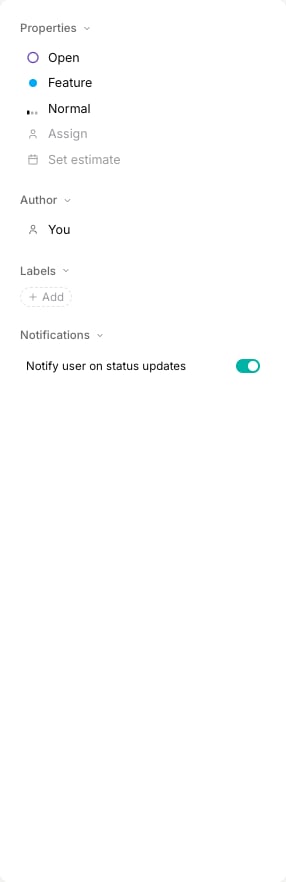
The properties panel on the right controls how the post is categorized and prioritized. You can set these while creating the post or change them any time afterward.
Attachments are added as the post's **first comment**, not embedded in the description itself. This keeps the original request text clean while still linking the files to the post. Attachments can only be added while creating the post.
## Set the post properties
The properties panel on the right controls how the post is categorized and prioritized. You can set these while creating the post or change them any time afterward.
 | Property | What it does | Values |
| -------------- | --------------------------------------------------------------------------------------------------------------------------------------------------- | ------------------------------------------------------------------------------------------ |
| **Status** | The stage of the post in your workflow. New posts start as **Open**. | Any status configured in your workspace (Open, Planned, In progress, Complete, and so on). |
| **Category** | The type of feedback, used to group and filter posts. Manage the options in [Categories](/help/feedback/categories). | Any category configured in your workspace (for example Feature or Bug). |
| **Precedence** | Your internal priority for the post, separate from user votes. Use it to sort what your team looks at first. | **High**, **Medium**, **Normal** (default), or **Later**. |
| **Owner** | The team member responsible for the post. | Any admin or team member in your workspace. |
| **Estimate** | The expected delivery timeframe, shown to users on the post. It also places the post on the [Month and Quarter roadmap](/help/roadmap/eta-roadmap). | A month and year, for example March 2026. |
You can also add **Labels** in the same panel to tag the post for your own organization. Labels are internal [tags](/help/feedback/tags) and don't change where the post appears.
## Next steps
Add a customer's upvote to a post that already exists on your board.
Group posts by status or timeline and move them across columns as they progress.
Approve, merge, and triage posts your users submit.
| Property | What it does | Values |
| -------------- | --------------------------------------------------------------------------------------------------------------------------------------------------- | ------------------------------------------------------------------------------------------ |
| **Status** | The stage of the post in your workflow. New posts start as **Open**. | Any status configured in your workspace (Open, Planned, In progress, Complete, and so on). |
| **Category** | The type of feedback, used to group and filter posts. Manage the options in [Categories](/help/feedback/categories). | Any category configured in your workspace (for example Feature or Bug). |
| **Precedence** | Your internal priority for the post, separate from user votes. Use it to sort what your team looks at first. | **High**, **Medium**, **Normal** (default), or **Later**. |
| **Owner** | The team member responsible for the post. | Any admin or team member in your workspace. |
| **Estimate** | The expected delivery timeframe, shown to users on the post. It also places the post on the [Month and Quarter roadmap](/help/roadmap/eta-roadmap). | A month and year, for example March 2026. |
You can also add **Labels** in the same panel to tag the post for your own organization. Labels are internal [tags](/help/feedback/tags) and don't change where the post appears.
## Next steps
Add a customer's upvote to a post that already exists on your board.
Group posts by status or timeline and move them across columns as they progress.
Approve, merge, and triage posts your users submit.