> ## Documentation Index
> Fetch the complete documentation index at: https://sleekplan.com/llms.txt
> Use this file to discover all available pages before exploring further.
# Write a document
> Create a document in Sleekplan, format it with Markdown and the slash menu, set its type and status, and save it.
A document is a title and a body, plus two properties that say what kind of thinking it holds and how finished it is. This page covers writing one. To connect it to the requests it informs, see [Link documents to feedback](/help/documents/link-feedback).
Creating and editing documents requires the **Starter** plan or above, and an **Owner** or **Admin** role. **Members** can read documents but not change them. See [Team roles and permissions](/help/account-security/roles-permissions).
## Create a document
Go to [**Documents**](https://app.sleekplan.com/documents) and click **New document** in the top right.
The document does not exist yet, so version history and linked posts stay empty until you save.
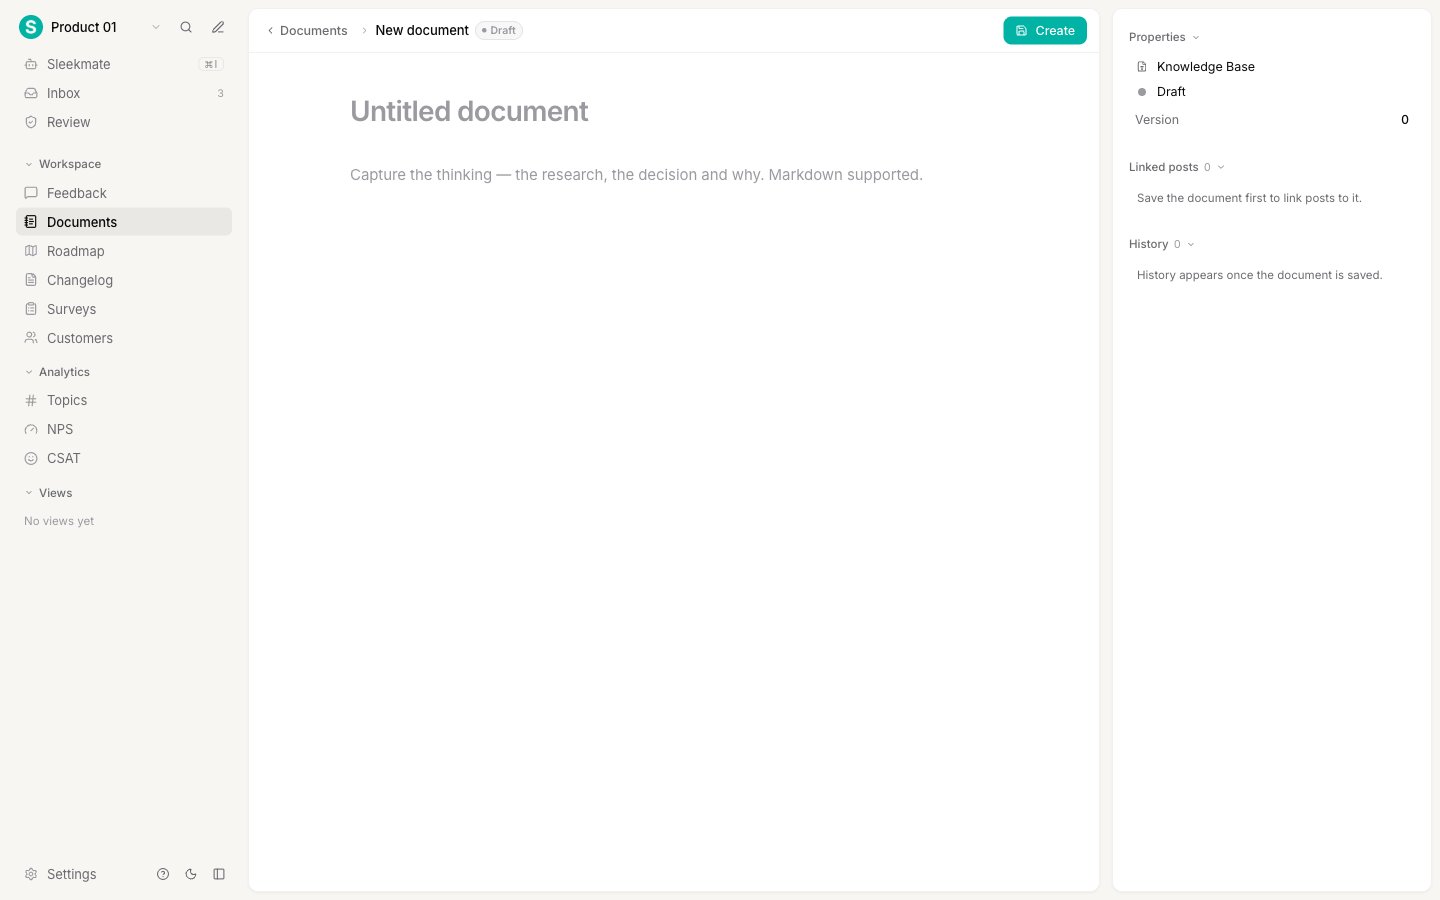 Type the title at the top. Write it as the conclusion, not the topic: "Why we keep one feedback queue" tells a reader what they will learn, while "Feedback queues" does not.
A title needs at least three characters. Press Enter to jump from the title into the body.
Write in the main area. Formatting works the way it does elsewhere in Sleekplan: type Markdown directly, or press / for the slash menu.
The slash menu covers **Heading 1**, **Heading 2**, **Heading 3**, **Bulleted list**, **Numbered list**, **Quote**, **Code block**, and **Divider**. Select any text to get a small toolbar for **bold**, *italic*, strikethrough, inline code, and links.
Open the right panel and pick a **type** for the document, then a **status**. Type says what kind of thinking this is, and comes from your [document types](/help/documents/document-types). Status says how finished it is: draft, published, or archived.
Type the title at the top. Write it as the conclusion, not the topic: "Why we keep one feedback queue" tells a reader what they will learn, while "Feedback queues" does not.
A title needs at least three characters. Press Enter to jump from the title into the body.
Write in the main area. Formatting works the way it does elsewhere in Sleekplan: type Markdown directly, or press / for the slash menu.
The slash menu covers **Heading 1**, **Heading 2**, **Heading 3**, **Bulleted list**, **Numbered list**, **Quote**, **Code block**, and **Divider**. Select any text to get a small toolbar for **bold**, *italic*, strikethrough, inline code, and links.
Open the right panel and pick a **type** for the document, then a **status**. Type says what kind of thinking this is, and comes from your [document types](/help/documents/document-types). Status says how finished it is: draft, published, or archived.
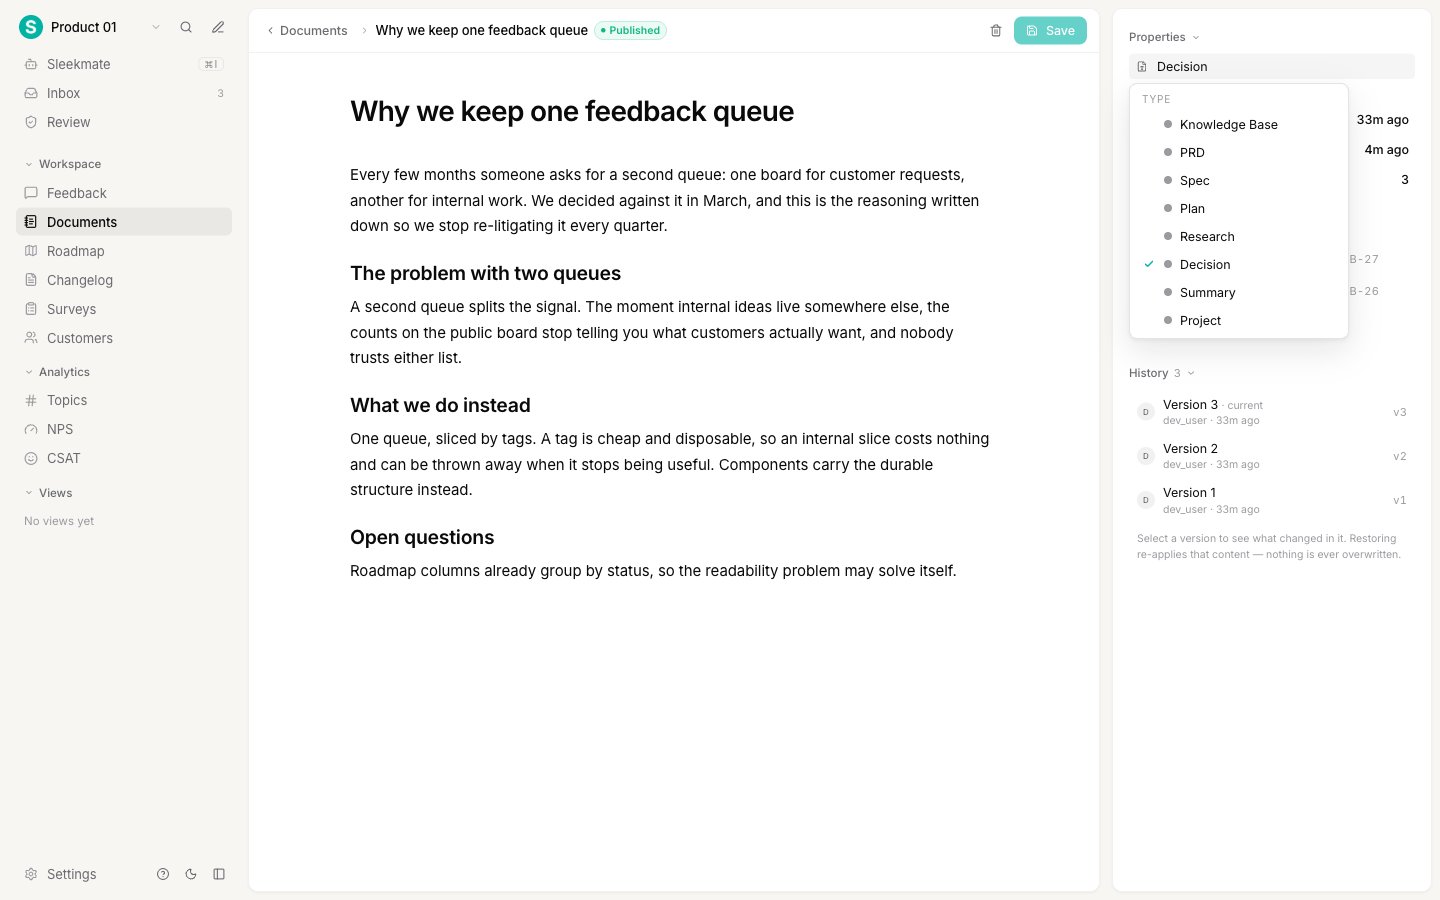 Click **Create**. From then on the button reads **Save**, and it stays greyed out until you actually change something.
Every save that changes the document adds a version, so you can see what changed later.
Documents do not autosave, and leaving the page does not warn you. Save before you navigate away, or your unsaved edits are lost.
## The editor and the panel
Once a document is saved, the screen has two parts.
Click **Create**. From then on the button reads **Save**, and it stays greyed out until you actually change something.
Every save that changes the document adds a version, so you can see what changed later.
Documents do not autosave, and leaving the page does not warn you. Save before you navigate away, or your unsaved edits are lost.
## The editor and the panel
Once a document is saved, the screen has two parts.
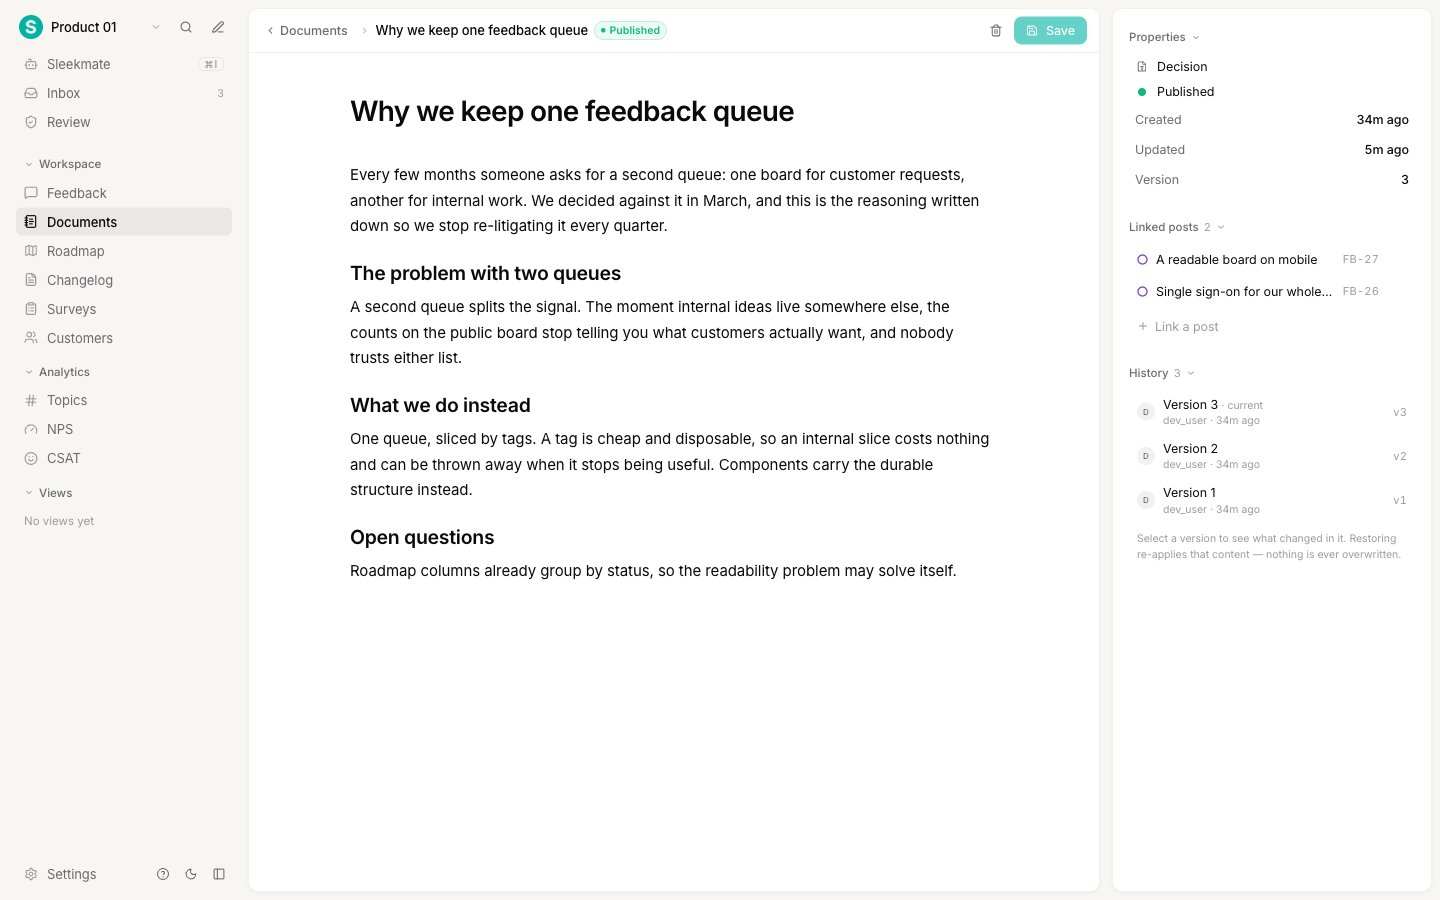 The **editor** on the left holds the title and body. The **panel** on the right holds everything about the document:
* **Properties**: its type, its status, when it was created, when it was last updated, and its current version number.
* **Linked posts**: the feedback posts this document informs. See [Link documents to feedback](/help/documents/link-feedback).
* **History**: every saved version, newest first. See [Version history and restore](/help/documents/version-history).
Changing the type or status in the panel is an edit like any other. It only takes effect when you save, and it adds a version when it does.
## What to write
Documents work best when they answer questions a feedback post cannot:
* **Research.** What you heard in customer calls, what people actually asked for, and what they did not.
* **A decision and its reasoning.** The option you picked, the ones you rejected, and why. This is the one that saves the most time later, because it stops the same debate coming back.
* **A PRD, then a spec.** The problem worth solving and who has it, then what you are going to build in enough detail that someone else could build it.
* **Anything else worth keeping.** Setup steps, payload shapes, or answers you give repeatedly. These sit on **Knowledge Base**, the general-purpose type.
Each of those is a built-in [document type](/help/documents/document-types), so the type you pick is usually just naming what you already sat down to write.
Keep one idea per document. If a document is trying to hold both research and a decision, split it and link both to the same post.
## Delete a document
Open the document and use the trash icon in the header. Deleting removes the document and its entire version history, permanently. There is no undo, so archive instead if you only want it out of the way.
## Next steps
Connect a document to the posts it informs, from either side.
See what changed in any version and go back to it.
Rename the built-in types or add your own.
What documents are for and how the Documents screen is organized.
The **editor** on the left holds the title and body. The **panel** on the right holds everything about the document:
* **Properties**: its type, its status, when it was created, when it was last updated, and its current version number.
* **Linked posts**: the feedback posts this document informs. See [Link documents to feedback](/help/documents/link-feedback).
* **History**: every saved version, newest first. See [Version history and restore](/help/documents/version-history).
Changing the type or status in the panel is an edit like any other. It only takes effect when you save, and it adds a version when it does.
## What to write
Documents work best when they answer questions a feedback post cannot:
* **Research.** What you heard in customer calls, what people actually asked for, and what they did not.
* **A decision and its reasoning.** The option you picked, the ones you rejected, and why. This is the one that saves the most time later, because it stops the same debate coming back.
* **A PRD, then a spec.** The problem worth solving and who has it, then what you are going to build in enough detail that someone else could build it.
* **Anything else worth keeping.** Setup steps, payload shapes, or answers you give repeatedly. These sit on **Knowledge Base**, the general-purpose type.
Each of those is a built-in [document type](/help/documents/document-types), so the type you pick is usually just naming what you already sat down to write.
Keep one idea per document. If a document is trying to hold both research and a decision, split it and link both to the same post.
## Delete a document
Open the document and use the trash icon in the header. Deleting removes the document and its entire version history, permanently. There is no undo, so archive instead if you only want it out of the way.
## Next steps
Connect a document to the posts it informs, from either side.
See what changed in any version and go back to it.
Rename the built-in types or add your own.
What documents are for and how the Documents screen is organized.