> ## Documentation Index
> Fetch the complete documentation index at: https://sleekplan.com/llms.txt
> Use this file to discover all available pages before exploring further.
# Create changelog entries
> Write and publish a changelog entry from the admin: format with Markdown, add inline images and attachments, use the slash and selection toolbars, schedule for later, notify subscribers, target a segment, and credit an author and contributors.
A changelog entry is a single product update you publish to your users: a new feature, a fix, or a batch of changes rolled into release notes. You write each entry in a focused composer, decide how it reaches people, and then publish it now or schedule it for later. For an overview of the list and its filters, see [The changelog](/help/changelog).
Creating changelog entries is available to team members with access to the workspace.
## The composer
The composer is where you write an entry: a title on top, a rich-text body below it, and a panel on the right for everything else (category, audience, publish date, and how the update is delivered).
Go to the [**Changelog**](https://app.sleekplan.com/changelog) screen and click [**New entry**](https://app.sleekplan.com/changelog/new) in the top right. The composer opens with an empty draft.
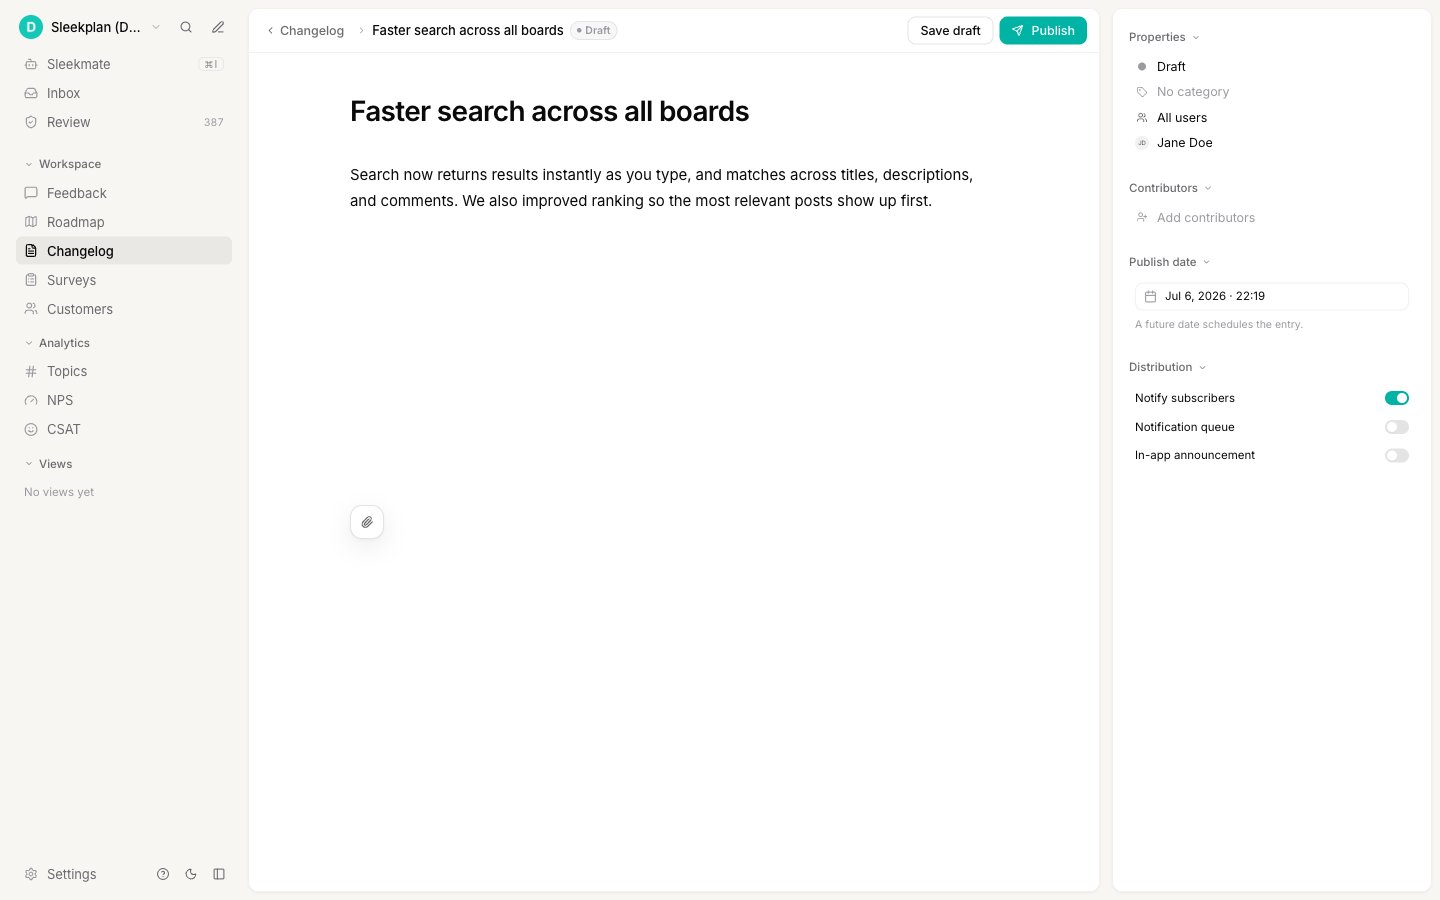 Give the entry a clear **title**, then write the update in the body: what shipped, why it matters, and how to use it. The body is a rich-text editor that supports Markdown, images, and inline styling (covered below).
In the panel on the right, choose a **category**, set the **publish date**, pick an **audience**, and decide whether to **notify subscribers** or show an **in-app announcement**. You can also credit an author and contributors. Every option has a sensible default, so you can skip this and add it later.
Click **Publish** in the top right to make the entry live, or **Save draft** to keep working on it without showing it to anyone. If you set a future publish date, the button reads **Schedule**; on an already-published entry it reads **Update**.
### Write with Markdown
The body supports Markdown, so you can format as you type. Markdown shortcuts convert instantly:
| Type | Result |
| ------------ | ------------- |
| `# ` | Heading |
| `- ` or `* ` | Bulleted list |
| `1. ` | Numbered list |
| `> ` | Quote |
| ` ``` ` | Code block |
| `**bold**` | **Bold** |
| `*italic*` | *Italic* |
You can also paste Markdown from another document and it keeps its formatting.
## Add images inside the entry
To place an image in the flow of your text, drag an image file straight into the body where you want it, or copy an image and paste it in. Sleekplan uploads it and embeds it inline at that spot. A brief "Uploading image" note appears while it saves, and publishing is held until the upload finishes.
Give the entry a clear **title**, then write the update in the body: what shipped, why it matters, and how to use it. The body is a rich-text editor that supports Markdown, images, and inline styling (covered below).
In the panel on the right, choose a **category**, set the **publish date**, pick an **audience**, and decide whether to **notify subscribers** or show an **in-app announcement**. You can also credit an author and contributors. Every option has a sensible default, so you can skip this and add it later.
Click **Publish** in the top right to make the entry live, or **Save draft** to keep working on it without showing it to anyone. If you set a future publish date, the button reads **Schedule**; on an already-published entry it reads **Update**.
### Write with Markdown
The body supports Markdown, so you can format as you type. Markdown shortcuts convert instantly:
| Type | Result |
| ------------ | ------------- |
| `# ` | Heading |
| `- ` or `* ` | Bulleted list |
| `1. ` | Numbered list |
| `> ` | Quote |
| ` ``` ` | Code block |
| `**bold**` | **Bold** |
| `*italic*` | *Italic* |
You can also paste Markdown from another document and it keeps its formatting.
## Add images inside the entry
To place an image in the flow of your text, drag an image file straight into the body where you want it, or copy an image and paste it in. Sleekplan uploads it and embeds it inline at that spot. A brief "Uploading image" note appears while it saves, and publishing is held until the upload finishes.
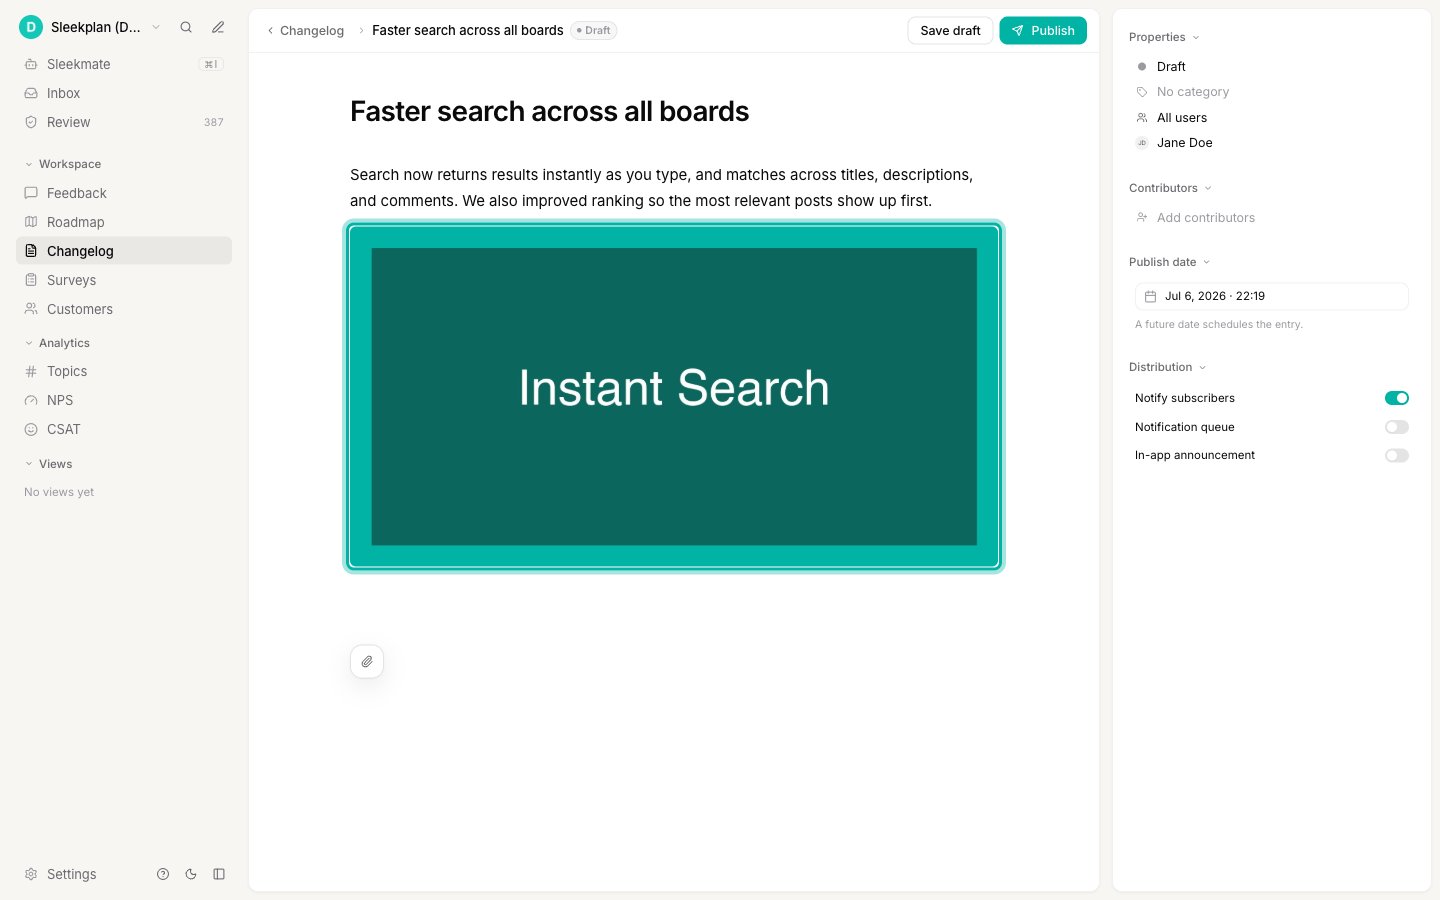 Inline images are best for screenshots and GIFs that belong next to a specific sentence, like a "before and after" or a step in a how-to.
## Attach images to the entry
Separately from inline images, you can attach images to the entry as a whole using the paperclip **Attach image** button in the toolbar below the body. Attachments appear as a set of files on the entry rather than embedded in your text, which keeps the written update clean while still giving users the visuals.
The accepted file types and size limits come from your workspace settings; by default only images are allowed. See [Attachment file types](/help/feedback/attachment-file-types) to review what your workspace accepts.
## Insert blocks and style text
Beyond typing Markdown, the body editor gives you two toolbars.
### The "/" menu
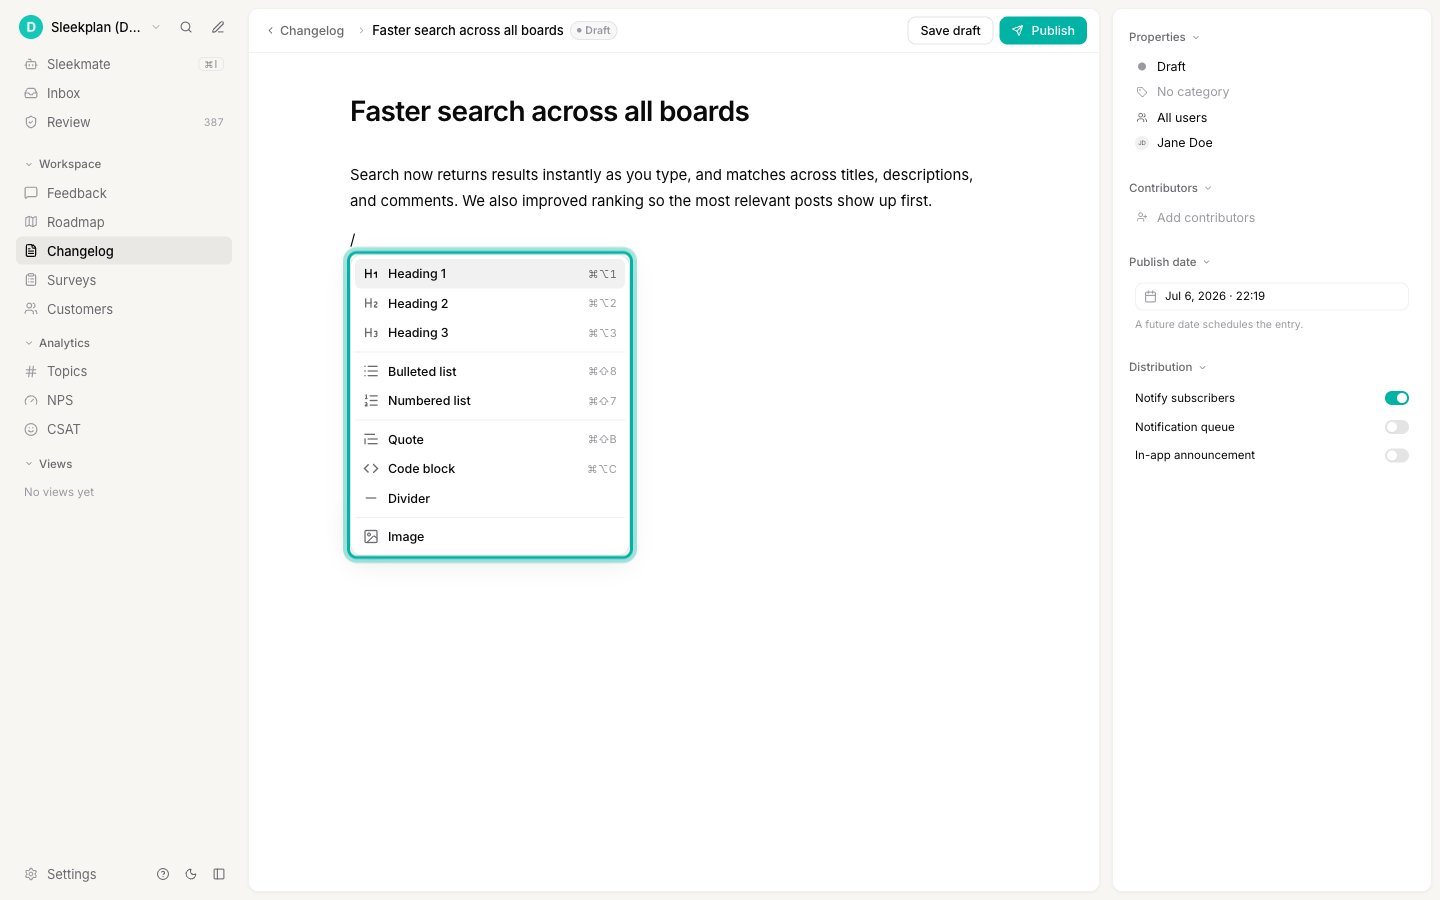
Type `/` on a new line to open the block menu, then pick what to insert: **Heading 1**, **Heading 2**, **Heading 3**, **Bulleted list**, **Numbered list**, **Quote**, **Code block**, **Divider**, or **Image**. Choosing **Image** opens the picker and embeds the image inline, the same as dragging one in.
Inline images are best for screenshots and GIFs that belong next to a specific sentence, like a "before and after" or a step in a how-to.
## Attach images to the entry
Separately from inline images, you can attach images to the entry as a whole using the paperclip **Attach image** button in the toolbar below the body. Attachments appear as a set of files on the entry rather than embedded in your text, which keeps the written update clean while still giving users the visuals.
The accepted file types and size limits come from your workspace settings; by default only images are allowed. See [Attachment file types](/help/feedback/attachment-file-types) to review what your workspace accepts.
## Insert blocks and style text
Beyond typing Markdown, the body editor gives you two toolbars.
### The "/" menu
Type `/` on a new line to open the block menu, then pick what to insert: **Heading 1**, **Heading 2**, **Heading 3**, **Bulleted list**, **Numbered list**, **Quote**, **Code block**, **Divider**, or **Image**. Choosing **Image** opens the picker and embeds the image inline, the same as dragging one in.
 ### Highlight text to style it
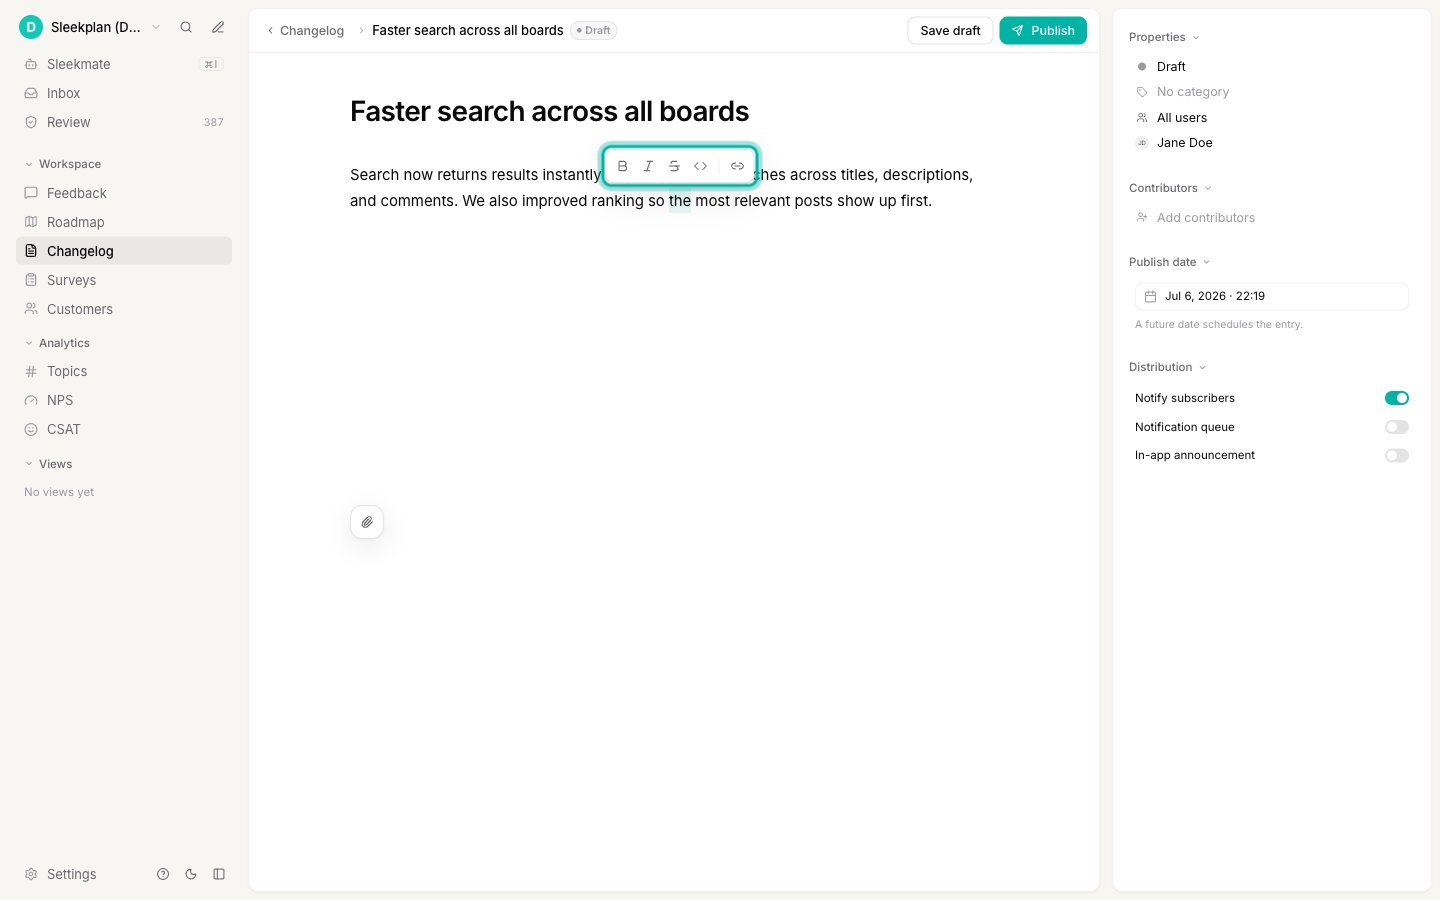
Select any text to bring up the styling toolbar, then apply **Bold**, **Italic**, **Strikethrough**, **Inline code**, or a **Link**. To add a link, click the link button, paste the URL, and press Enter.
### Highlight text to style it
Select any text to bring up the styling toolbar, then apply **Bold**, **Italic**, **Strikethrough**, **Inline code**, or a **Link**. To add a link, click the link button, paste the URL, and press Enter.
 Published entries are rendered with a Markdown engine that has no underline or checklist syntax, so the editor deliberately leaves those out. Everything the toolbars offer displays correctly to your users.
## Schedule an entry for later
Every entry has a **publish date** in the options panel. Leave it at the current date and time to go live immediately on publish, or pick a date and time in the future to schedule it.
When the date is in the future, the primary button changes to **Schedule**. Sleekplan then publishes the entry automatically once that time arrives (it checks every minute), and the entry moves from the **Scheduled** section to **Published**. Until then it stays hidden from your users.
Published entries are rendered with a Markdown engine that has no underline or checklist syntax, so the editor deliberately leaves those out. Everything the toolbars offer displays correctly to your users.
## Schedule an entry for later
Every entry has a **publish date** in the options panel. Leave it at the current date and time to go live immediately on publish, or pick a date and time in the future to schedule it.
When the date is in the future, the primary button changes to **Schedule**. Sleekplan then publishes the entry automatically once that time arrives (it checks every minute), and the entry moves from the **Scheduled** section to **Published**. Until then it stays hidden from your users.
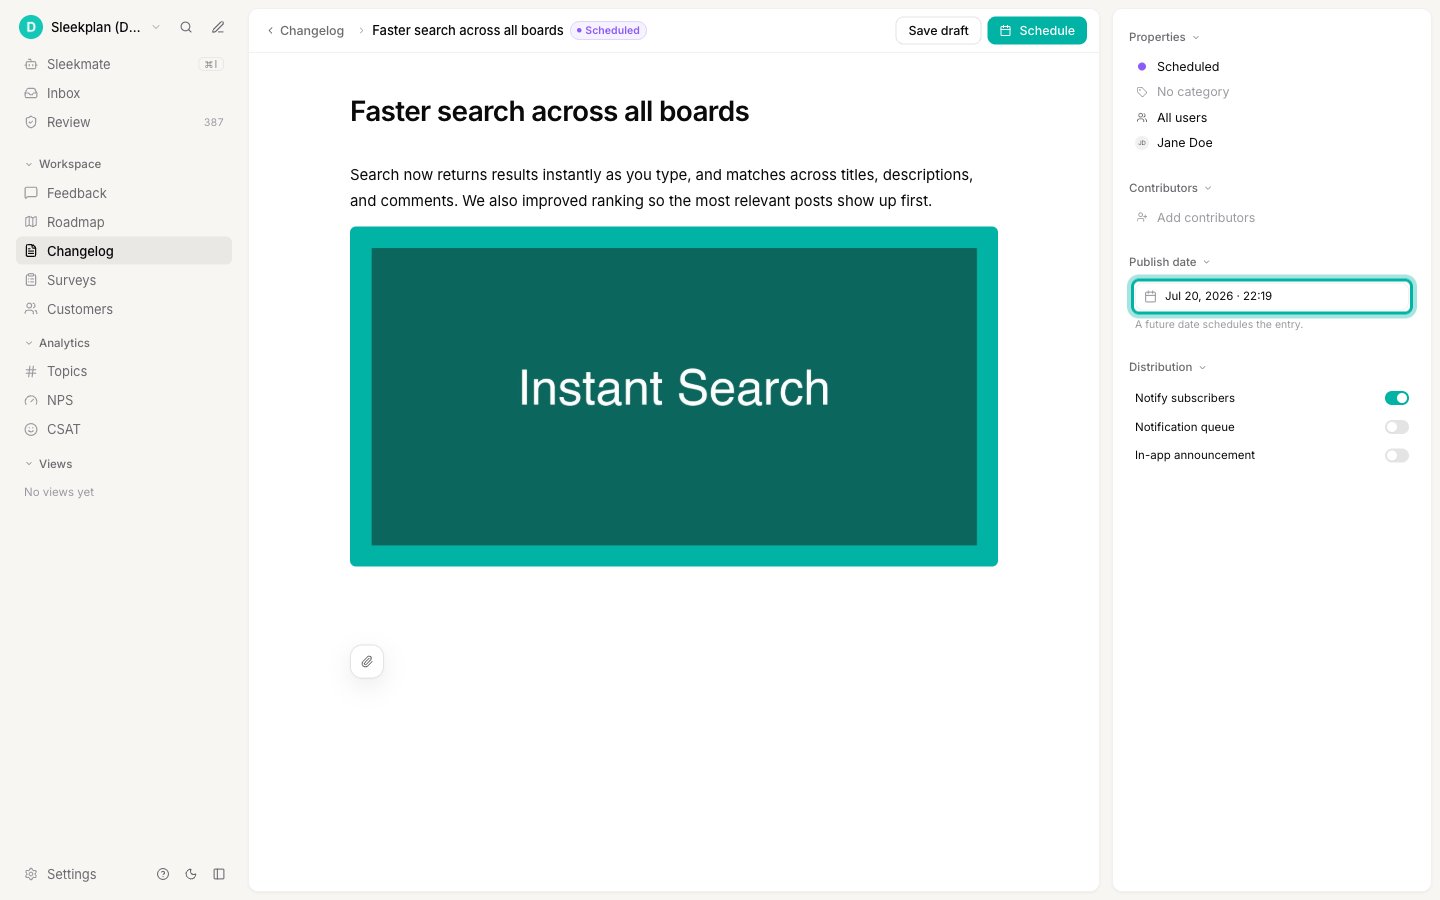 An already-published entry can be backdated but not moved into the future, so you cannot re-schedule something that is already live. Scheduling a future publish date is a plan feature; if your plan does not include it, publish the entry directly instead.
## Notify subscribers and the notification queue
Publishing an entry does not automatically email anyone. Two toggles in the options panel, under **Distribution**, control email delivery to the users who subscribed to your changelog.
* **Notify subscribers** sends an email about the entry once it is live. Leave it on to email subscribers, or turn it off for a quiet update that only appears in the changelog and widget.
* **Notification queue** holds this entry's email and bundles it into a single daily digest instead of sending on its own. It is only available when **Notify subscribers** is on.
Here is how the two settings play out once an entry is live:
| Notify subscribers | Notification queue | What subscribers get |
| ------------------ | ------------------ | ----------------------------------------------------------------------------------------------------------------------- |
| Off | any | No email. |
| On | Off | An email for this entry, sent shortly after it goes live. |
| On | On | This entry is added to a once-a-day digest, so several updates arrive together in one email rather than one email each. |
The queue is what lets you post many small updates without emailing subscribers every single time. Turn it on for the minor entries, and leave it off for the headline release you want to land on its own.
Notification settings are locked once an entry is published, because its emails have already been sent or queued. Set **Notify subscribers** and **Notification queue** before you publish. The **In-app announcement** toggle, which surfaces the entry as a pop-up in your widget, can still be changed afterward; see [In-app announcements](/help/changelog/in-app-announcements).
## Target the entry to a segment
By default an entry's **Audience** is **All users**, so everyone sees it. Setting the audience to a [user segment](/help/account-security/segments) narrows who the entry reaches, in three consistent ways:
* **On the frontend**, the entry is shown only to signed-in users who match the segment. Anyone not signed in, or who does not fall into the segment, never sees it in the widget or on your portal.
* **The in-app announcement**, if you enabled one, pops up only for users in that segment.
* **The email notification**, if you enabled it, is sent only to subscribers in that segment.
An already-published entry can be backdated but not moved into the future, so you cannot re-schedule something that is already live. Scheduling a future publish date is a plan feature; if your plan does not include it, publish the entry directly instead.
## Notify subscribers and the notification queue
Publishing an entry does not automatically email anyone. Two toggles in the options panel, under **Distribution**, control email delivery to the users who subscribed to your changelog.
* **Notify subscribers** sends an email about the entry once it is live. Leave it on to email subscribers, or turn it off for a quiet update that only appears in the changelog and widget.
* **Notification queue** holds this entry's email and bundles it into a single daily digest instead of sending on its own. It is only available when **Notify subscribers** is on.
Here is how the two settings play out once an entry is live:
| Notify subscribers | Notification queue | What subscribers get |
| ------------------ | ------------------ | ----------------------------------------------------------------------------------------------------------------------- |
| Off | any | No email. |
| On | Off | An email for this entry, sent shortly after it goes live. |
| On | On | This entry is added to a once-a-day digest, so several updates arrive together in one email rather than one email each. |
The queue is what lets you post many small updates without emailing subscribers every single time. Turn it on for the minor entries, and leave it off for the headline release you want to land on its own.
Notification settings are locked once an entry is published, because its emails have already been sent or queued. Set **Notify subscribers** and **Notification queue** before you publish. The **In-app announcement** toggle, which surfaces the entry as a pop-up in your widget, can still be changed afterward; see [In-app announcements](/help/changelog/in-app-announcements).
## Target the entry to a segment
By default an entry's **Audience** is **All users**, so everyone sees it. Setting the audience to a [user segment](/help/account-security/segments) narrows who the entry reaches, in three consistent ways:
* **On the frontend**, the entry is shown only to signed-in users who match the segment. Anyone not signed in, or who does not fall into the segment, never sees it in the widget or on your portal.
* **The in-app announcement**, if you enabled one, pops up only for users in that segment.
* **The email notification**, if you enabled it, is sent only to subscribers in that segment.
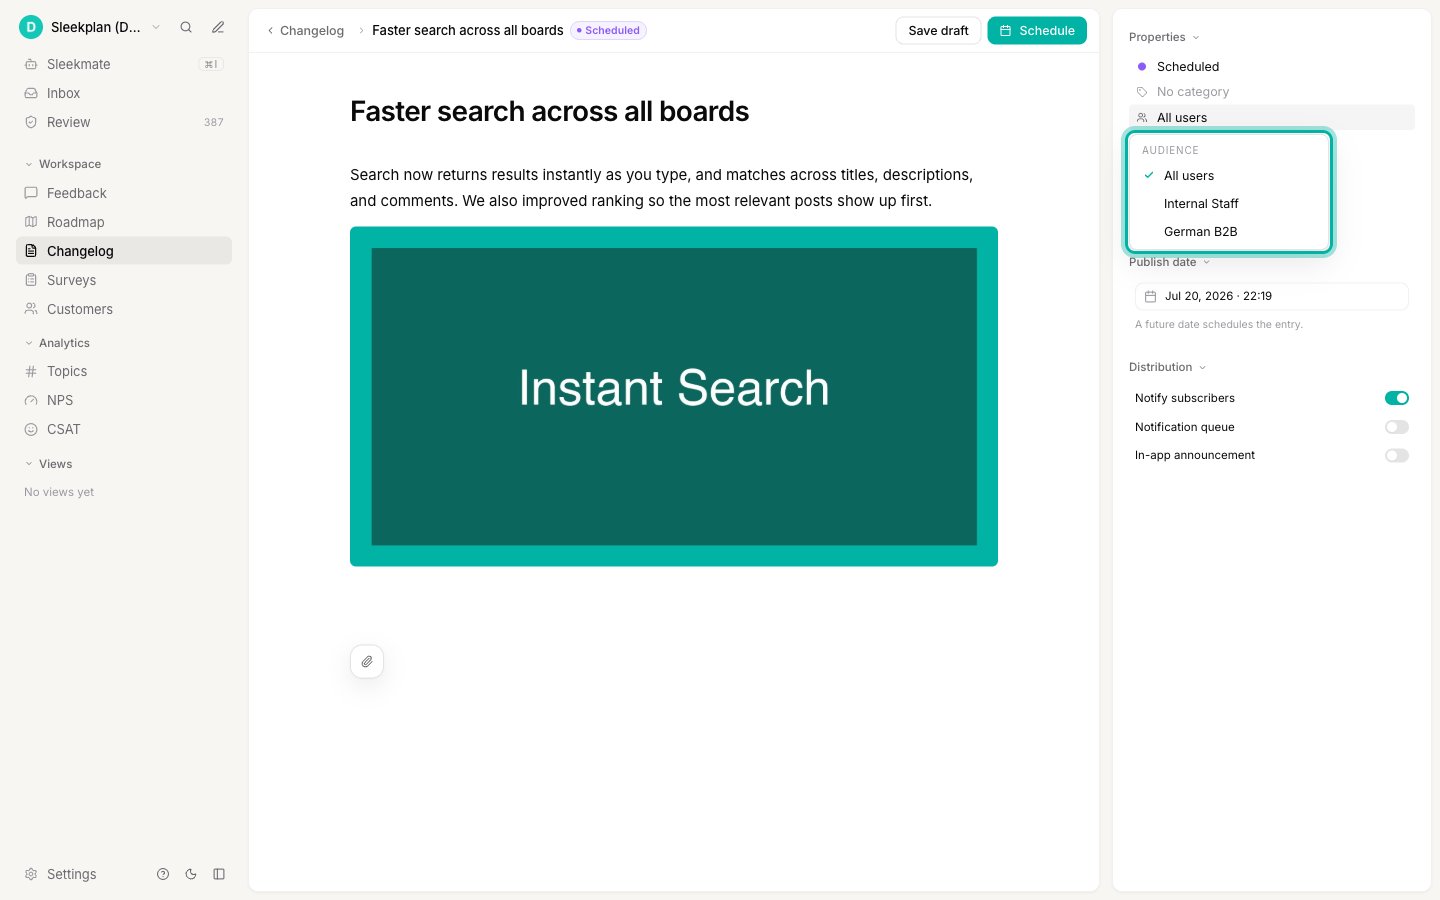 Because segment membership is worked out from a known user's attributes, a segmented entry reaches identified (signed-in) users only. Segments are a Business-plan feature. Build and manage them in [User segments](/help/account-security/segments).
## Author and contributors
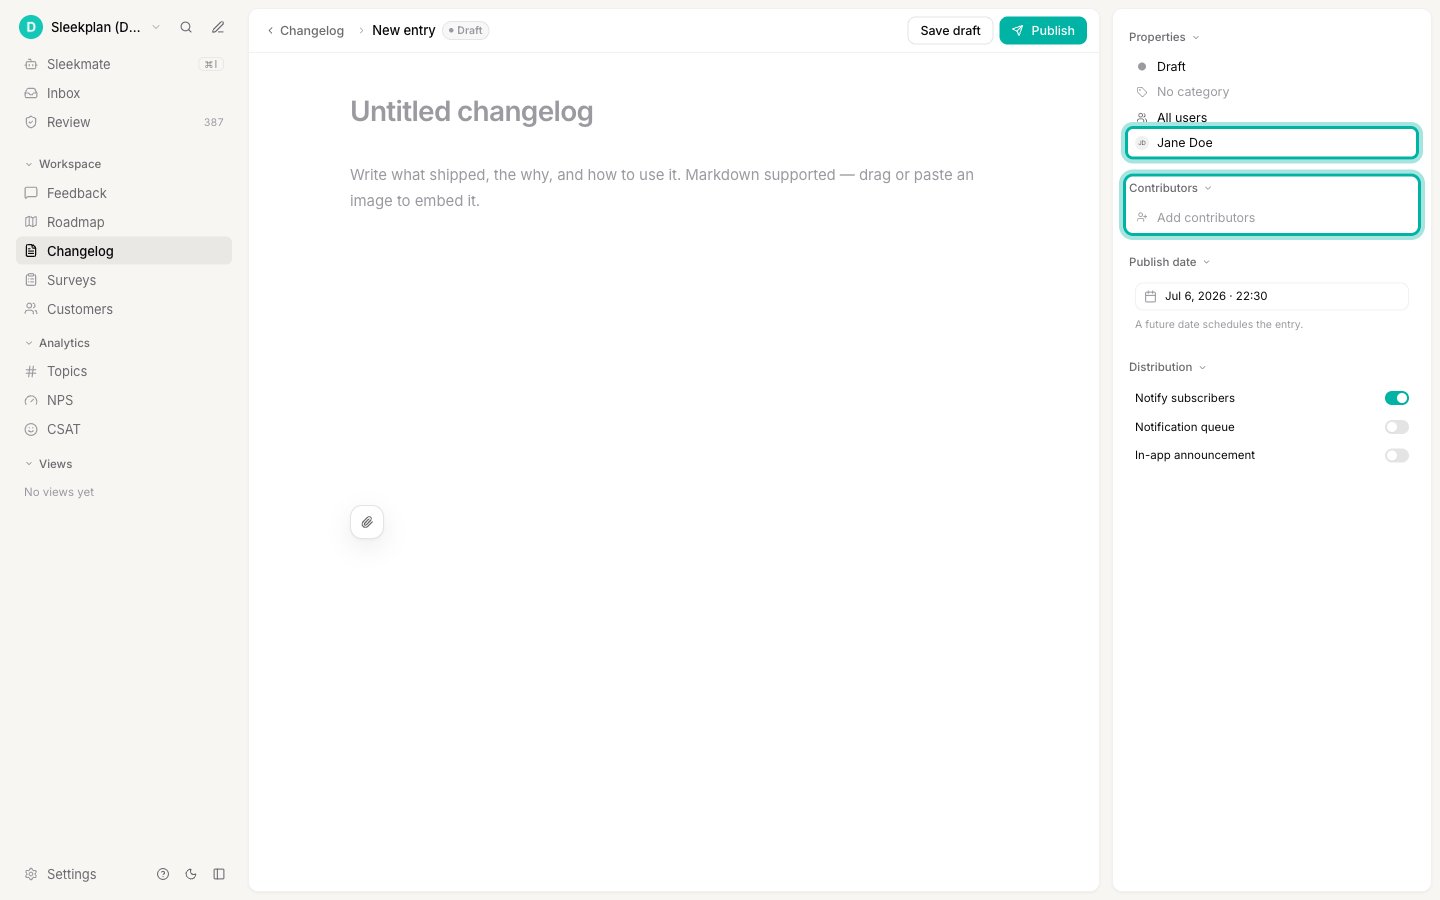
The options panel lets you credit the people behind an update:
* **Created by** sets the entry's author, shown on the published entry. New entries default to you, and you can reassign it to any team member.
* **Contributors** adds any number of other team members who worked on the update, so the whole team gets credit.
Because segment membership is worked out from a known user's attributes, a segmented entry reaches identified (signed-in) users only. Segments are a Business-plan feature. Build and manage them in [User segments](/help/account-security/segments).
## Author and contributors
The options panel lets you credit the people behind an update:
* **Created by** sets the entry's author, shown on the published entry. New entries default to you, and you can reassign it to any team member.
* **Contributors** adds any number of other team members who worked on the update, so the whole team gets credit.
 ## Related
Read the changelog list and manage every entry in your workspace.
Surface a published entry as a New Updates pop-up inside your widget.
Configure how your changelog looks and behaves on the public portal.
Build the audiences that decide who sees a targeted entry.
## Related
Read the changelog list and manage every entry in your workspace.
Surface a published entry as a New Updates pop-up inside your widget.
Configure how your changelog looks and behaves on the public portal.
Build the audiences that decide who sees a targeted entry.