> ## Documentation Index
> Fetch the complete documentation index at: https://sleekplan.com/llms.txt
> Use this file to discover all available pages before exploring further.
# Invite teammates
> Add colleagues to your Sleekplan workspace so they can triage feedback, publish changelog updates, and manage your board together.
Sleekplan is better with your whole team on it. Once you invite colleagues, they can triage feedback, reply to submitters, publish changelog updates, and see the same analytics you do. This guide walks through sending an invitation, tracking it until it's accepted, and revoking one you no longer need.
Only **Owners** and **Admins** can invite people. If you open the Team page and don't see an **Invite member** button, you're a Member. Ask an Owner or Admin to send the invite or promote you. See [Team roles and permissions](/help/account-security/roles-permissions) for what each role can do.
## Send an invitation
New people always join as a **Member**. If you want someone to be an Admin, invite them first, then [change their role](/help/account-security/roles-permissions#change-someones-role).
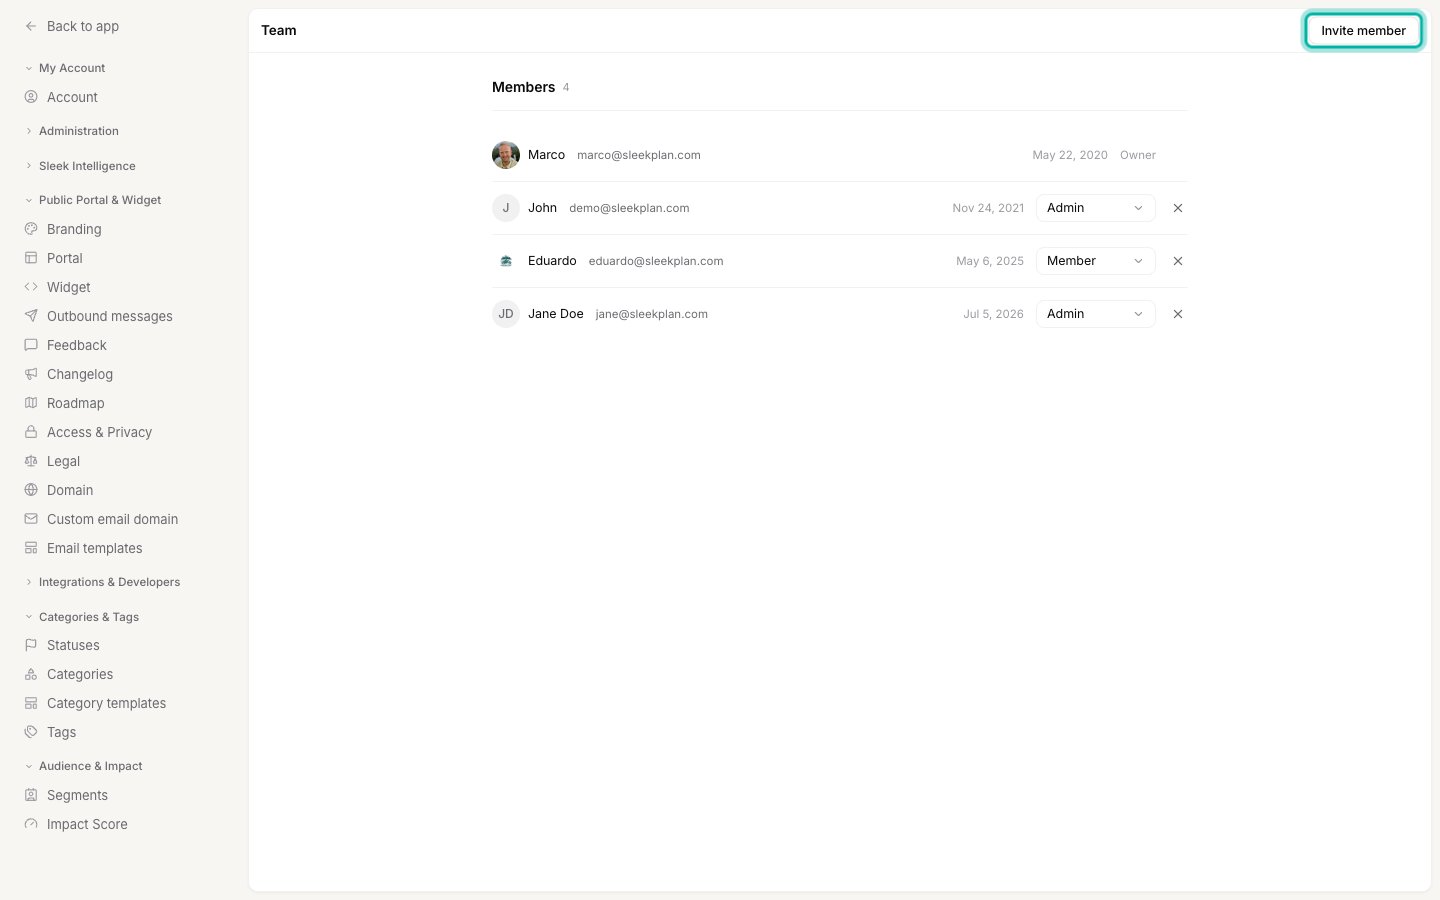
Go to [**Settings → Team**](https://app.sleekplan.com/settings/team). You'll see everyone who currently has access, along with their role and when they joined. Click **Invite member** in the top right.
 Type the teammate's email address. You can add a short message that's included in the invitation email, which is a nice way to give them context on why they're being added.
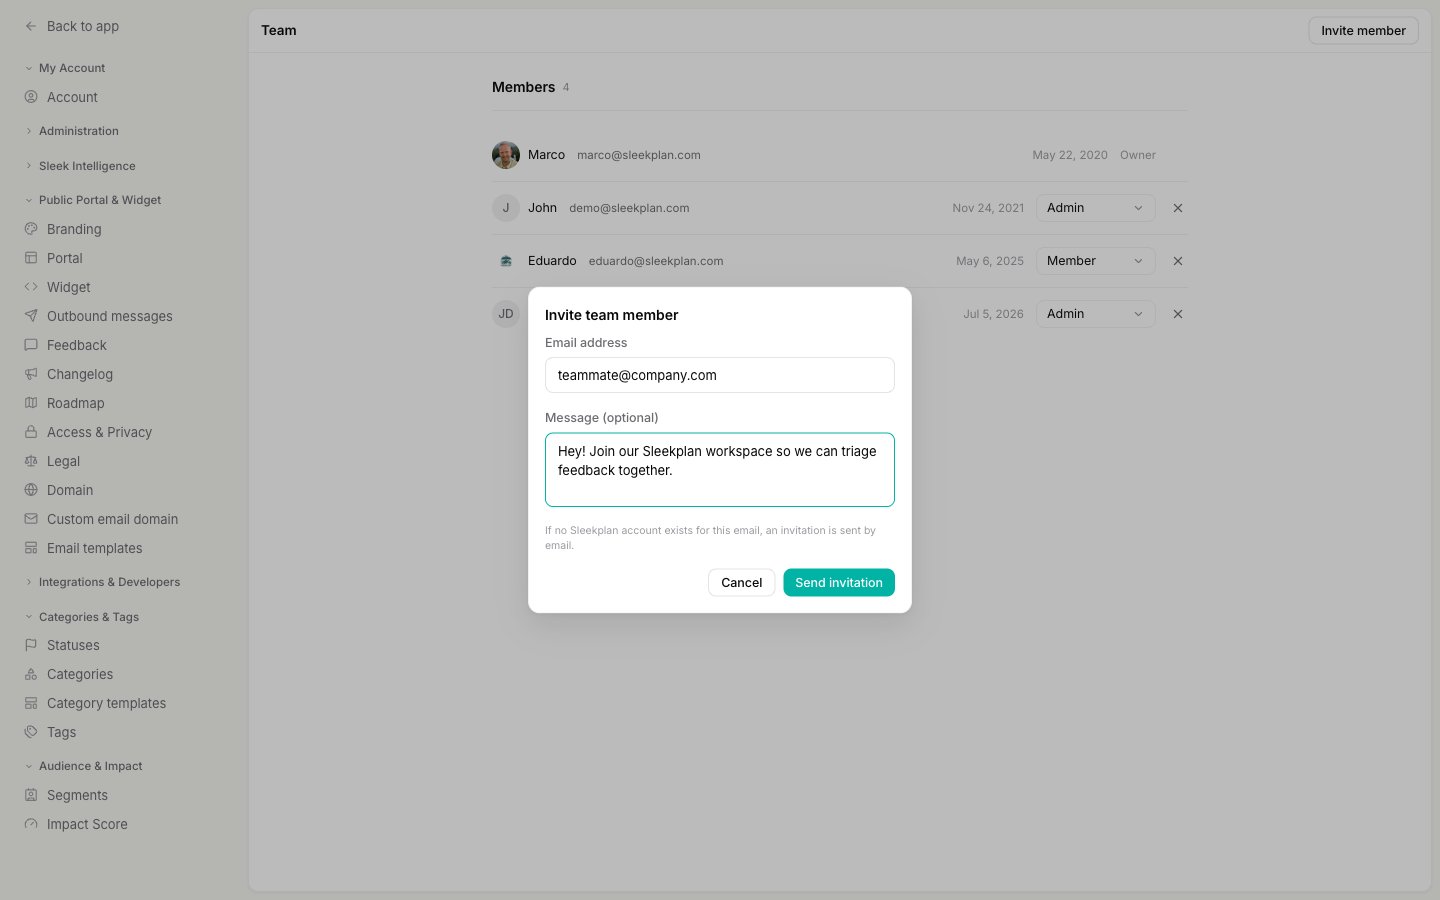 Click **Send invitation**.
* If the person already has a Sleekplan account, they get access to the workspace right away and appear in the members list.
* If they don't have an account yet, an invitation email is sent and they show up under **Pending invitations** until they accept and set up their account.
There's no per-invite limit on the number of people you add, but your plan may cap how many team members a workspace can have. If an invitation is blocked, check your [plan and billing](https://app.sleekplan.com/settings/billing).
## Track and revoke pending invitations
Anyone who hasn't accepted yet is listed under **Pending invitations** on the [**Team**](https://app.sleekplan.com/settings/team) page. To cancel an invitation before it's accepted, find it in that list and remove it using the **✕** control on its row. The link in the invitation email stops working once it's revoked.
If a teammate says they never received the email, ask them to check their spam folder, then revoke the pending invitation and send a fresh one to confirm the address is correct.
## After someone joins
New members land in the workspace as a **Member**, which lets them work the feedback board and changelog without touching settings or billing. When their responsibilities change, an Owner or Admin can promote them to **Admin** or move them back down from the same Team page. For the full breakdown of what each role can and can't do, see [Team roles and permissions](/help/account-security/roles-permissions).
To revoke someone's access entirely, remove them from the members list. The feedback, comments, and changelog entries they created stay in place.
## Related
Understand the Owner, Admin, and Member roles and change who can do what.
Manage your own account, security, and workspace settings.
Click **Send invitation**.
* If the person already has a Sleekplan account, they get access to the workspace right away and appear in the members list.
* If they don't have an account yet, an invitation email is sent and they show up under **Pending invitations** until they accept and set up their account.
There's no per-invite limit on the number of people you add, but your plan may cap how many team members a workspace can have. If an invitation is blocked, check your [plan and billing](https://app.sleekplan.com/settings/billing).
## Track and revoke pending invitations
Anyone who hasn't accepted yet is listed under **Pending invitations** on the [**Team**](https://app.sleekplan.com/settings/team) page. To cancel an invitation before it's accepted, find it in that list and remove it using the **✕** control on its row. The link in the invitation email stops working once it's revoked.
If a teammate says they never received the email, ask them to check their spam folder, then revoke the pending invitation and send a fresh one to confirm the address is correct.
## After someone joins
New members land in the workspace as a **Member**, which lets them work the feedback board and changelog without touching settings or billing. When their responsibilities change, an Owner or Admin can promote them to **Admin** or move them back down from the same Team page. For the full breakdown of what each role can and can't do, see [Team roles and permissions](/help/account-security/roles-permissions).
To revoke someone's access entirely, remove them from the members list. The feedback, comments, and changelog entries they created stay in place.
## Related
Understand the Owner, Admin, and Member roles and change who can do what.
Manage your own account, security, and workspace settings.